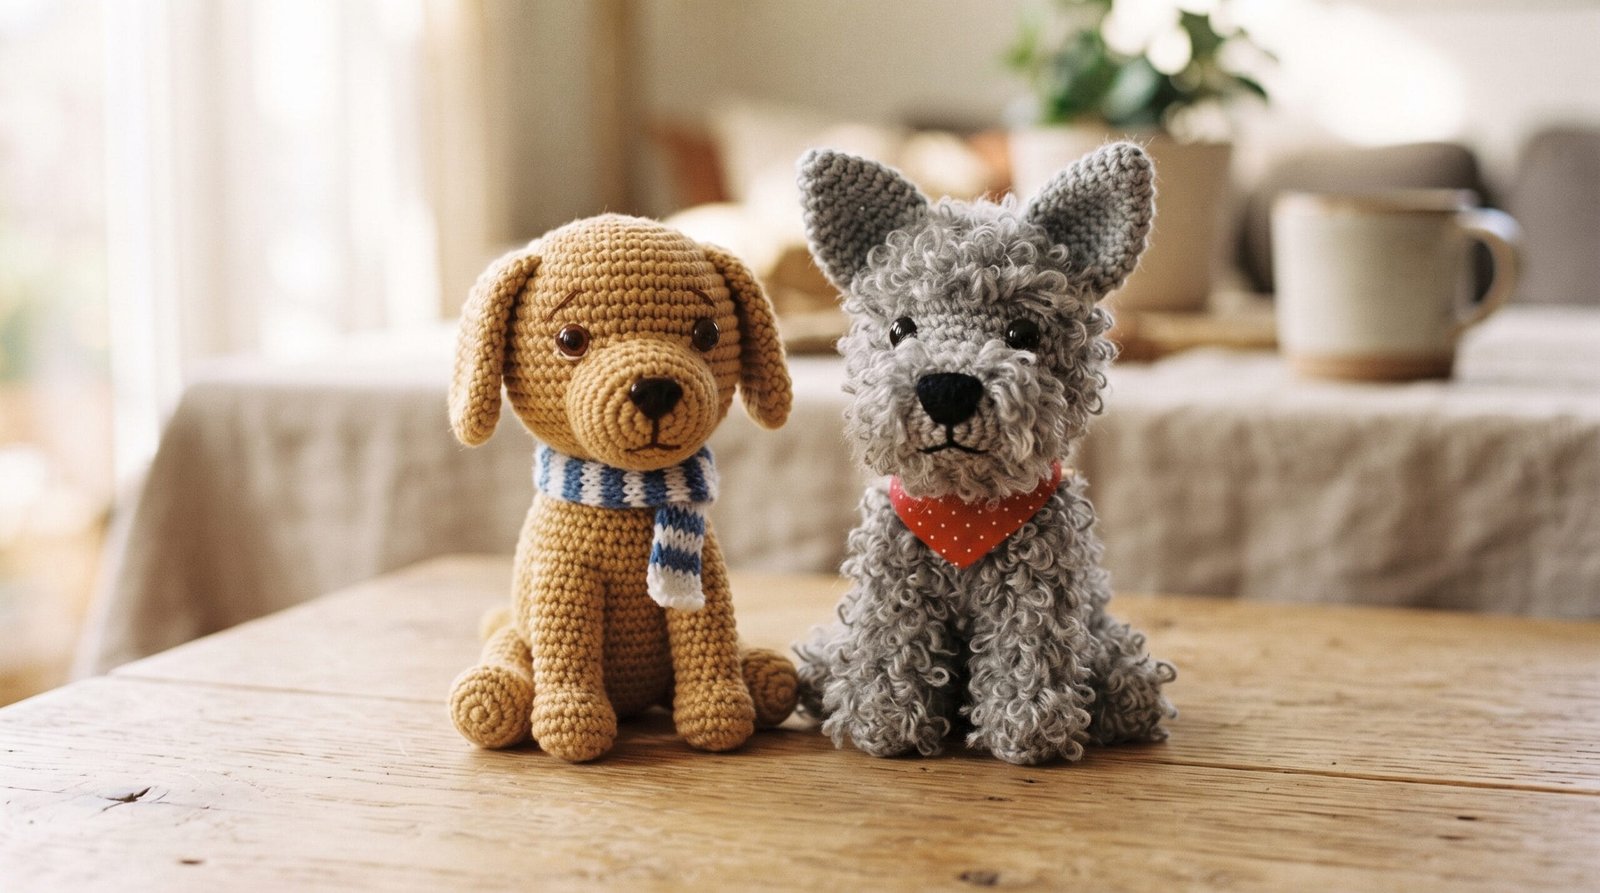
A crochet dog pattern lives or dies on details a cow or a bear pattern doesn’t have to worry about nearly as much: ear shape, snout length, and coat texture vary enormously across dog breeds, and getting those details even slightly wrong is often the difference between “clearly a dog” and “some kind of generic four-legged animal.” This guide focuses specifically on those variable details — the parts of amigurumi construction that change the most depending on which dog you’re picturing.
If you haven’t worked through basic amigurumi shaping before — the magic ring, sphere construction, invisible decreases — our crochet cow pattern guide covers those fundamentals in more depth than there’s room for here. This guide builds on that foundation and focuses on what’s actually different about dogs.
What You’ll Need
Materials overlap heavily with any other amigurumi project, with a couple of dog-specific additions worth calling out.
Yarn — worsted weight remains the most practical default, for the same reasons covered in the cow guide: wide color availability and a manageable working speed. For fur-textured breeds specifically, a smooth, tightly plied yarn holds a loop stitch shape more cleanly than a fuzzy or loosely spun one, since the loops themselves are already adding texture — a textured base yarn on top of textured stitching tends to look muddled rather than deliberately shaggy.
Hook — sized down from the yarn label as usual for a dense, stuffing-proof fabric, though loop stitch sections may need a very slight size-up if the base stitches feel too tight to comfortably wrap loops around, since loop stitch already adds bulk to each stitch.
A stiffening option for prick ears — a small scrap of felt, buckram, or even a bent pipe cleaner, kept on hand in case a densely worked ear still doesn’t hold its shape once sewn on.
Safety eyes or embroidery supplies, following the same reasoning covered in the cow guide — plastic safety eyes are a small, hard component, and embroidered eyes are the safer choice for anything genuinely intended as a toy for a child under three.
Why Dogs Are Harder to Generalize Than Other Amigurumi Animals
A cow, a pig, or a bear all follow a fairly narrow visual template — most people picture roughly the same proportions regardless of which specific animal they’re thinking of. Dogs don’t work that way. A Dachshund and a Great Dane are both unmistakably dogs, but almost nothing about their proportions matches: leg length, snout length, ear shape, body-to-head ratio, even tail carriage differ dramatically breed to breed.
This means a genuinely useful crochet dog pattern guide has to work at the level of “here’s how to build a floppy ear versus a prick ear,” rather than “here’s the one correct dog shape,” because there isn’t one correct dog shape. The rest of this guide is organized around exactly those variable decision points.
Crochet Dog Pattern PDF Free Download
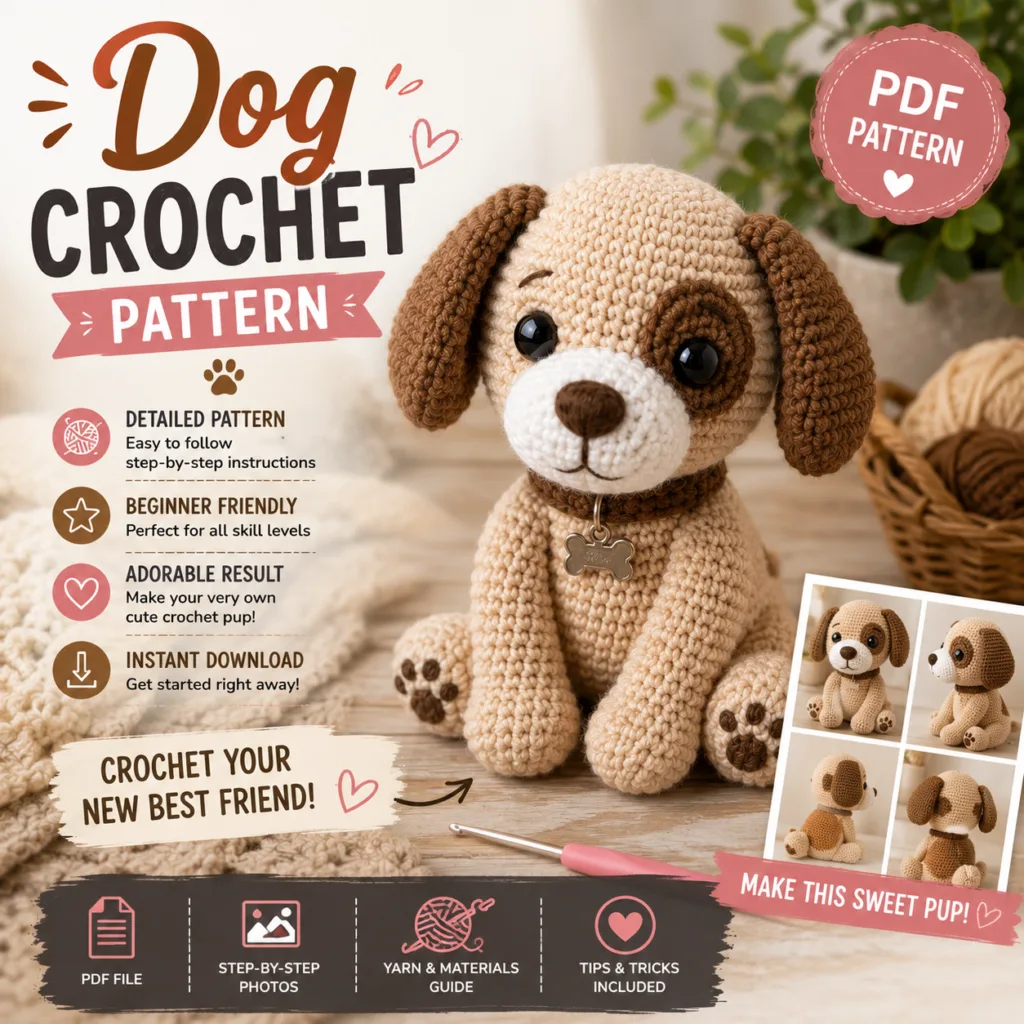
Simple crochet dog pattern free (Video)
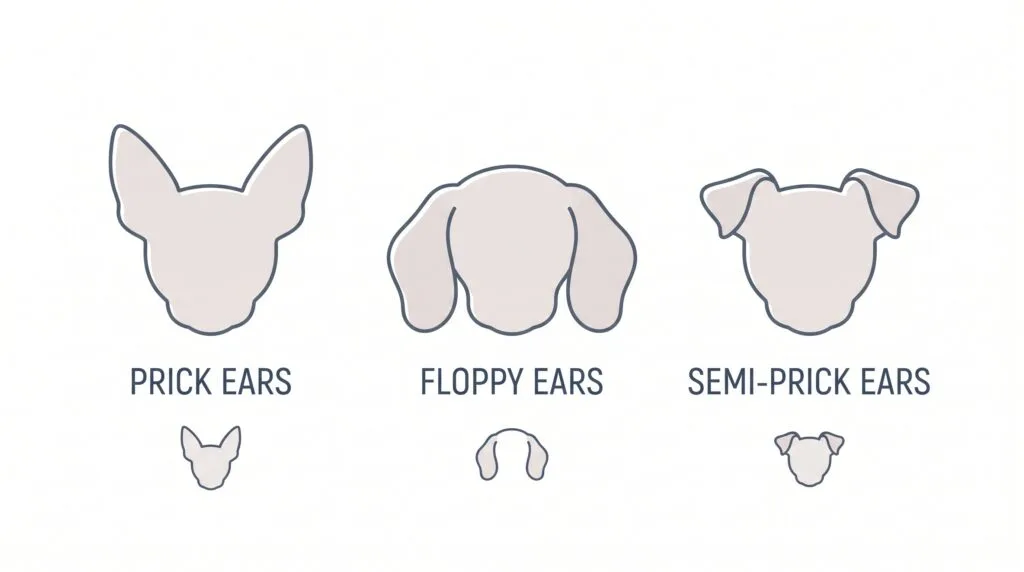
Ear Shapes: Prick, Floppy, and Everything Between
Ears are usually the single most identity-defining feature on an amigurumi dog, more than snout shape or even color.
Prick ears — upright, pointed, held erect like a German Shepherd or a Corgi — are typically worked as a small flat triangle or teardrop shape with a firm, tightly worked fabric (a smaller hook than the rest of the body helps here) and little to no stuffing. The stiffness of a densely worked, unstuffed piece is usually enough to hold the ear upright once it’s sewn on with a slight forward lean; if it still droops, a small stiff insert (a scrap of felt or even a bent pipe cleaner tucked inside before closing the seam) can add structure without changing the visible shape.
Floppy or drop ears — like a Beagle or a Cocker Spaniel — use the same basic flat shape, usually elongated into more of an oval, but deliberately worked looser and left completely unstuffed so the fabric has no stiffness to fight gravity with. These are sewn on higher and further back on the head than prick ears typically are, then left to hang naturally rather than being tacked down.
Semi-prick or folded ears — like a Collie or some terriers — split the difference: the base third of the ear is worked densely and attached to stand upright, while the upper portion is worked more loosely (or simply folds over naturally once sewn) to create that partial fold. This is genuinely the fiddliest of the three to get looking intentional rather than accidental, and it’s worth test-folding the piece before committing to a permanent seam.
Snout Length: The Detail Most Patterns Get Wrong
After ears, snout proportion is what most strongly signals a specific breed style rather than a generic dog shape.
A short, flat-faced snout — the Bulldog or Pug style — is often built as barely more than a slightly raised, flattened oval directly on the front of the head, sometimes with almost no separate piece at all, just a few strategically placed stitches and a change in shaping density to suggest the wrinkled, compressed muzzle. A long, narrow snout — Collie or Dachshund style — is the opposite: a genuinely elongated cylinder or tapered oval, proportionally quite long relative to the rest of the head, extending well forward before curving down to the nose. A medium snout, which covers a large share of mixed-breed and generic “dog” depictions, sits between these two extremes — noticeably projecting from the face but not dramatically elongated.
Picking one of these three general lengths before starting, and staying consistent with it through both the snout piece and the surrounding head shaping, does more for a recognizable result than any other single decision in this guide.
Building Realistic Fur Texture
This is where “realistic dog crochet patterns free” territory usually diverges most from a simple stylized toy — coat texture.
For short-haired breeds (Labradors, Boxers, Dobermans), standard single crochet in a smooth, tightly plied yarn already reads convincingly as short fur — no special stitch needed, just consistent tension and a smooth yarn choice.
For long-haired or shaggy breeds (Old English Sheepdogs, Huskies, terriers with a rough coat), loop stitch — sometimes called fur stitch — creates raised loops of yarn across the surface of the fabric that read as actual fur texture rather than flat stitches. PlanetJune’s loop stitch tutorial is a clear, well-regarded reference for the technique if you haven’t worked it before — it involves wrapping the working yarn around a finger (or a similar guide, like a chopstick, for longer loops) at each stitch to leave a consistent loop on the surface, rather than pulling the stitch flat the way standard single crochet does.
Loop stitch is considerably slower to work than plain single crochet, and it uses noticeably more yarn for the same area of coverage, both worth planning for if this is your first time using it on something as shaped as a dog rather than a flat swatch.
For a middle ground — a slightly textured, not fully shaggy coat, like a Golden Retriever’s feathering around the ears and tail — loop stitch can be worked selectively, just at those specific areas, while the rest of the body stays in plain single crochet. This targeted approach is often more effective (and considerably less time-consuming) than covering an entire piece in loop stitch for a breed that isn’t uniformly shaggy.
Realistic Color Blending
A single flat color reads as a simple, stylized toy. A more realistic coat usually involves some form of color variation, and there are a few ways to achieve that without attempting complex intarsia-style colorwork on a small curved surface.
Variegated or self-striping yarn does a lot of the work for you — a yarn that shifts gradually between a couple of close, natural tones (various browns, or black through gray) will produce a mottled, realistic-looking coat with zero extra technique required beyond normal single crochet.
Holding two strands together — a base color plus a thin, contrasting fleck or heathered strand — is another low-effort way to add visual depth without committing to color-changed sections. This works especially well for breeds with a subtly ticked or brindled coat rather than sharply defined patches.
Deliberate patches, using the same invisible color change technique covered in the cow guide, are worth reserving for breeds with genuinely high-contrast markings — a Border Collie’s white blaze, a Dalmatian’s spots — where a blended or variegated yarn wouldn’t read correctly no matter how well chosen.
Shading around the muzzle and paws is a smaller-scale technique worth knowing separately from full-body color changes. Many realistic-looking dog patterns work the snout tip, the area just above the paws, or the tail tip in a slightly darker or lighter shade than the rest of the body — a subtle change that reads as natural shading rather than a deliberate marking. Because these areas are small, a few rounds worked in a second color, without any complex shaping to accompany the change, is usually enough to suggest the effect convincingly.
Leg Length, Posture, and Tail Type
Leg length is a proportion decision more than a technique one — short, stubby legs (Corgi, Dachshund) versus long, slender legs (Greyhound, Doberman) both use the same basic cylinder construction described in the cow guide’s leg section, just worked to dramatically different lengths relative to body size.
Posture changes the construction more meaningfully. A standing pose uses four roughly even-length legs supporting the body directly. A sitting pose typically shortens the front legs slightly, angles them forward, and either shapes the back legs as a folded, wider base or omits distinct back legs entirely in favor of a rounded haunch shape the body simply rests on — sitting amigurumi animals are often considerably more stable and easier to pose successfully than standing ones, worth keeping in mind for a first attempt.
Tail type varies about as much as ears do: a curled tail (Pug, Husky) is usually achieved by working a simple tube then applying gentle tension or a few strategically placed backstitches to hold it in a curl after stuffing; a straight or slightly wagging tail (Labrador) is just a plain tapered tube left to hang naturally; a docked or stub tail (some Terriers, some working breeds) is barely more than a small rounded bump, worked as just two or three rounds total.
Neck length and head angle are easy to overlook but do real work in how alert or relaxed the finished piece looks. A very short or absent neck, with the head attached almost directly to the body, tends to read as a puppy or a more cartoonish, rounded style. A slightly longer neck section, angled the head marginally upward during attachment rather than straight forward, gives a more alert, poised impression — closer to how a dog naturally holds its head when interested in something. This is a stitching-and-attachment decision rather than a separate technique, but it’s worth deciding deliberately rather than defaulting to whatever angle feels easiest during assembly.
Common Problems Specific to Dog Proportions
The finished piece looks generic rather than like a specific dog. This almost always traces back to picking a snout length or ear shape that doesn’t match the intended breed style — a floppy ear paired with a Husky-length snout, for instance, tends to read as an unclear hybrid rather than either breed convincingly. Neck length and head angle, covered above, play a smaller but real role here too — a puppy-proportioned short neck under an otherwise adult-proportioned long snout can look mismatched even when every individual piece is well made.
Standing poses tip over. This is a weight-distribution problem, not a stuffing problem — legs that are too thin relative to the body’s weight, or spaced too narrowly under the body, won’t hold a standing piece upright regardless of how firmly they’re stuffed. Widening the stance slightly, or switching to a sitting pose, resolves this more reliably than adding more stuffing.
Loop stitch fur looks patchy or uneven. This usually comes from inconsistent loop length within the same piece — even a small variation in how far the yarn is wrapped around your finger each stitch becomes visually obvious once an entire surface is covered. Using a consistent physical guide (the same point on the same finger, or a marked chopstick) for every loop keeps the length uniform.
Ears sit at mismatched angles. Exactly like the crooked-limb problem covered in the cow guide, this is often a stuffing-density or attachment-symmetry issue rather than a shaping issue — pinning both ears in place and stepping back to check the piece from directly in front, before committing to permanent stitches, catches this early.
A curled tail won’t hold its curl after stuffing. This usually means the curl was relying entirely on the yarn’s own tension rather than being reinforced. A few small, hidden backstitches worked through the base of the curl after stuffing — anchoring the tip of the tail lightly to the body or to itself — holds the shape far more reliably than tension alone, especially once the piece has been washed or handled repeatedly.
Semi-prick or folded ears look accidental rather than intentional. Because this ear type relies on a visible transition between the stiffer base and the softer fold, a fold that happens in the wrong place — too high or too low on the ear — reads as a mistake rather than a deliberate style. Marking the intended fold line before attaching the ear, and checking it against a reference image of the breed style you’re going for, helps avoid this.
A Simple Crochet Dog Pattern Free Approach for a First Attempt
If tackling breed-specific proportions feels like a lot for a first dog amigurumi, a simple crochet dog pattern free of breed-specific detail works just as well as a starting project: one rounded head-and-body shape, small floppy ears (the most forgiving ear type to attach, since there’s no need to worry about getting a prick ear to stand upright), a short, medium-length snout, plain single crochet throughout with no loop stitch, and a simple straight tail. This combination uses every core technique — sphere shaping, ear attachment, snout proportion, basic tail — while sidestepping the trickiest variables (loop stitch texture and prick-ear stiffness) until a first project is under your belt.
Finishing matters here just as much as it does anywhere else — a rushed or loose fasten-off is easy to overlook on a small piece, and our fasten-off guide is worth a look if you’re not confident the technique will hold up to repeated handling.
Common Questions About Crochet Dog Patterns
Do I need to know which specific breed I’m making before I start? Not strictly, but deciding roughly which category — short-legged versus long-legged, floppy versus prick ears, smooth versus shaggy coat — before starting keeps the proportions consistent with each other, rather than accidentally combining features from breeds that don’t actually look like that in combination.
Is loop stitch difficult to learn? The stitch mechanics themselves are simple — most people pick up the wrapping motion within a few stitches — but keeping loop length consistent across an entire piece takes more practice than the stitch itself does. Practicing on a flat swatch before attempting it on a shaped piece is worth the extra time.
Why does my standing dog keep falling over even with firm stuffing? This is almost always a stance-width or leg-thickness issue rather than a stuffing issue, as covered above — widening the leg spacing slightly, or switching the piece to a seated pose, usually solves it faster than adjusting stuffing density.
Can I mix and match features from different breeds? Absolutely — plenty of well-loved amigurumi dogs aren’t strict breed representations at all, just a pleasing combination of floppy ears, a medium snout, and a friendly expression. The breed-specific detail in this guide is meant to help you get a specific look when you want one, not to suggest that’s the only valid approach.
Does eye placement affect how the finished dog looks, beyond just safety considerations? Yes, considerably — eyes placed higher and closer together tend to read as a younger, more puppy-like expression, while eyes set lower and further apart read as a more mature or alert expression. This is worth experimenting with (safety eyes can usually be repositioned before their washer is fully pressed on) rather than defaulting to a single placement for every project.
What’s the easiest tail type for a first attempt? A straight, plain tapered tube is the simplest by a meaningful margin — no curling technique to manage, no risk of the curl relaxing over time, just consistent decreases worked to a point. It’s a reasonable default even for breeds typically shown with a curled tail, if the curling technique itself feels like one variable too many for a first project.
Putting It Together
What separates a convincing crochet dog pattern from a generic four-legged amigurumi blob comes down to a small number of proportional decisions made early and kept consistent: ear type, snout length, coat texture, and posture. None of these require new stitches beyond what’s covered in general amigurumi shaping — they’re really decisions about proportion and technique choice, applied deliberately rather than left to chance.
If you build your own version, we’d love to see which breed style you went for — share a comment with your ear and snout choices, and follow along for more technique breakdowns like this one.