A crochet sweater pattern asks for more precision than almost any other crochet project, because unlike a blanket or a scarf, a sweater has to actually fit a specific body. This guide walks through how that precision works in practice — gauge, sizing, construction methods, and the decisions that separate a sweater that fits from one that doesn’t — so you understand the reasoning behind a pattern instead of just following numbers blindly.
Whether you’re hunting for a free crochet sweater pattern to start with or trying to understand why a pattern you already have is written the way it is, the logic underneath is the same. Once that logic clicks, reading and adapting sweater patterns gets dramatically easier.
Why Sweaters Are Different from Everything Else You’ve Crocheted
A blanket forgives a lot. If your gauge runs slightly off, the blanket ends up a little bigger or smaller than planned, and in most cases nobody but you will ever know. A sweater doesn’t offer that same margin. A few stitches of difference per inch, multiplied across a full chest measurement, can be the difference between a sweater that skims the body comfortably and one that either won’t go over your shoulders or hangs like a tent.
This is why gauge swatching, which feels like an annoying extra step on a blanket project, is genuinely non-negotiable for a sweater. A swatch — a small test square worked in the actual yarn, hook, and stitch pattern the sweater calls for — tells you whether your personal tension matches what the pattern assumes. Skipping it is the single most common reason a first sweater doesn’t turn out the way the pattern photo suggested it would.
Understanding Ease and Sizing Before You Start
Before touching yarn, it helps to understand a concept most beginners have never heard of: ease. Ease is the difference between your actual body measurement and the finished measurement of the garment. Positive ease means the sweater is roomier than your body; negative ease means it’s snugger than your actual measurement, relying on the stretch of the fabric.
According to the Craft Yarn Council’s standard body measurements and sizing guidelines, garment fit is calculated from actual chest or bust measurements plus a chosen amount of ease, and their published fit charts lay out how much ease to add or subtract depending on whether you want a close-fitting, oversized, or in-between silhouette. This matters more than most beginners expect, because two patterns claiming to be “your size” can produce very different-fitting garments if one is drafted with two inches of positive ease and the other with negative ease.
Practically, this means before you pick a pattern (or design your own construction), you need your actual chest/bust measurement and a decision about how loose or fitted you want the final sweater to feel. Everything downstream — how many stitches you cast on or chain, where the armholes fall — depends on that decision.
Free Crochet Sweater Pattern for Beginners PDF

Easy Colourblock Crochet Sweater – Free Pattern
Choosing Yarn and Gauge for a Sweater
Sweaters are a bigger investment of both time and yarn than most projects, which makes the yarn choice worth thinking through rather than grabbing whatever’s on sale.
Weight matters for both drape and yardage. A lighter weight yarn (DK or fingering) drapes closer to the body and feels less bulky, but takes considerably longer to work up and requires more careful gauge matching, since small stitch differences compound over a large project. A worsted or bulky weight works up faster and is more forgiving to control tension-wise, but produces a noticeably heavier, stiffer fabric — which some modern crochet sweater patterns lean into deliberately for an oversized, textured look, and others avoid for anything meant to drape softly.
Fiber affects both feel and structure. Cotton has almost no stretch and can grow (stretch out permanently) under its own weight over time, which matters for anything with length, like a cardigan. Wool has natural elasticity and holds shape well but needs gentler washing. Acrylic sits in between — affordable, low-maintenance, and widely available, though it drapes less naturally than a good wool or wool blend.
Gauge swatch honestly, not optimistically. Work a swatch at least four inches square in the actual stitch pattern the sweater will use, then measure it after blocking (blocking can change gauge meaningfully, especially with natural fibers). If your stitch count per inch doesn’t match what the pattern specifies, adjust your hook size rather than pushing forward and hoping it works out — a half-millimeter hook change is a much smaller adjustment than reworking an entire garment later.
Simple Crochet Sweater Pattern Construction Methods
There isn’t one way to build a sweater — several construction methods exist, and each has a different learning curve.
Granny-Square and Motif-Based Construction
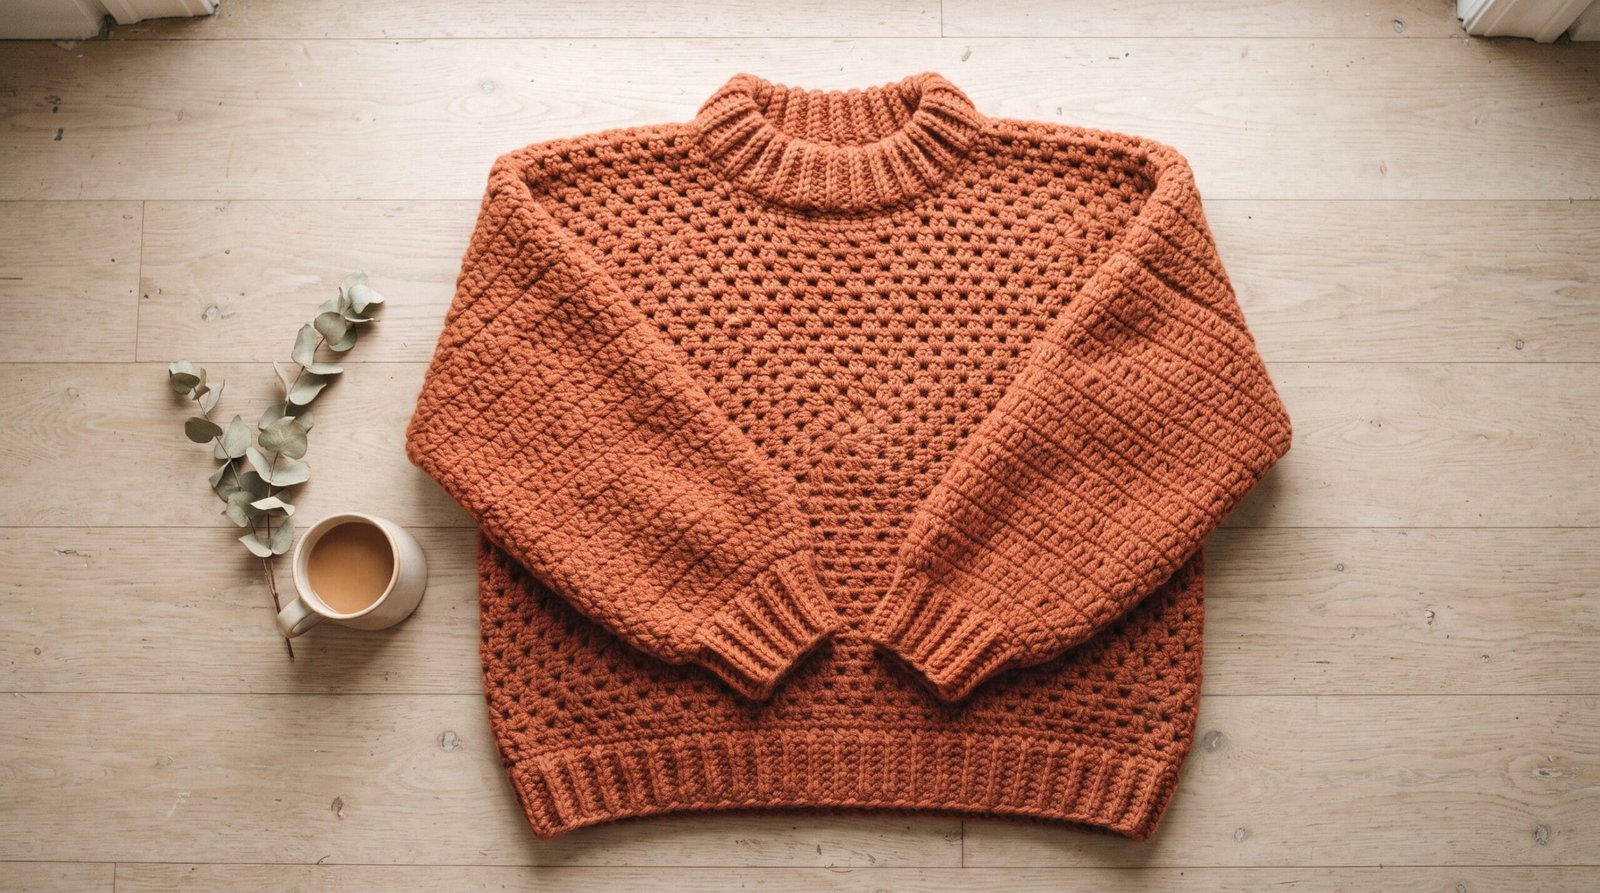
This is genuinely one of the most beginner-accessible ways to build a sweater, and it’s a large part of why a simple crochet sweater pattern often means “made from squares” rather than a fully shaped, tailored garment. Individual motifs (granny squares, hexagons, or similar shapes) are worked separately, then joined into panels that form the front, back, and sleeves. Because you’re only ever really mastering one small repeated motif, this method sidesteps a lot of the shaping math that intimidates new sweater-makers, at the cost of a boxier, less tailored silhouette.
Rectangle and Poncho-Style Construction
An even simpler starting point: rectangles of fabric, folded and seamed with openings left for the head and arms. This produces a boxy, oversized shape rather than a fitted garment, but it requires no increase or decrease shaping at all — just consistent straight rows or rounds to a target length and width. This is often where a genuinely beginner-appropriate first sweater project starts, since the only skill required beyond basic stitches is following a straightforward set of measurements.
Top-Down Raglan Construction
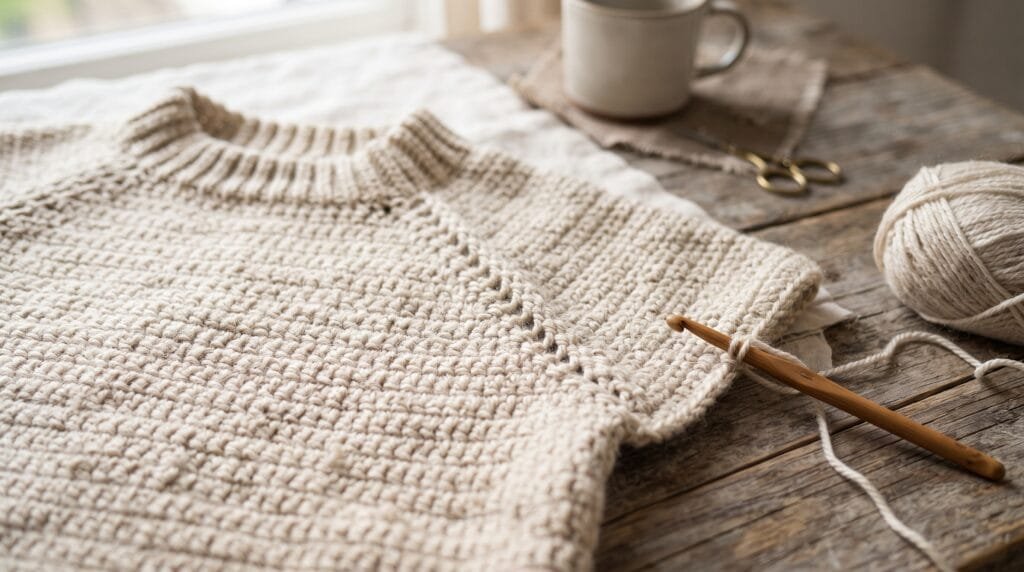
This is the method most patterns marketed as a “modern crochet sweater pattern” tend to use, because it produces a more tailored, contemporary silhouette without requiring a lot of separate pieces to be seamed together afterward. Construction starts at the neckline and works downward, with four evenly spaced increase lines (two at the front, two at the back, dividing the body from the sleeves) that widen the piece as you go. At a certain point, the sleeve stitches are set aside on holders while the body continues down alone, and the sleeves are worked separately afterward. This method requires more attention to stitch counts at each increase point than the motif or rectangle methods, but produces a shape much closer to ready-to-wear.
Bottom-Up Seamed Construction
The more traditional approach: front, back, and two sleeves are worked as separate flat pieces (or in the round, for a seamless body), then assembled and seamed at the end. This method gives the most control over shaping — waist tapering, sleeve tapering, armhole depth — but the extra seaming step is a real skill of its own, and a rushed seam can undermine an otherwise well-shaped sweater.
If you’re deciding between these for a first project, rectangle or granny-square construction is genuinely the most forgiving place to start, precisely because it removes shaping math from the equation while you’re still building comfort with the stitches themselves.
Choosing a Stitch Pattern for a Sweater
The stitch pattern you choose affects a sweater more than almost any other project type, because it determines both how the fabric drapes and how much yarn and time the project realistically needs.
Dense stitches like standard double crochet create a warm, structured fabric that holds its shape well, which makes them a common default for a first sweater. The tradeoff is weight — a dense double crochet fabric across a full garment can feel noticeably heavier on the body than the same yarn worked in a more open stitch, and it uses considerably more yardage.
Open, airy stitches — a simple mesh, a v-stitch, or a filet-style pattern — drape more naturally and use less yarn for the same coverage, which makes them a common choice for lighter-weight modern crochet sweater patterns aiming for a softer silhouette. The tradeoff runs the other way: less structure means the fabric relies more on accurate gauge and blocking to hold its intended shape, since there’s less density to disguise minor tension inconsistencies.
Textured stitches, like moss stitch, linen stitch, or a simple shell pattern, sit in between — they add visual interest and a bit more give than plain double crochet, without the yardage cost of a fully open lace-style stitch. These are a reasonable middle ground for a first sweater project, since minor tension variation tends to blend into the texture rather than standing out.
Solid granny stitch deserves its own mention, since it’s genuinely one of the most forgiving stitch patterns for garment construction — the repeating cluster structure naturally hides small gauge inconsistencies row to row, which is part of why granny-based sweaters remain a popular entry point even among people who’ve made very few garments before.
How to Read a Crochet Sweater Pattern
Sweater patterns tend to look more intimidating on the page than they actually are once you know what you’re looking at.
The schematic — a flat diagram of the finished pieces with measurements labeled at key points (bust circumference, total length, sleeve length, armhole depth) — is usually more useful for understanding fit than the written instructions themselves. Comparing schematic measurements against your own body and desired ease, before you start counting stitches, tells you whether a given size will actually work for you.
Repeat instructions, usually marked with asterisks or brackets (like “*2 dc in next st, dc in next 3 sts, rep from * around”), indicate a sequence that repeats a specified number of times. Reading these slowly the first time through a new pattern, rather than assuming familiarity from other projects, avoids a common source of miscounted stitches — sweater patterns often use slightly different shorthand conventions between designers.
Stitch counts in parentheses at the end of a row or round (like “(48 sts)”) are a checkpoint, not just information — if your count doesn’t match after working a row, that’s the moment to stop and recount rather than continuing forward and hoping the discrepancy resolves itself. On a sweater, an uncaught miscount early in the shaping tends to compound significantly by the time you reach the armhole.
Where Shaping Actually Happens
Regardless of which construction method a pattern uses, shaping tends to concentrate in the same few places, and understanding why helps you troubleshoot when something doesn’t fit right.
The armhole and shoulder area determines how the sweater sits across the top of the body. Too shallow, and the sweater restricts arm movement; too deep, and the shoulder seams (or raglan lines) droop past where your actual shoulders are.
Sleeve tapering shapes the arm from a wider point near the shoulder down to a narrower cuff. This is usually done through evenly spaced decreases (or increases, if working cuff-to-shoulder) worked at a consistent interval — every few rows, rather than all at once, so the taper looks gradual instead of stepped.
Waist and hip shaping, if included, follows the same increase/decrease logic applied to the body panel, usually spaced out over a longer stretch of rows since the change in circumference from bust to waist to hip tends to be more gradual than the change from shoulder to wrist.
None of this shaping math is something to invent on the fly for a specific size — it comes from a designer’s tested schematic, calculated against the ease and ready-to-wear standards discussed earlier. What’s genuinely useful to understand as a maker is why the shaping is placed where it is, so that if you need to lengthen a sleeve or adjust an armhole for your own body, you know which section of the pattern to modify without disrupting the rest.
Common Sweater Problems and What Causes Them
The sweater is noticeably bigger or smaller than expected. This traces back to gauge almost every time — either the swatch wasn’t accurate, or gauge wasn’t rechecked after blocking. Before frogging an entire sweater, measuring the actual finished piece against the pattern’s stated finished measurements (not your body directly) will usually reveal exactly where the mismatch happened.
The armholes feel too tight or restrict movement. This is usually an ease problem rather than a stitch-count problem — the armhole depth was drafted for less ease than the body actually needs at the size being worked. Adding an extra half inch to an inch of armhole depth on a future project, evenly distributed across the increase rounds leading into it, is a common adjustment.
Sleeves twist or the seam doesn’t sit straight. For sleeves worked in the round, this often comes down to not marking the start of the round consistently, so the “seam line” drifts gradually rather than running straight down the arm. A stitch marker at the true start point, moved up every round, prevents this.
The garment stretches out of shape after wearing. Fiber choice is usually the cause here, especially with cotton or loosely spun yarns under their own weight. Blocking correctly and, in some cases, adding a length of ribbon or seam binding along stress points like shoulder seams can help a finished sweater hold its shape longer.
Visible puckering or bunching at seams. This usually comes from a mismatch between the tension used while seaming and the tension of the pieces themselves — pulling a seam too tight draws the surrounding fabric in with it. Seaming with a slightly looser hand than feels natural, and checking the seam lying flat every few inches rather than only at the end, tends to prevent this.
Color changes or stripes look messy at the edge. For pieces worked in rows rather than continuous rounds, this is often a matter of where the color change happens relative to the turn. Starting a new color at the very beginning of a row, rather than partway through, keeps the color break aligned to one visible edge instead of scattered across the fabric.
Edging and Finishing
The edges of a sweater — neckline, cuffs, and hem — do a lot of work in how “finished” the whole garment looks, often more than the stitch pattern used for the body.
A simple round of single crochet worked evenly around an edge tightens and stabilizes it, which matters especially at the neckline, where an unfinished edge can look stretched or wavy. Ribbing (worked separately and seamed on, or worked directly into the edge using front-post/back-post stitches) adds elasticity at cuffs and hems, which helps the garment hold its shape at the points that see the most stress from pulling on and off.
Fastening off cleanly matters just as much on a sweater as on a smaller project, arguably more since a loosened end on a garment that’s washed and worn regularly is more likely to eventually work free. Our guide on how to fasten off crochet covers the technique in more detail if you want to make sure that step is genuinely secure before considering a sweater finished.
Common Questions About Crochet Sweater Patterns
Is a crochet sweater pattern realistic for a first big project, or should I start smaller? A rectangle or granny-square construction is a genuinely reasonable first sweater project, since it avoids shaping math almost entirely. A fitted raglan or seamed construction asks for more — comfort with reading increase/decrease instructions and matching gauge carefully — and is usually easier after a smaller shaped project, like a hat or a pair of mittens, first.
What’s the difference between a free crochet sweater pattern and a paid one? Not necessarily quality — plenty of free patterns are well-tested and clearly written. The more useful distinction is how much testing and grading (adjustment across multiple sizes) a pattern has gone through, which independent designers and larger publishers vary on regardless of price.
Why do modern crochet sweater patterns often look oversized? A lot of current garment design, in both knit and crochet, favors positive ease and drop shoulders, partly because that silhouette is more forgiving of small gauge variations than a close-fitted garment would be, and partly because it’s simply a current style preference. It’s not a technical requirement of crochet as a craft — fitted crochet garments are entirely possible, just less common in current pattern releases.
How much yarn does a sweater actually take? This varies enormously by size, yarn weight, and stitch pattern, but it’s meaningfully more than most other garments — patterns typically state required yardage for each size, and it’s worth buying an extra skein beyond that estimate for a first sweater, since gauge swatching itself uses yarn too.
Can a crochet sweater pattern be resized after it’s already written for one size? To some extent, yes, especially with rectangle or motif-based construction where resizing mostly means adding or removing rows or squares. Fitted constructions like raglan or seamed sweaters are harder to resize after the fact, since the shaping increases are calculated against a specific stitch count — adjusting the overall size usually means recalculating those increase points rather than simply adding extra rows at the end.
Bringing It Together
A crochet sweater pattern is really the intersection of three things working correctly at once: an accurate gauge swatch, an honest understanding of your own body measurement plus the ease you want, and a construction method that matches your current comfort level with shaping. Get those three things aligned, and the specific stitch pattern you choose becomes almost a styling decision rather than a technical risk.
If you’re working through your first sweater, or you’ve hit a specific fit problem partway through one, we’d love to hear about it — leave a comment with what construction method you’re using, and follow along for more technique guides like this one.