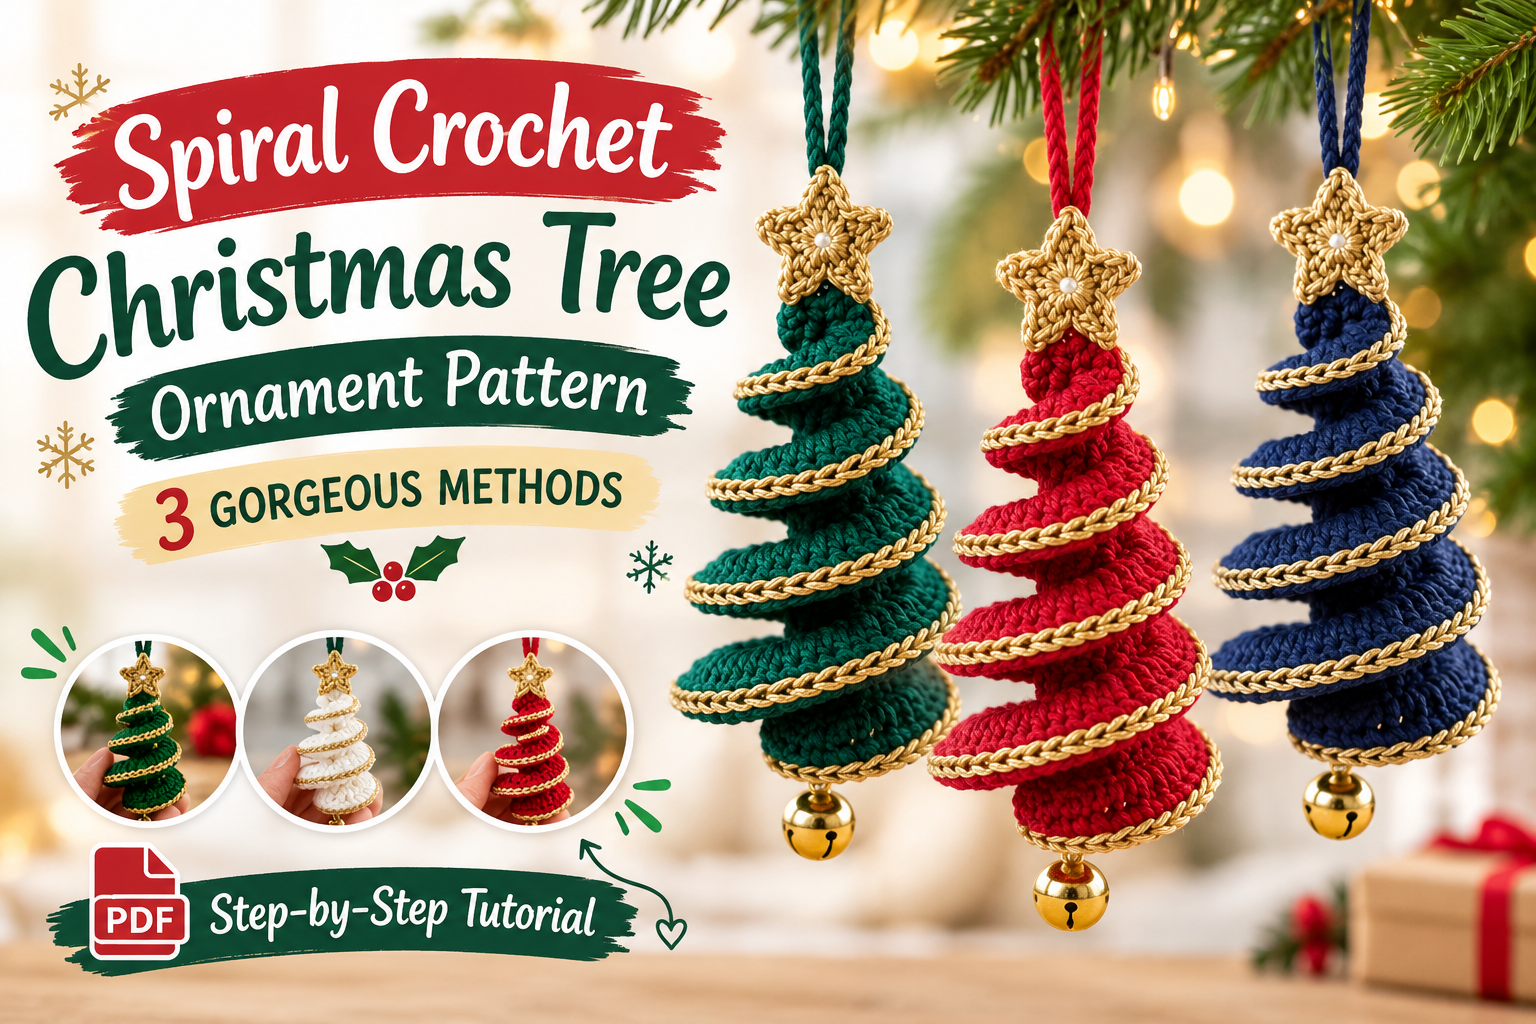
A spiral crochet Christmas tree ornament pattern gives you a tree that twists, curls, or swirls in stripes instead of sitting in a plain cone. It looks fancy on the branch, and the shaping behind it is simpler than it appears. This guide explains the idea, three ways to make it, and the stiffening and finishing steps that keep it standing.
A quick note first. This is a technique guide, not a tested pattern, so every number is a starting estimate. Swatch, adjust, and trust your own hands over my arithmetic.
What “Spiral” Means for a Crochet Tree Ornament
When people search for a spiral tree, they usually mean one of two things, and the difference matters.
The first is a twisty tree: a long, tapered strip of crochet that curls around itself like a ribbon and forms a cone-ish shape. The spiral is the shape of the fabric itself. You see these hanging on branches, sometimes spinning gently in the air.
The second is a spiral-round cone: a small tree worked in continuous rounds with no joins, the way you would make a tiny amigurumi. Here the spiral is in how you work, and it becomes visible if you change colors, which gives you candy-cane stripes that twist up the tree.
Both are worth making. I will cover one twisty method and two spiral-round methods below, so you can pick the one that matches your patience and your yarn stash.
How a Spiral Crochet Christmas Tree Ornament Pattern Works
Every spiral in crochet comes from one idea: one edge of the fabric has more stitches than the other. If the top edge of a strip is longer than the bottom edge, the strip cannot lie flat. It curls.
Here is a quick way to see it. Take a ribbon and stretch one side while holding the other still. It bends. A crocheted strip does the same thing, except you control how much it bends by how many extra stitches you add.
For a gentle curve, work two stitches into every stitch of the row. For a tighter curl, work three. For a ruffle that spirals into a tree, mix stitch heights as well, so the strip is taller at one end and shorter at the other, and it tapers as it curls.
This is also the trick behind many a crochet christmas tree pattern you will find online. When you read one, look for the extra stitches. They are the spiral.
Once you understand that, you can change any pattern. More extra stitches mean a tighter curl. Fewer mean a looser one. It is a dial, not a rule.
Yarn, Hook, and Supplies
You do not need much, and what you choose changes the look more than the shaping does.
- Yarn. Smooth cotton gives crisp, sharp curls. Acrylic is softer and more forgiving. For a first try, use a light or medium green that shows your stitches.
- Hook. For a spiral that holds shape, I use a hook one size smaller than the label suggests.
- Fabric stiffener or similar, if you want a twisty tree to stand on its own.
- A paper or card cone to wrap the tree around while it dries.
- Tapestry needle, scissors, and a loop of thread or yarn for hanging.
The Craft Yarn Council publishes a standard yarn weight system that lists a recommended hook range for each yarn category. For worsted weight, the range is 5.5 to 6.5 mm. That range is meant for drapey fabric. A spiral ornament wants crisper stitches, so my starting estimate is a 4 mm hook with worsted yarn.
For a sense of what a free spiral looks like in worsted yarn, the AllFreeCrochet spiral ornament lists a 4.5 mm hook and a gauge of 16 to 20 stitches per 4 inches. Your tension will land somewhere near there.
Method One: The Twisty Strip Tree
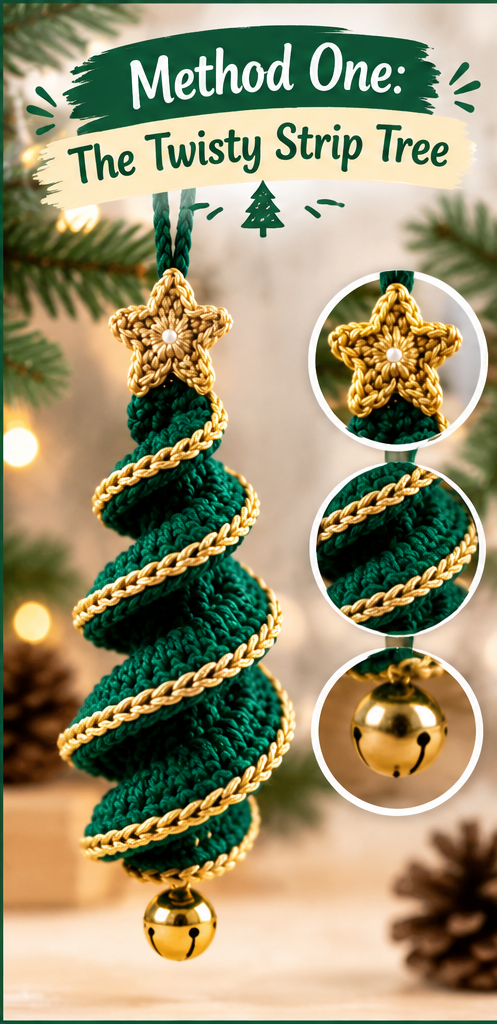
This is the one that makes people stop and ask how you did it. It is also the least predictable, so make a spare.
The idea. Work a single row of extra stitches along a foundation chain, with stitches that get shorter along the length of the strip. The tall end becomes the bottom of the tree, and the short end becomes the tip. As the strip curls, it coils into a cone.
Starting estimate (4 mm hook, worsted yarn):
- Chain 37.
- Work 2 double crochet in each of the first 12 chains.
- Work 2 half double crochet in each of the next 12 chains.
- Work 2 single crochet in each of the last 12 chains.
- Fasten off, leaving a tail for hanging.
Expect a strip of around 72 stitches that curls on its own. If it only wiggles, add a third stitch to each chain. If it twists like a corkscrew, go back to two.
Tip. Do not try to flatten it. The curl is the whole point. Pin or wrap the strip around a paper cone, wet it lightly if your yarn allows, and let it dry in shape. More on stiffening below.
I made my first twisty tree with 3 stitches per chain, thinking more curl would be better. It came out like a tiny crochet tornado. Dialing it back to 2 gave me the soft spiral I was after.
Method Two: The Spiral-Round Cone
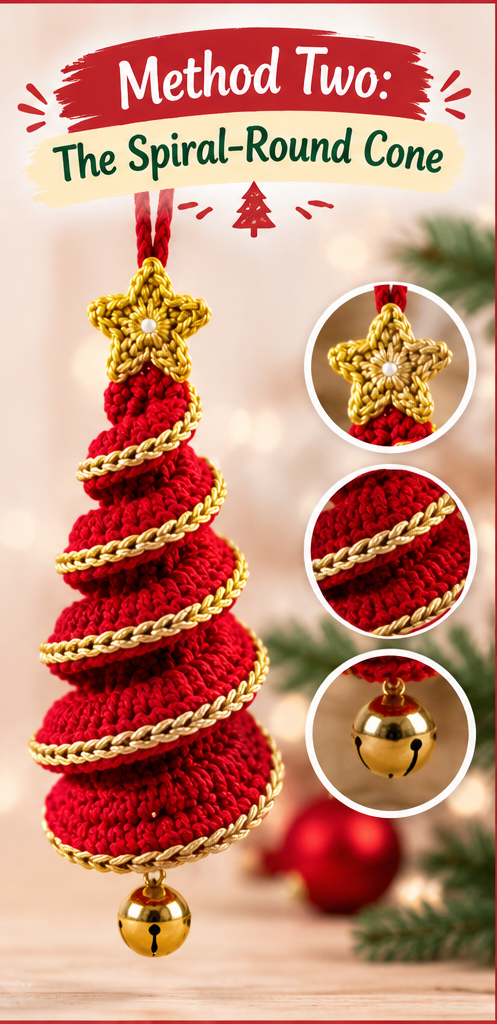
This is the friendly one. If you have ever made a small amigurumi, you already know how to do it.
The idea. Work in a continuous spiral, with no joining at the end of each round. Add six stitches every third round, so the cone widens at a steady pace.
Starting estimate (4 mm hook, worsted yarn):
- Round 1: 6 single crochet in a magic ring. (6)
- Round 2: increase in each stitch. (12)
- Rounds 3-4: single crochet around. (12)
- Round 5: 1 single crochet, increase, repeat 6 times. (18)
- Rounds 6-7: single crochet around. (18)
- Round 8: 2 single crochet, increase, repeat 6 times. (24)
- Rounds 9-10: single crochet around. (24)
That gives a small cone about 2.5 inches (6 cm) tall, estimated. Stop here for an ornament, or keep adding the same pattern for a larger tree.
Stuff it lightly, or not at all if you plan to stiffen it. Add a loop of yarn at the tip to hang it, and weave the ends in carefully. For the full cone, with a base disc and a trunk, my general crochet christmas tree guide walks through it in detail.
Use a stitch marker in the first stitch of each round. Spirals do not forgive lost counts.
Method Three: The Candy-Stripe Spiral
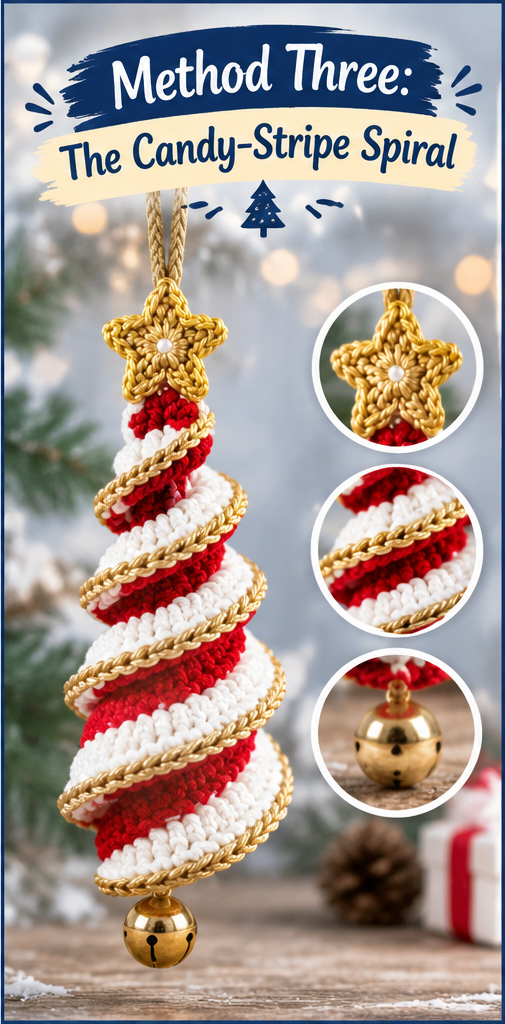
Take the cone from Method Two, and change color every round. That is the entire trick.
Because you are working in a spiral, the color change does not line up neatly at one seam. Instead, each new color starts a little higher than the last, and the stripes lean around the tree like a barber pole. That slanted twist is the “spiral” in a candy-stripe ornament.
How to change color. On the last stitch of the round, pull the new color through the final loop to finish it. Then carry on with the new color. Do not cut the old one if you will use it again two rounds later. Carry it loosely up the inside, where the stuffing or the cone will hide it.
Color ideas. Green and cream is classic. Red and white looks like a peppermint. Teal and gold feels modern. For the sharpest spiral, pick two colors with real contrast.
A word of warning from experience: if you pull the carried yarn tight, the tree puckers. Keep it loose, as loose as you can stand.
For a variation, try three colors in rotation. The stripes become narrower and the spiral slants more.
Stiffening a Spiral Ornament
Soft spirals droop on a heavy branch, so most crocheters stiffen them. Here are the common approaches, from the gentlest to the firmest.
Light starch or sugar water. Some crocheters use a light starch to give cotton a little body. Test it on a scrap first.
Commercial fabric stiffener. This is the strongest option. Follow the product instructions, work in a ventilated space, and wear gloves.
Shape while it dries. Wrap the damp ornament around a paper cone, and slide it over a bottle or jar to hold the shape. Leave it until it is completely dry.
A few cautions. Stiffeners can darken pale yarns slightly, and they can change the feel of acrylic, so test a scrap first. Always follow the instructions on the product you use. A stiffened ornament is for display only, and it should not be washed.
Hanging Your Spiral Tree
The hanging loop is a small detail that makes or breaks the look. A loop that is too thick hangs the tree crooked, and one that is too thin snaps.
For a strip tree, thread a length of yarn through the top few stitches and tie a knot. For a cone, a short chain loop at the tip works well. Aim for a loop long enough to slip over a branch without bunching.
If the tree hangs crooked, check the balance. The tip should sit directly above the center of the base. A tiny stitch of yarn at the wide end can fix a lean.
For extra sparkle, hang a spiral tree in a window. The light shows off the twist, and a stiffened strip casts a lovely curly shadow.
Watch It Worked Up: A Video Tutorial
Curls are easier to understand when you watch them. This video shows how a twisty spiral tree comes together, from the first row to the final shape:
Watch for how the maker handles the extra stitches and how the strip curls on its own. That is the idea from Method One in action. Pause it often, and compare your swatch to what you see.
If you are new to working multiple stitches into one chain, practice on a short foundation chain before you commit a whole skein.
Making a Set and Giving Spiral Ornaments
One spiral tree is a nice surprise. Three, in different sizes or colors, is a small gift.
For sizes, work the same pattern with more or fewer rounds. For a bigger twisty tree, lengthen the foundation chain and keep the same stitch pattern. For a smaller one, shorten it.
For color, try one rule: keep the yarn the same weight, and vary the shade. A cream, a green, and a red tree look like a family.
For gifts, tuck an ornament into a small box with tissue, or tie one to a present. Add a tiny card with the yarn fiber and a note that stiffened ornaments should stay dry. I have given a set of three to neighbors, and the most common reaction was that they thought it was a purchased decorating piece. That is the kind of compliment I look for.
Keep small decorations like beads off any ornament that a young child may handle.
Colors and Yarn Textures That Suit a Spiral
A spiral shows off color changes and texture better than a plain cone, so the yarn you pick matters more than usual.
Smooth yarns make the twist look crisp. A cotton or a tightly spun acrylic lets every stitch read clearly, which is what you want for candy stripes. Fuzzy or brushed yarns blur the stripes, though they can be lovely on a twisty tree, where the soft edge looks like snow.
Variegated yarn is a fun shortcut. A color-changing skein makes its own spiral stripes on a cone without any carrying, although the effect is unpredictable. I like to test a short length first and see where the colors fall.
For a quiet, elegant look, try a single color with a metallic strand held alongside. A thin gold thread worked with green gives a subtle shimmer. Hold the two strands together as one, and keep the tension a little looser, since two strands make the fabric thicker.
If you are making several ornaments, keep one thing the same: the yarn weight, the hook, or the color palette. That one link makes mixed ornaments look like a family.
Troubleshooting Your Spiral
Spirals fail in a few predictable ways, and each one has a quick fix.
The strip lies flat. You have the same number of stitches on both edges. Work two stitches into every stitch of the row, and it will curl.
The curl is too tight. Use fewer extra stitches, or move to a hook one size larger. A tight curl often means the stitches are packed too closely.
The cone leans. You lost your place in the round. Count your stitches after each increase round, and check that the marker is in the first stitch.
The stripes look jagged. Pulling the new color through too tightly makes the join pucker. Keep the color change loose, and snug it up on the next stitch.
The ornament droops after stiffening. It likely was not fully dry, or the stiffener was too thin. Let it dry completely over a form, and apply a second light coat if the product allows.
The tip has a hole. Pull the starting tail tight, and pass it through the first round before weaving it in.
Most of these come down to one habit: stop every few rounds and look at the shape. A spiral tells you what it is doing long before it goes wrong.
Displaying a Spiral Ornament Collection
Once you have a few, they deserve a good place to hang.
A bare branch in a vase makes a simple tree for spirals, since the curls hang freely and catch the light. A window with a curtain rod works too. For a mantel, hang them from a garland of wool or twine.
Space them out. Spirals need room around them to show their shape, so avoid crowding them next to bulky decorations. Mix sizes, with the biggest in the middle, and let a few hang at different heights.
If you have a real tree, put the spirals toward the outer branches, where they have space to turn. A crochet xmas tree hanging from a bigger tree is a little joke that never gets old.
Finishing: Fasten Off and Weave In Ends
Spirals reveal loose ends more than most projects do, since the curls move and expose anything that is not secure.
When you reach the end, cut the yarn, leave a tail, and pull it through the last loop. If you want a refresher, my guide on how to fasten off in crochet covers it step by step.
Then weave the tail in. For a twisty strip, follow the stitches on the wrong side. For a cone, run it up the inside. There is more detail in this guide to weaving in crochet ends.
Weave in before you stiffen. Once the stiffener dries, a stray tail becomes a hard, scratchy spike that is much harder to hide.
Mistakes I Have Made So You Don’t Have To
I have made most of the mistakes available on a small spiral, so here is the short list.
Too many extra stitches. My first strip curled into a knot. Start with two stitches per chain, and add more only if it will not curl.
A hook that was too large. The strip looked limp and refused to hold a curl. Going down a size fixed it.
Stiffening before weaving in. I once stiffened an ornament with the tails loose, and had to snip them into stubby points. Always weave in first.
Hanging too close to a heat source. A stiffened ornament can warp. Keep ornaments away from radiators and strong sun.
Skipping the test strip. A new yarn behaves differently. Make a tiny test before you commit a whole skein.
Frequently Asked Questions
Do I have to stiffen a spiral ornament? Not always. A tightly worked cone holds its shape without help. A twisty strip usually needs stiffening if you want it to stand, and it will hang softly without it.
What is the easiest spiral to start with? The spiral-round cone in Method Two. It uses single crochet and increases only, and you can finish one in an evening.
Why does my strip lie flat instead of curling? It probably has the same number of stitches on both edges. Add a second stitch to each chain along the strip, and it will start to curl.
Can I use cotton instead of acrylic? Yes. Cotton gives sharper stitches and holds stiffener well. Acrylic is softer and can be harder to shape, so test a scrap.
How big will the ornament be? It depends on your yarn, hook, and tension. My estimates give a cone of roughly 2.5 inches (6 cm) and a strip of around 72 stitches. Measure your own swatch before you rely on a number.
Can I wash a stiffened ornament? No. Stiffened pieces are for display only. If you make an unstiffened cone, hand wash it gently, following the yarn label.
Is this safe to give to a child? Keep the ornament plain, with no beads, and make sure the ends are woven in well. For babies and toddlers, a decoration is better placed out of reach.
Final Thoughts
A spiral crochet Christmas tree ornament pattern does not need to be complicated to be charming. Start with the spiral-round cone, then try a twisty strip when you feel ready, and keep notes on what your hook and yarn actually do. If you want one more crochet xmas tree for the branch, a candy-stripe version takes only a few more rounds.
If you make your own version, I would love to hear which method you chose. Leave a comment below, share your trees with a friend who crochets, and follow along for more guides like this one.