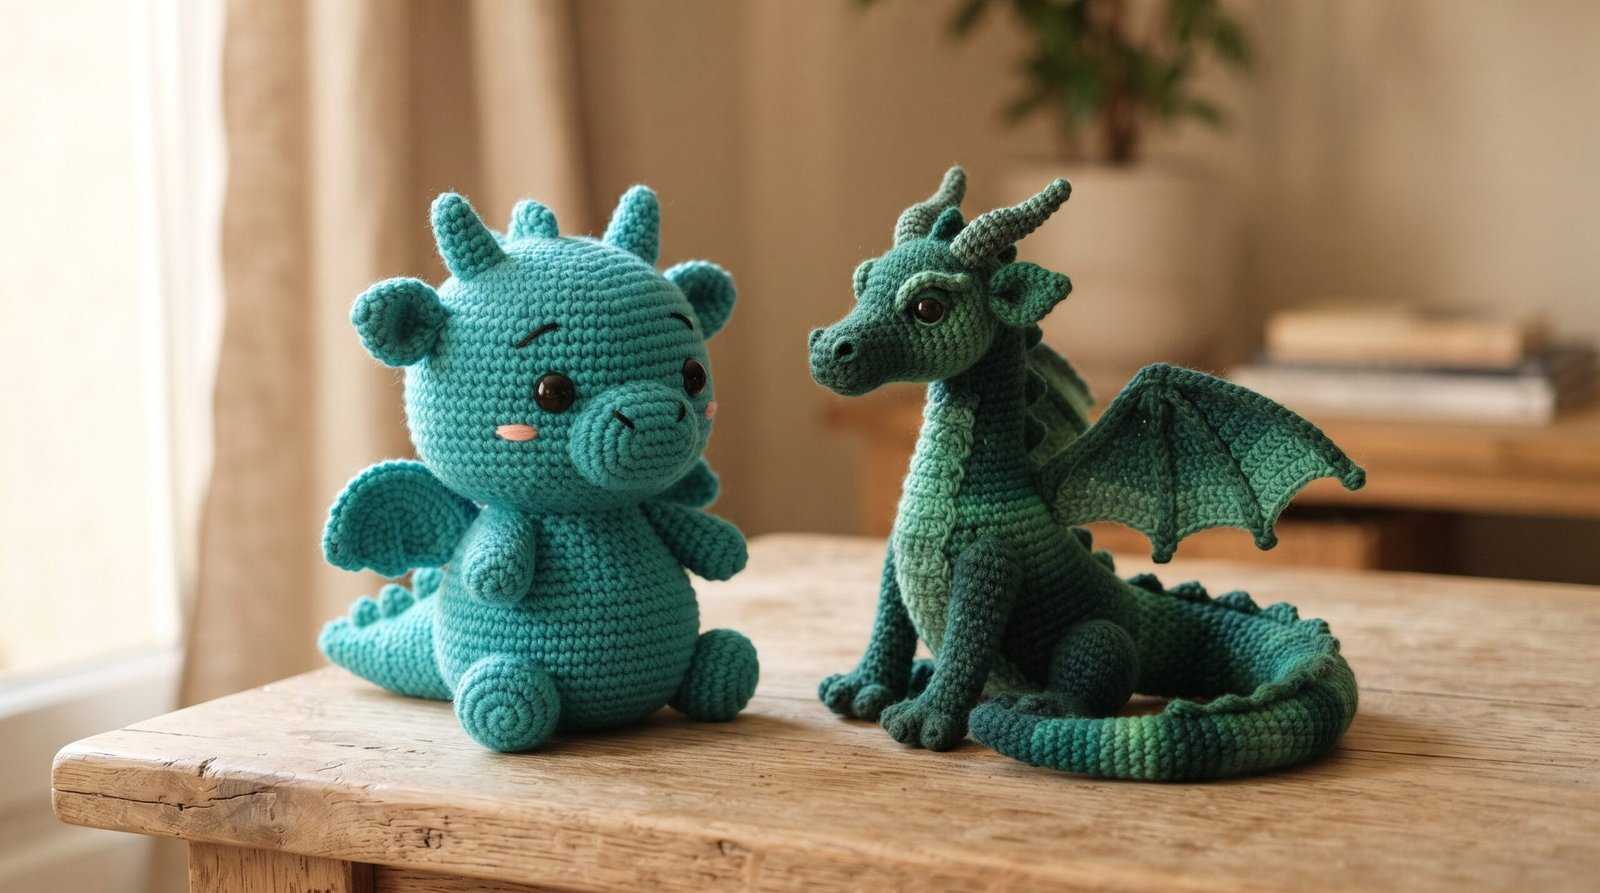
A dragon crochet pattern is unlike every other amigurumi animal covered on this site, for one simple reason: there’s no real animal to check your proportions against. A dragon is a construction of borrowed parts — reptile body, bat wings, sometimes a snake’s tapering tail — and this guide focuses on how those borrowed parts come together, from wing shaping to spike placement to the color and texture choices that separate a stylized dragon from a more realistic one.
If you haven’t worked through the amigurumi fundamentals — magic rings, sphere and cylinder shaping, invisible decreases — our crochet cow pattern guide covers those in more depth than there’s room for here. This guide assumes that foundation and focuses entirely on what’s specific to dragons.
Stylized Versus Realistic: Deciding Your Direction First
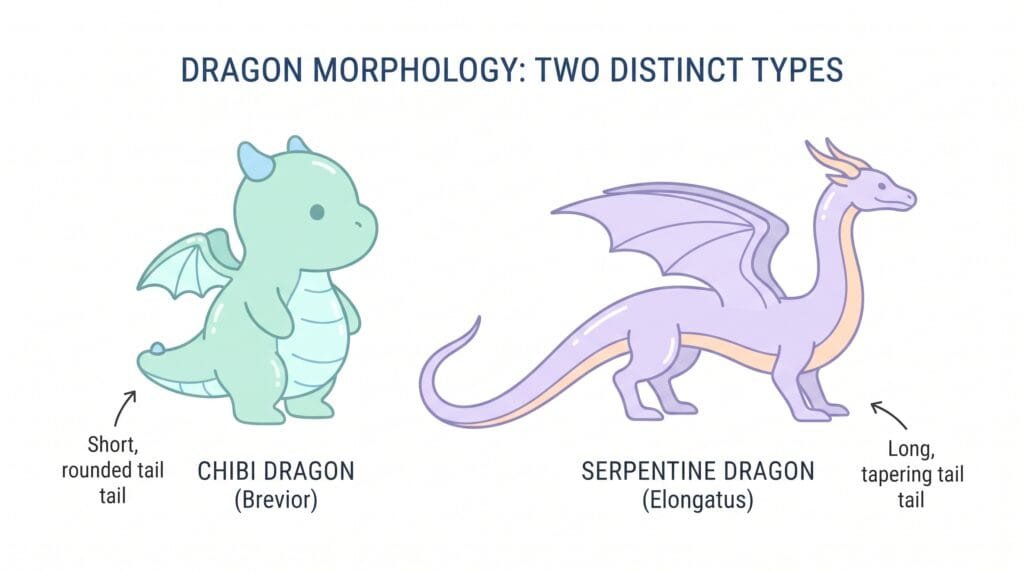
Unlike a cow or a bunny, where “realistic” and “stylized” are variations on the same basic shape, a dragon crochet pattern splits into two genuinely different design directions worth choosing between before you start.
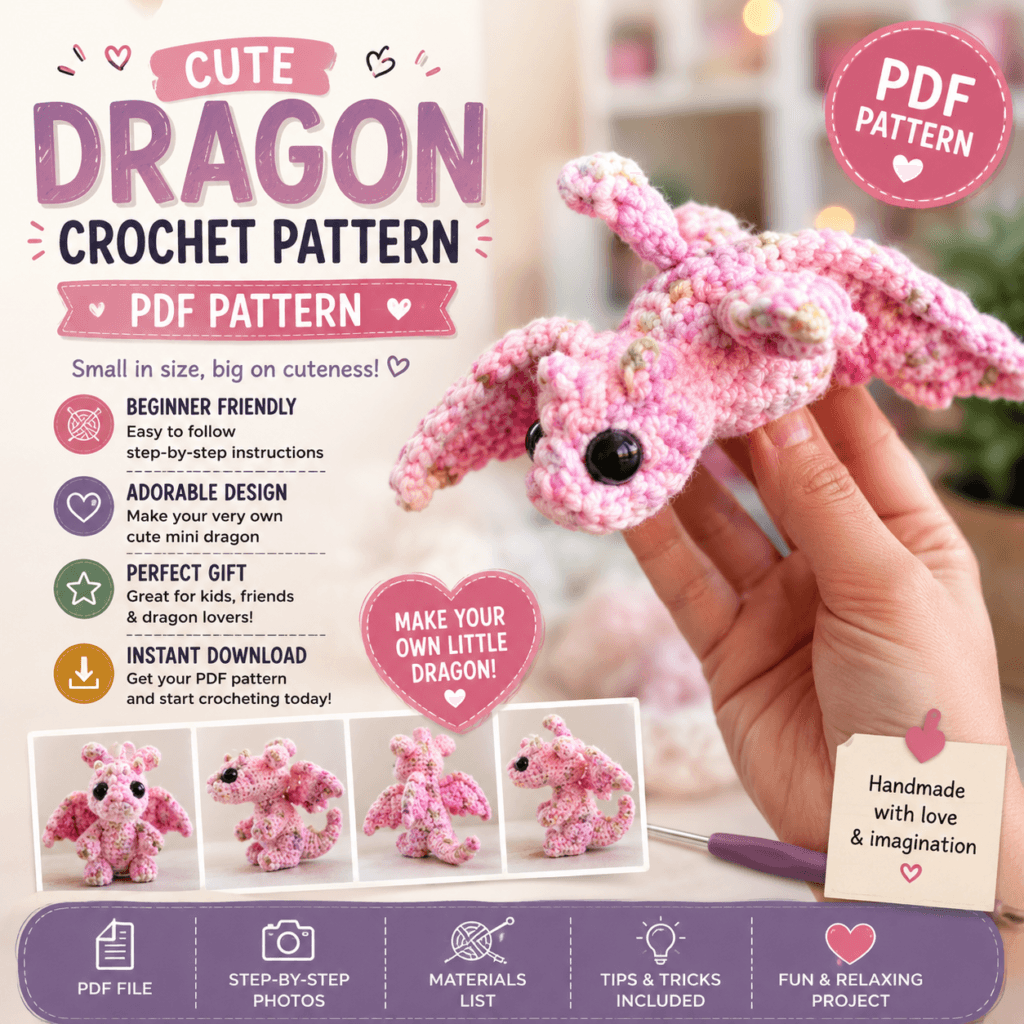
A stylized, chibi-style dragon leans into a large, round head and body, small stubby limbs, oversized eyes, and a short, thick tail — proportions borrowed more from a puppy or a cartoon character than an actual reptile. It’s the more forgiving direction for a first dragon project, since exaggerated, rounded proportions hide minor shaping inconsistencies more easily than an elongated, anatomically considered body does.
A realistic crochet dragon free pattern direction goes the opposite way: an elongated, lower-slung body, a long tapering tail often as long as the body itself, proportionally larger wings, and a more angular, reptilian head shape with a distinct snout rather than a round face. This direction is genuinely more technically demanding, mostly because there’s more surface area for proportion mistakes to become visible, and because the tail and wings both require more deliberate shaping work than a stylized version’s simplified versions of the same features.
Deciding between these two directions before starting keeps every subsequent decision — body length, wing size, color choice — working toward the same overall look, rather than accidentally mixing stylized and realistic elements in a way that reads as unfinished rather than intentional.
What You’ll Need
Yarn. Worsted weight is the practical default, as with the other amigurumi guides on this site. For a realistic-direction dragon specifically, a variegated or gradient yarn that shifts gradually between related tones (deep green through olive, or charcoal through slate blue) does a lot of the scale-texture work on its own, discussed further below.
Hook, sized down as usual from the yarn label for dense, stuffing-proof fabric.
Thin wire or pipe cleaners, genuinely useful for a dragon in a way they’re less necessary for a cow, dog, or bunny — wings and a long tail both benefit from some internal support if you want them posed rather than hanging limp. Florist wire or a few pipe cleaners twisted together, inserted before stuffing and closing a seam, gives a wing or tail enough structure to hold a bent or curved pose.
Safety eyes or embroidery supplies, plus a safety note that matters more here than on some of the other animal guides: a dragon design with wire-supported wings, pointed horns, or small hard spikes involves genuinely sharp or hard points in a way a rounded cow or bunny mostly doesn’t. According to federal toy safety regulations on sharp points, toys intended for children under eight must not present accessible sharp points that could cause puncture or laceration injury — worth keeping in mind specifically for any wire ends (which should be fully bent back and covered by yarn or fabric, never left exposed) and for horn or spike tips, which should be softly rounded rather than worked to a genuinely sharp point if the piece is meant as a child’s toy rather than a display piece.
Building the Body and Tail
A dragon’s body-to-tail proportion is one of the most defining choices in the whole project, and it varies more than almost any other feature between stylized and realistic directions.
For a stylized dragon, the body can follow the same basic sphere-and-cylinder logic covered in the cow guide — a rounded torso, a shorter, thicker tail worked as a simple tapered cylinder, not dramatically different in concept from a bunny’s tail just scaled up and given a more pointed tip.
For a realistic dragon, the body is usually worked as an elongated, gently tapering cylinder rather than a sphere — closer to the concept of a snake or lizard’s torso than a rounded mammal body. The tail extension of that same logic, continuing the taper for a much greater length than the body itself, often worked in segments (several shorter tapered sections joined end to end, sometimes with a slight color or texture change at each segment boundary) rather than as one single continuous piece. Segmenting the tail this way makes an otherwise very long, thin piece considerably easier to stuff evenly and keep from twisting compared to working the entire length in one continuous round.
A tail tip — whether a simple point, a small arrow or spade shape, or a rounded club — is usually worked as a distinct small piece attached at the very end, giving you a natural place to add a final design flourish without complicating the shaping of the main tail length.
Head and Snout Shaping
The head is where the stylized-versus-realistic decision shows up most obviously, since it’s the first thing anyone looks at on a finished piece.
A stylized dragon head stays close to the round sphere construction covered in the cow guide — a large, rounded cranium with a short, blunted snout, often barely more than a slight forward projection with a small mouth line embroidered or lightly indented rather than built as a separate piece. Large, prominent eyes (proportionally bigger than a realistic reptile’s) reinforce the friendly, approachable character this direction is usually going for.
A realistic dragon head takes more construction work — an elongated, tapered snout built similarly to a long-snouted dog’s muzzle (covered in more depth in our crochet dog guide), often with a slight downward or forward taper toward the nostrils rather than a blunt end, and a flatter, more angular cranium shape rather than a full round sphere. Smaller, more deliberately placed eyes, set further forward on the head than a stylized design’s, contribute to the more serious, reptilian read this direction goes for.
Jaw and mouth detail, if included beyond a simple embroidered line, is usually achieved with a thin contrasting-color edge worked along where the mouth would be, or a very slight gap left in the shaping to suggest an open, slightly parted jaw — full articulated jaws are technically possible but add a meaningful amount of assembly complexity for a detail most finished pieces don’t strictly need to look convincing.
Legs and Claws
Legs are a comparatively smaller design decision than wings or the tail, but they still shift between the two overall directions in a way worth being deliberate about.
Stylized dragon legs are usually short, thick, and stubby — proportionally closer to the short-legged dog styles covered in the dog guide than to anything reptilian, since the goal in this direction is an approachable, toy-like silhouette rather than anatomical accuracy.
Realistic dragon legs tend to be longer and more clearly jointed, sometimes worked with a visible bend built into the shaping (a slight change in stitch count or a strategically placed decrease partway down the leg) to suggest a reptilian crouched stance rather than a straight, mammal-like leg.
Claws, when included, are usually small pointed extensions worked at the end of each foot — three or four tiny points, either crocheted as small individual picot-style extensions or simply embroidered on for a lower-effort alternative. As with horns and spikes, any crocheted claw tips intended for a child’s toy are worth softening slightly rather than working to a genuinely sharp point, following the same safety reasoning covered in the materials section.
Wing Construction
Wings are arguably the single most identity-defining feature on a dragon, more than even the head or tail, and they’re also the feature with the least direct amigurumi precedent among the other animals covered on this site.
Bat-style membrane wings — the most common dragon wing style — are typically worked flat, not in the round, as a roughly triangular or fan shape with several elongated points (echoing bat “fingers”) extending from a central spine, with the fabric between those points worked more thinly or left slightly open, sometimes using a simple mesh or picot pattern between the points to suggest a thin membrane rather than solid fabric.
A wire spine, run along the main structural edge of the wing and bent slightly to hold a curve, lets the finished wing hold a spread or folded pose rather than lying completely flat — this is where the wire mentioned in the materials section earns its place, since a wing without any internal support tends to flop rather than display any of the dramatic curve that makes dragon wings visually interesting.
Attachment matters as much as construction here. Wings sewn on with a slight upward or outward angle, rather than flat against the back, tend to look more dynamic and less like an afterthought. For a genuinely posed, adjustable result, some makers attach wings with a small button or snap join rather than sewing them permanently flat, allowing the wings to be repositioned — though this adds a layer of assembly complexity and a small hard component that circles back to the safety note above if the piece is meant for a young child.
Spikes, Horns, and Ridges
The small raised details along a dragon’s back and head do a lot to sell the “dragon” identity, and they’re worth planning as a deliberate sequence rather than adding individually as an afterthought.
A dorsal ridge of spikes is usually built from a series of small triangular or leaf-shaped flat pieces, worked individually and then sewn along the centerline of the back at evenly spaced intervals, graduating in size from smaller near the head to larger at the shoulders and tapering back down toward the tail. Planning the total number of spikes and their size progression before attaching any of them — a quick sketch, similar to the ring-chart approach in our mandala guide — prevents an uneven, oddly spaced result partway through attachment.
Horns are typically small, tightly worked cones, shaped with the same increase-then-plain-rounds logic as a sphere but stopped well before the decrease phase, then left unstuffed or only lightly stuffed for a firm, defined point (softened at the very tip for safety, as covered above). Horn placement and angle affects the head’s whole expression — horns swept backward read as sleeker and more serpentine, while horns angled more upright and forward read as more alert or aggressive.
Facial ridges and brow shaping, small raised areas worked above the eyes using a similar shaping trick to the cheek-widening technique covered in the crochet bunny guide, give a dragon’s face more dimension and a more deliberately reptilian brow than a smooth, rounded head would.
Dragon Crochet Pattern PDF Free Download
Scale Texture and Color
This is where the realistic-versus-stylized decision matters most for the finished look, since scale texture is almost entirely optional for a stylized design but does a lot of work for a realistic one.
Gradient or variegated yarn, mentioned in the materials section, is the lowest-effort way to suggest scale variation — a yarn that shifts gradually between related tones mimics the subtle color variation real reptile scales often show, with zero extra stitching technique required.
A dedicated scale stitch, sometimes worked as a row of overlapping V-stitches or small fan shapes, each one worked into the row below in a way that creates a raised, layered, overlapping texture, is a more deliberate technique for suggesting individual scales rather than just color variation. This is considerably slower to work than plain single crochet and is usually reserved for a smaller feature area (the top of the head, along the spine) rather than the entire body, both for time and because a very densely scaled full body can end up visually busy rather than convincingly textured.
Plain smooth stitching with color blocking — a lighter belly color against a darker back and side color, using the same invisible color change technique covered in the cow guide — is a middle-ground approach that suggests reptilian coloring without the time investment of an actual scale stitch, and works well for either the stylized or realistic direction.
Common Problems Specific to Dragon Construction
Wings won’t hold a pose and flop flat. This traces directly back to the wire spine discussed above — a wing with no internal support has nothing to resist gravity with regardless of how it’s attached. Adding wire, even after the fact by carefully working it in through a small opening left near the wing’s seam, is usually more effective than trying to solve a floppy wing through stuffing density alone.
The tail looks lumpy or uneven along its length, particularly on a segmented realistic-style tail. This usually means the segments weren’t stuffed to a consistent firmness relative to each other — a tightly stuffed segment next to a loosely stuffed one creates a visible size or firmness change at the join. Stuffing each segment to the same felt density, checked by gently squeezing each one before moving to the next, keeps the taper looking continuous rather than segmented.
Spikes look randomly placed rather than deliberately graduated. As mentioned above, this is a planning problem more than a construction one — sewing spikes on as they’re finished, without a predetermined size progression and spacing plan, tends to produce an uneven result even when each individual spike is well made.
Horn or spike tips feel sharp to the touch. Beyond the safety consideration covered earlier, this is also a construction quality issue — a tip decreased too abruptly, without enough plain rounds to round out the very point, tends to feel pokier than intended even at a modest size. Working one or two additional plain rounds before the final decrease, then closing more gradually, softens the felt point without changing the overall silhouette much.
The head looks disconnected from the body’s overall style. This usually happens when a realistic-direction snout is attached to a stylized round body, or the reverse — a blunt stylized head on an elongated realistic body. Revisiting the stylized-versus-realistic decision from the start of this guide and keeping every major piece (head, body, tail, legs) consistent with that one direction resolves this more reliably than trying to adjust individual pieces after the fact.
Free dragon crochet pattern in Video
Common Questions About Dragon Crochet Patterns
Do I need to know which specific dragon “type” I’m making before starting? Not in the way you might need to pick a dog breed — dragons don’t have a fixed real-world reference the way animals do, so the main decision that actually matters is stylized versus realistic proportions, covered at the top of this guide. Everything else (color, horn style, wing shape) is genuinely open creative territory.
Is a dragon crochet pattern a reasonable second or third amigurumi project, or should it be a first? Given the wire work, segmented tail, and wing construction involved, a dragon is a reasonable step up after a rounder, simpler animal like the cow or bunny covered elsewhere on this site — the individual techniques (spheres, cylinders, color changes) are shared, but the sheer number of distinct pieces (wings, spikes, horns, tail segments) adds real assembly complexity that’s more comfortable to take on once those individual techniques already feel familiar.
Can I make a dragon without any wire at all? Yes — a stylized dragon in particular works perfectly well with wings sewn on flat, without any internal support, if a fully spread, dramatically posed wing isn’t the goal. Wire adds a specific visual effect (a dynamic, curved wing pose) rather than being a required part of dragon construction generally.
Should the wings and tail be worked in the same color as the body, or different? Both approaches show up regularly, and it comes down to the overall look you’re going for. Matching the wing membrane to the body color keeps the design visually unified and slightly more realistic-reading, since real bat wings are typically close in tone to the surrounding body. A contrasting wing color — a deep jewel tone against a neutral body, for instance — reads as more stylized and decorative, and can help the wings stand out as a focal point rather than blending into the overall silhouette.
What’s the easiest way to make the scale texture without a lot of extra time? A gradient or variegated yarn, discussed above, gives a genuine sense of scale-like color variation with literally no extra stitching technique — it’s a reasonable choice if the dedicated scale stitch feels like more time investment than the project calls for.
Bringing the Pieces Together
What makes a dragon crochet pattern more involved than the other animal guides on this site isn’t any single unfamiliar stitch — it’s the sheer number of distinct decisions stacked together: body proportion direction, wing construction and posing, spike and horn planning, and how much scale texture to commit to. Taken one decision at a time, using techniques that mostly extend what’s covered in the cow, dog, and bunny guides, it’s a manageable progression rather than an entirely separate skill set.
If you build your own version, we’d love to see which direction you went — stylized or realistic — and how you handled the wings. Share a comment with your approach, and follow along for more technique guides like this one.