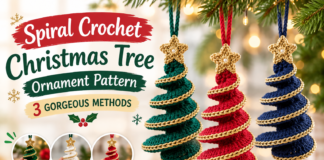

A crochet christmas tree is one of those projects that looks far harder than it is. A cone, a triangle, or a few stacked layers, and suddenly you have a decoration that sits on a shelf, hangs on a branch, or goes into a gift bag. This guide walks through five styles, the yarn and hook choices behind them, and the finishing steps that make them look polished.
Why a Crochet Christmas Tree Is Worth Making
Most holiday projects ask a lot. A stocking is big, a blanket is bigger, and an advent calendar is a commitment that runs into November. A small tree takes an evening.
That is exactly why I like them. You can try a new stitch, test a yarn you are unsure about, or use up scraps from the bottom of the basket, and the stakes stay low. If one tree comes out lopsided, it becomes the one you hide at the back of the shelf.
They also stack well as a set. A row of small trees in different greens, or in cream, red, and gold, looks like a deliberate collection. Three trees made in an afternoon make a better gift than most things you could buy.
If you have never made a cone before, you are in luck. Shaping a tree is mostly about one idea, which is adding stitches at a steady pace, and once you see it, you will spot it in every pattern.
Choosing Your First Crochet Christmas Tree Style
Five styles cover most of what you will see. Here is how I think about them:
- The stuffed cone. Worked in the round, filled, and standing on its own. The classic.
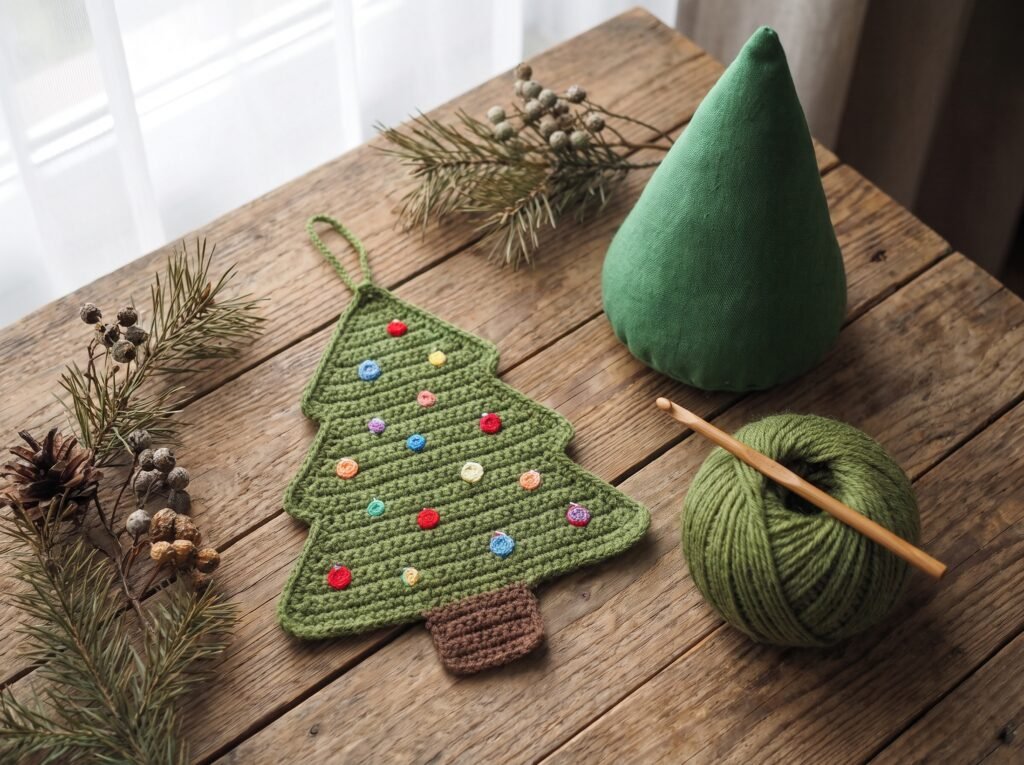
- The flat triangle ornament. Worked in rows, no stuffing. The fastest option.
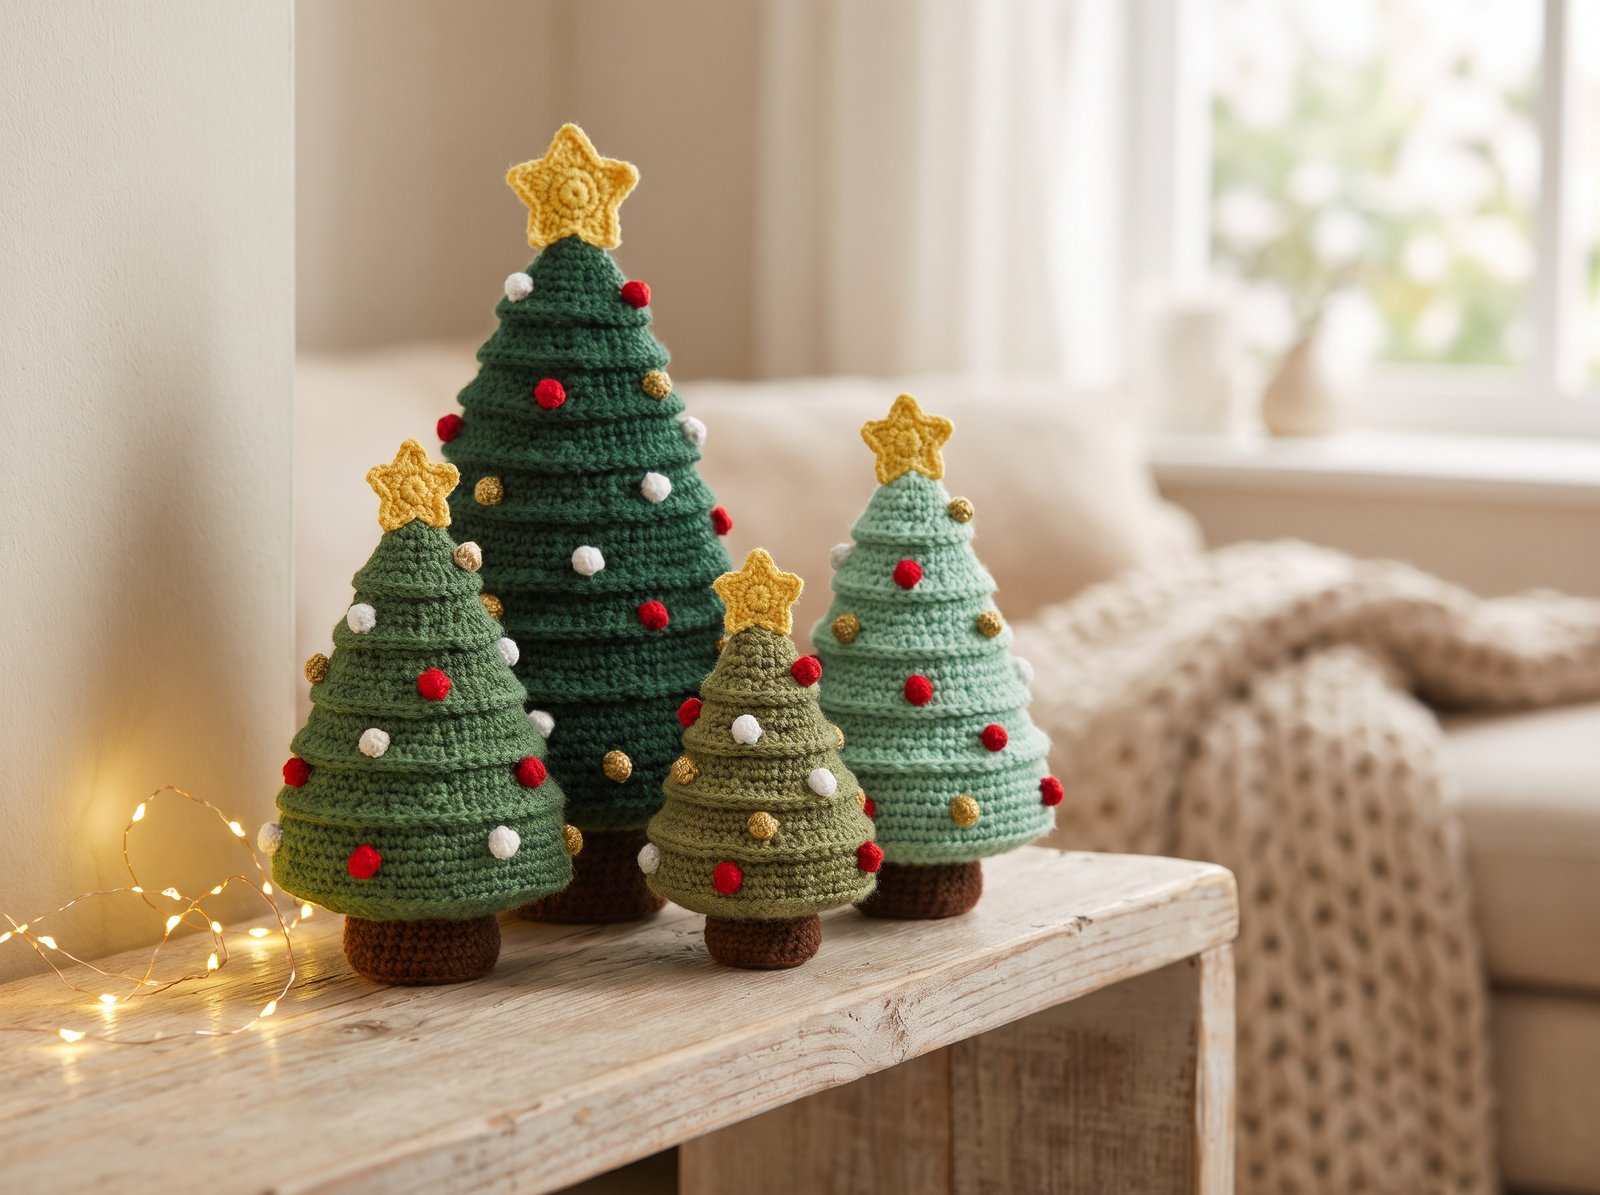
- The tiered tree. Layers of ruffled or stacked rounds. The showy one.
- The granny-stitch triangle. An open, textured wall or window hanging.
- The potted tree. A cone sitting in a small pot or cup. The gift-ready one.
If you are new to crochet, start with the flat triangle. It needs only a chain and a basic stitch, and you can finish it in one sitting. If you are comfortable working in the round, the cone is the most satisfying place to begin.
Everything below assumes you know the basics: chain, slip stitch, single crochet. If you want a refresher on abbreviations, the Craft Yarn Council keeps a standard list at its crochet abbreviations page
Yarn, Hooks, and Stuffing
Yarn is where a tree gets its character. Smooth cotton gives crisp, defined stitches. Acrylic is forgiving and comes in every green you could want. Wool grips itself and holds shape, though it can feel fuzzy next to a decorated tree.
The Craft Yarn Council publishes a standard yarn weight system that sorts yarn into numbered categories with a recommended hook range for each. For worsted-weight yarn, the range is 5.5 to 6.5 mm. That range is built for fabric you wear or drape, though, and stuffed trees need a firmer fabric.
So for stuffed trees, I go down a size or two from the label. My starting estimate for worsted yarn is a 4 mm hook, which keeps the stitches tight enough that the stuffing does not show through. For flat ornaments, the label size is fine.
For stuffing, polyester fiberfill is the usual choice. Push it in small tufts rather than one big wad, especially into the tip, so the cone does not go lumpy.
A tapestry needle, scissors, and a few stitch markers finish the kit. You will also want a contrasting piece of yarn for marking the start of each round.
Style One: The Stuffed Cone
This is the shape most people picture when they search for a crochet xmas tree. It is a cone worked in a spiral, widening as it goes.
The idea. Start at the tip with a small ring of stitches. Then add stitches at even intervals every second round, so the cone grows wider while staying smooth. Because you spiral, you do not join rounds, which means no visible seam.
Starting estimate (4 mm hook, worsted yarn):
- Round 1: 6 single crochet into a magic ring.
- Round 2: increase in every stitch (12).
- Round 3: single crochet around (12).
- Round 4: increase in every other stitch (18).
- Round 5: single crochet around (18).
- Round 6: increase every third stitch (24).
- Continue the pattern, adding six stitches every second round, until the base is as wide as you like.
Finished size is roughly 5 inches (13 cm) tall, though your tension will change that.
Tip. Use a stitch marker in the first stitch of every round. Without it, you will lose your place, and the cone will start twisting.
Stuff before you finish the base. Close the bottom with a flat round of single crochet, or leave it open and add a cardboard circle for stability.
Style Two: The Flat Triangle Ornament
If a cone feels like too much, try this. It is the simplest crochet christmas tree you can make, and it works for beginners.
The idea. Chain a row, work single crochet back and forth, and decrease one stitch at each end of every row. The decreases make the sides slope inward, and the triangle takes care of itself.
Starting estimate (hook to match the yarn label):
- Chain 22 (this gives 21 stitches).
- Work single crochet in each row.
- At the start and end of each row, work two stitches together.
- After about 10 rows, you will be down to one or two stitches. Fasten off.
Add a small rectangle of brown yarn at the bottom for the trunk, or skip it. A loop of yarn at the tip lets you hang it.
I made a dozen of these one December to tie onto gift bags, and I learned something fast. The decrease edge is easier to keep neat if you work the first decrease about one stitch in from the edge. Right at the edge, the fabric puckers.
A flat tree is also the best canvas for decorating. Embroider tiny French knots for baubles, or sew on a few beads. Keep beads off anything for small children.
Style Three: The Tiered Tree
This one looks complicated. It is not, which is the best kind of showpiece.
The idea. Instead of one smooth cone, you build the tree from layers, each one a little wider than the last. The ruffled look comes from working extra stitches into a single round, so the fabric waves.
You can make the layers as separate rings and stack them over a cone, or work them directly into the front loops of a base cone. The second option is neater and needs less sewing.
Starting estimate: Make a base cone about 4 inches (10 cm) tall. Then pick up the front loops at evenly spaced rows, and work a ruffle round with two stitches in each loop. Repeat three or four times, moving up the cone.
The effect depends heavily on yarn. A soft, drapey acrylic makes a gentler ruffle. A crisp cotton makes sharper layers.
If you want a more textured look, use a slightly fuzzy yarn for the layers and a smooth one for the base. It reads as snow-dusted boughs.
My honest opinion on this style: it is worth the extra time only if you enjoy the process. If you are making tiny gifts in bulk, stick with the flat triangle.
Style Four: The Granny-Stitch Triangle
For a lacy, open look, a granny-stitch triangle is hard to beat. It uses clusters of double crochet separated by chain spaces, which gives you a pretty, airy fabric.
The idea. The triangle shape comes from adding clusters at the edges. Start with a small group, then add one more cluster per row. By the end, the triangle widens into a tree.
Starting estimate (hook to match the yarn label): Start with a ring and three clusters. Add one cluster at each end of every row. About 6 to 8 rows give you a wall-hanging size.
This style works well in a window, where light passes through the chain spaces. It also pairs nicely with a string of small lights.
If you have never worked a granny stitch, watch a video demonstration first. The turning chain trips people up, and seeing it done is faster than reading about it.
Style Five: The Potted Tree
This is the one I give as a gift. It is a stuffed cone sitting in a little pot, usually a small ceramic cup or a crocheted cover over a jar.
The idea. Make a cone as in style one, then add a trunk, then a base. For a quick version, push the cone into a small pot filled with stuffing or a weighted bag.
If you want it to stand firm, add a weight at the bottom. Polyester pellets in a small fabric bag tucked inside the base work well. Keep in mind that loose pellets and small decorations are not suitable for young children, so check your recipient before you add them.
For the pot, you can crochet a simple cup shape in brown or white yarn, or use a real terracotta pot. Real pots look charming and cost very little.
A cluster of small pom-poms or French knots makes baubles. Add a tiny star at the tip, made from a flat crochet shape or a felt cutout.
Watch It Worked Up: A Video Tutorial
Some shapes make more sense when you watch them. For a clear walkthrough of a classic cone tree, this video shows the technique from the first ring to the finished shape:
https://www.youtube.com/watch?v=J6c-erbeg6s
Pause often, especially at the increase rounds. Match your stitch count to the video at each stage. If your tree looks different, check whether you missed an increase.
Use the video to confirm the rhythm of the shaping, then apply the same idea to the other styles in this guide.
Shaping Without a Pattern: The Core Idea
Here is the trick that makes every tree style easier. A cone or triangle is built by adding or removing stitches at a steady rate.
For a cone in the round, each increase round adds a set number of stitches, usually the same as the starting count. Adding six stitches every second round gives you a smooth, even slope. Adding six every round gives a flatter, wider shape, almost a disc. Adding six every third round gives a tall, slim tree.
For a flat triangle, you remove one stitch at each end of every row. A decrease every second row gives a gentler slope.
So if you want a different shape, you only need to change how often you shape. Try it on a small swatch. It takes five minutes and teaches you more than any written pattern.
This is also how you adapt a christmas tree crochet pattern you find online. If the tree looks too wide for your taste, spread the increases out. If it looks too narrow, add them faster.
Decorating Your Tree
Decorations are where each tree becomes yours. A plain green cone is fine, but a few touches make it memorable.
- Garland. A long chain of contrasting yarn, wrapped around the cone and tacked in place.
- Baubles. Tiny balls made from a magic ring and a few rounds, or simple French knots in red and gold.
- A star. A small flat five-point star, sewn to the tip.
- Lights. A strand of battery-powered fairy lights, threaded between the layers on a tiered tree.
Keep the proportions in mind. Oversized decorations on a small tree make it look top-heavy.
For a more natural look, skip the colors. A cream or white tree with tiny wooden beads looks quiet and elegant. I made one of those in a soft off-white, and it ended up looking better than the bright ones.
Making a Set: Colors and Sizes
Once you have made one tree, making a small forest is easy. The trick is to vary two things and keep one fixed.
Keep the yarn type the same, or at least the same weight, so the trees look related. Then vary either the size or the color, not both at once.
For sizes, try three heights: a small one for a branch or a gift tag, a medium one for a shelf, and a larger one for a mantel. The shaping stays the same. Only the number of rounds changes. To make a taller cone, simply keep adding stitches at the same steady pace for more rounds.
For color, I like three approaches:
- Classic greens. Pale, medium, and dark green, grouped by height.
- Winter neutrals. Cream, gray, and white, with tiny wooden beads.
- Bright and playful. Red, teal, and mustard, for a modern, cheerful look.
Group trees in odd numbers on a shelf. Three or five looks natural, while two or four tends to look stiff.
Leftover yarn is perfect here. Small amounts of several greens make a patchwork forest, and nobody will complain that the shades are not identical.
Storing and Displaying Your Trees
A handmade tree should last for many seasons, and a little care helps.
After the holidays, check each tree for loose decorations. Pack them in a box with tissue paper, not in a plastic bag, since fabric needs to breathe. Keep the box somewhere dry, away from direct sun, which fades dyed yarn.
For display, small trees look best on a tray or a wooden board, which also makes them easy to move. A flat ornament can hang on a branch, a curtain rail, or a gift box. A string of lights wrapped around the group adds warmth without any extra work.
Finishing: Fasten Off and Weave In Ends
A good finish is what separates a handmade tree from a homemade-looking one. Loose ends are the thing people notice.
When you reach the end, cut the yarn, pull it through the last loop, and secure it. If you want a clear walkthrough, my guide on how to fasten off in crochet covers it step by step.
Then weave the tail in. On a stuffed tree, you can run the tail through the inside of the cone, which hides it completely. For flat trees, follow the stitches on the wrong side. There is more detail in this guide to weaving in crochet ends.
Close gaps in the stuffing as you go. A cone that is only half full will slump after a day, no matter how carefully you shaped it.
Keeping Your Tree Standing Tall
Floppy trees are a common complaint, and there are a few reliable fixes.
Use a tighter hook. If the fabric is loose, stuffing will bulge through, and the shape will sag. Go down a hook size.
Stuff firmly, in layers. Push the fiberfill into the tip first, then fill upward. Fill until the cone feels firm, not squishy.
Add a flat base. A circle of crochet or felt at the bottom helps the tree sit flat.
Weight the bottom, if suitable. A small bag of pellets keeps the tree from tipping. Skip it for anything a young child might handle.
For flat ornaments that need to hold their shape, some crocheters use a fabric stiffener. Follow the product instructions, and test on a scrap before you use it on a finished tree.
Mistakes I Have Made So You Don’t Have To
I have made most of the mistakes you can make on a small tree, so here is the short list.
Losing count in the spiral. I made a cone with no marker and ended up with a tree that leaned like it was tired. A stitch marker fixes this.
Stuffing too late. I once closed the base before stuffing and had to unpick the whole bottom. Always stuff before the last few rounds.
Choosing fuzzy yarn for a first try. It hides your stitches, which sounds helpful, but it also makes it impossible to see what you are doing. Pick a smooth yarn first.
Making it too tall. A very tall cone with a narrow base falls over. A slightly wider base is more stable.
Skipping the test. A tree in a new yarn can behave very differently. Make a tiny test cone first.
Frequently Asked Questions
Do I need a magic ring to start a cone? No. If the magic ring gives you trouble, chain two and work six single crochet into the first chain. It leaves a small hole, but a few stitches pulled tight from the inside close it.
What yarn is best for a crochet tree? Smooth, medium-weight yarn is the easiest to work with. Cotton gives crisp stitches. Acrylic is soft and comes in many colors. Pick whatever you can see your stitches in clearly.
How big will my tree be? It depends on your yarn, hook, and number of rounds. My cone estimate gives about 5 inches (13 cm), but your tension will change that. Measure as you go.
Can I make a tree without stuffing? Yes. A flat triangle needs none. For a standing tree without stuffing, you can work a cone over a paper cone form, though it will not be washable.
How do I make the tree stand up? A firm fill, a flat base, and a bit of weight in the bottom. Add the weight only if the tree is not for a small child.
Can I wash a crochet tree? Hand washing is safest, and only if the stuffing and decorations can take it. Check the yarn label, and never wash anything with glued parts or stiffener.
Is this suitable for a total beginner? The flat triangle is. It needs only chains and single crochet. Start there, then move on to the cone.
Final Thoughts
A crochet christmas tree does not need to be complicated to be charming. Start with a flat triangle or a small cone, keep a note of your hook size and stitch counts, and build a little forest from there. By the time you reach the tiered or potted style, the shaping will feel familiar.
If you make your own version, I would love to hear which style you chose. Leave a comment below, share your trees with a friend who crochets, and follow along for more guides like this one.