
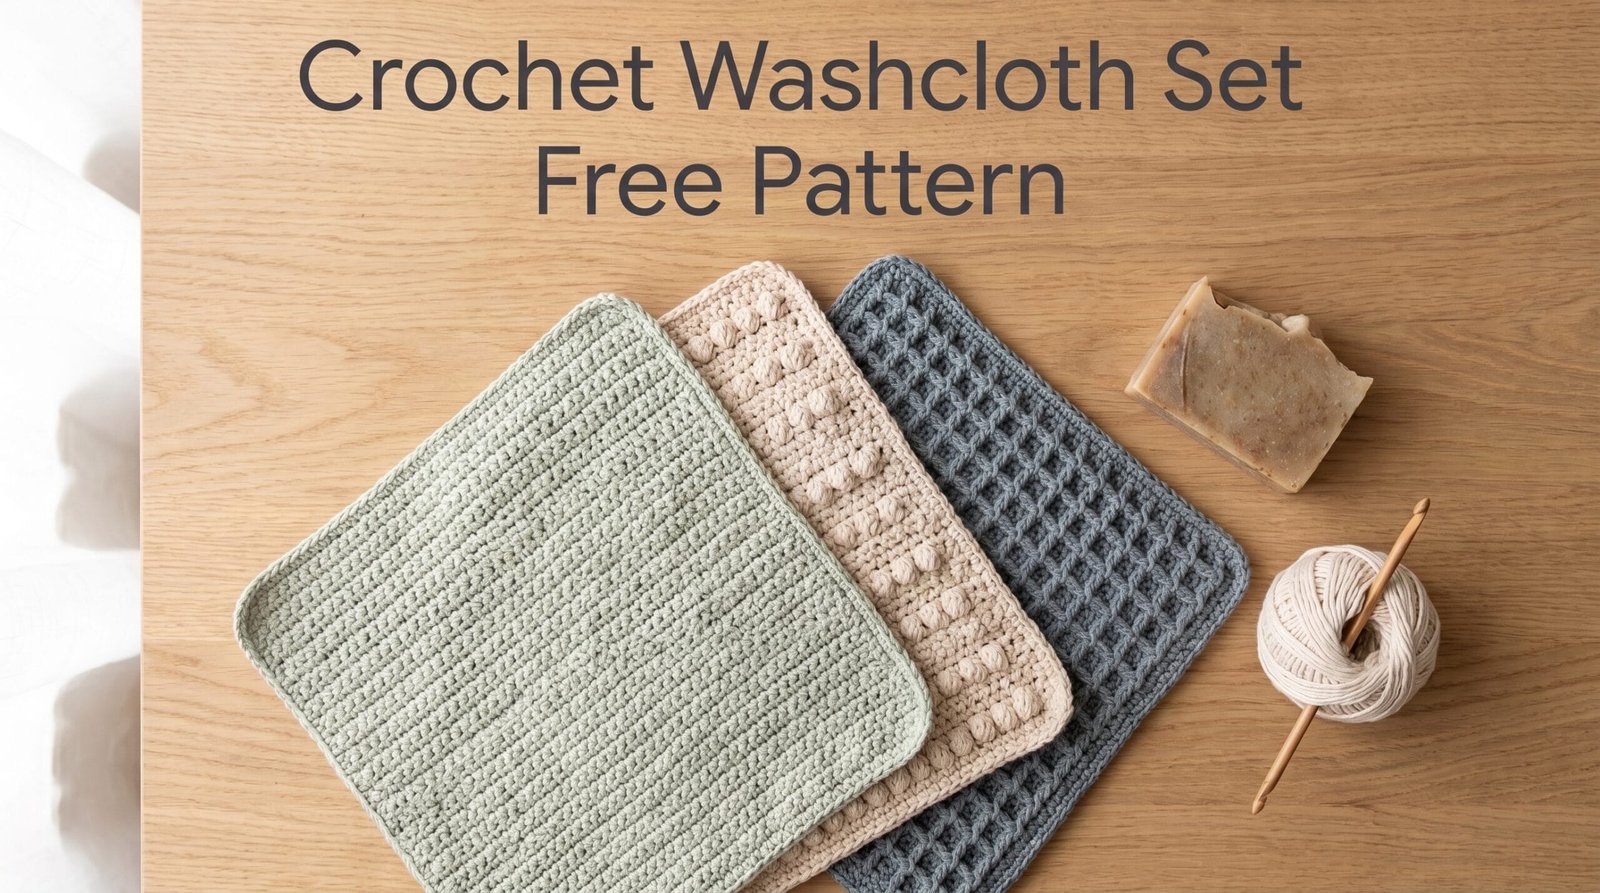
A crochet washcloth set free pattern is the project I reach for when I need something useful, quick, and giftable. Three small cloths, one cotton yarn family, three different stitches. This guide gives you the method, the stitch choices, and the finishing tricks, with blanks where your own gauge and hook size go.
One honest note before we start. This is a technique guide, not a stitch-by-stitch tested pattern, so the numbers below are starting estimates. Swatch first and adjust. That is a feature, since it means the set works with whatever cotton you already own.
Why Make a Set Instead of a Single Cloth
A single washcloth is a nice afternoon. A set of three is a gift.
When cloths match in color but differ in texture, they look intentional. Someone unwrapping them sees a collection, not a pile of swatches. And from a maker’s side, three small projects teach you more than one big one, because each cloth is a chance to try a new stitch without a big commitment.
I also like sets because they forgive mistakes. If cloth number one comes out a little wonky, cloth number three will be better, and the set still reads as handmade on purpose. A single wonky cloth just looks wonky.
Sets are also kind to your yarn stash. Leftover cotton from one project usually covers a cloth or two, so a mixed set can be a clever way to use up three half-skeins that have been sitting in a basket.
What You Need Before You Start
You do not need much. That is the charm of this project.
- Cotton yarn. More on choosing it below.
- A crochet hook. Start with a 5.5 mm hook for worsted-weight cotton, then adjust after your swatch.
- A tapestry needle for weaving in ends.
- Scissors.
- A tape measure or ruler to check your cloth sizes.
- A few stitch markers, optional, but they save you when you lose count of a row.
Keep the whole kit in one small bag. I have a zip pouch that lives next to the sofa, and a washcloth is usually the first thing I grab when I want something I can finish before the weekend ends.
Choosing Cotton Yarn and Hook Size
Cotton is the standard choice for washcloths, and the reason is practical. It holds up when wet, it feels sturdy rather than fuzzy, and it has very little stretch, so the cloth keeps its shape. Acrylic can work for a decorative cloth, but it behaves differently in the shower and in the wash, so I save it for projects that will not get scrubbed.
For the yarn weight, the label will tell you what you are holding. The Craft Yarn Council publishes a <a href=”https://www.craftyarncouncil.com/standards/yarn-weight-system” target=”_blank” rel=”noopener”>standard yarn weight system</a> that sorts yarn into numbered categories and lists a recommended hook range for each. I use that chart as my starting point, then adjust after a swatch. Medium-weight cotton in the worsted range is what most crocheters pick for washcloths, but there is no rule against going thinner for a softer cloth.
Hook size is where people get stuck. The ball band suggests a range, and your own tension decides the rest. If your fabric feels stiff enough to stand up on its own, go up a hook size. If it looks full of holes, go down. The Craft Yarn Council chart lists 5.5 to 6.5 mm for this weight, and about 11 to 14 single crochet stitches per 4 inches. My starting estimate is 5.5 mm hook | about 12 stitches and 14 rows per 4 in (10 cm). The row count is my estimate, so check it on your own swatch and write down what you actually get.
Picking Three Stitches That Look Like a Family
This is the part I enjoy most. The trick to a good set is contrast with a common thread. Keep the yarn consistent, then change the texture.
My go-to trio goes from simple to showy:
- Single crochet. Dense, flat, and scrubby. The workhorse.
- Alternating single and double crochet. A bit more open, with a pleasant bumpy rhythm.
- Waffle stitch. Raised grid texture, made with post stitches. This is the one that makes people ask where you bought it.
Why this order? Each cloth builds on the last. By the time you reach the waffle cloth, your hands already know the rhythm of the first two. If you are still getting comfortable holding the yarn, the single crochet cloth alone is a solid first project.
You can swap in whatever you like: half double crochet, granny stitch, or a simple ripple. The method below works for any of them.
Washcloth One: The Single Crochet Cloth
Start here. Single crochet makes a tight, sturdy fabric that scrubs well and lies flat.
How it works. Make a foundation chain for the width you want, then work single crochet back and forth. For single crochet, the foundation chain is one longer than your final stitch count, because the first chain is skipped (that is the one the hook is sitting in the second chain from). Chain 1 at the end of each row and turn.
Starting estimate for an 8 in (20 cm) cloth: Foundation chain: 26 (25 stitches plus one). Rows: about 28. Stop when the cloth looks square.
What goes wrong. The classic problem is a cloth that slowly gets wider or narrower. It happens when you skip the last stitch of a row, or add an extra one in the first stitch by mistake. My fix is simple: count your stitches at the end of every few rows. It takes ten seconds and saves you from unpicking a whole cloth.
Single crochet is also the best place to practice an even edge. The tidier these first cloths are, the more polished the whole set looks.
Washcloth Two: The Alternating Single and Double Crochet Cloth
The second cloth adds a little height and a bumpier surface. Alternating a single crochet with a double crochet across the row makes a fabric with texture on both sides.
How it works. In each row, you alternate the two stitches. On the next row, you work the opposite stitch above each one, so the double crochets stack above the singles. That offset is what creates the nubbly, almost woven look.
Starting estimate: Foundation chain: about 26 (an even number of stitches, 24, plus two). Turning chain: about 2 at the start of each row. This stitch is the least predictable of the three, so let your swatch decide.
Two small things will make this easier. First, mark your first stitch of the row with a stitch marker so you do not lose the edge. Second, be careful with the turning chain at the start of a double crochet row, since it can look like a stitch but may or may not count as one depending on how your pattern or habit treats it. Pick one approach and stick to it for the whole cloth.
I made this cloth once with the wrong stitch on the wrong row. The mistake was invisible for a few rows, and then the pattern stopped lining up. I pulled it back to the last good row and carried on. Lesson learned: if the texture suddenly looks off, trust that feeling and check the row below.
Washcloth Three: The Waffle Stitch Cloth
The waffle cloth is the showpiece. It has deep little pockets, which also makes it a lovely scrubber.
How it works. Waffle stitch relies on post stitches, which means you insert your hook around the post of a stitch from the row below instead of through the top loops. Rows of post stitches alternate with plain rows, and the result is a raised grid.
Starting estimate: Foundation chain: about 27 (an odd number of stitches, 25, plus two), since waffle stitch repeats in pairs with one extra. Rows: about 20, because this stitch is taller. Check a stitch dictionary for the exact repeat before you commit.
If post stitches are new to you, practice on a small swatch first. The first few attempts usually look uneven, then something clicks and the grid forms. Do not judge the stitch by your first two rows.
I will be straight with you: this cloth takes the longest of the three. It is also the one people hold up and examine. A cloth in this stitch goes into a gift bag looking far more complicated than it is.
How to Size Your Washcloths Without a Tested Pattern
Here is a method that works for any stitch. It is how I plan every cloth when I am designing without a written pattern.
Step 1: Swatch. Work a small square in your chosen stitch, using the yarn and hook you plan to use. Measure how many stitches fit across a stretch of fabric, such as 4 inches (10 cm).
Step 2: Decide the finished width. Pick the size you want. About 8 inches (20 cm) square is a good starting size. Many people like a cloth that fits comfortably in the palm of the hand with room to fold it over.
Step 3: Do the math. Divide your target width by the width of one stitch, based on the swatch. That gives your stitch count.
Step 4: Adjust for the stitch pattern. Some stitches repeat every two or four stitches, so round your count to the nearest repeat.
Step 5: Work until the cloth is square. Measure the cloth while it lies flat, not stretched. Stop when it is as long as it is wide, or the shape you want.
Do this once for each stitch in the set. Different stitches have different gauges, even with the same yarn and hook, so the chain counts for the three cloths will rarely match. That surprises people, and it is the reason a set made from one chain count often ends up with cloths of different sizes.
If you want the three cloths to match in size, aim for the same width and length, not the same stitch count.
Easy Crochet Washcloth Set Free Pattern: Straight Edges and Square Corners
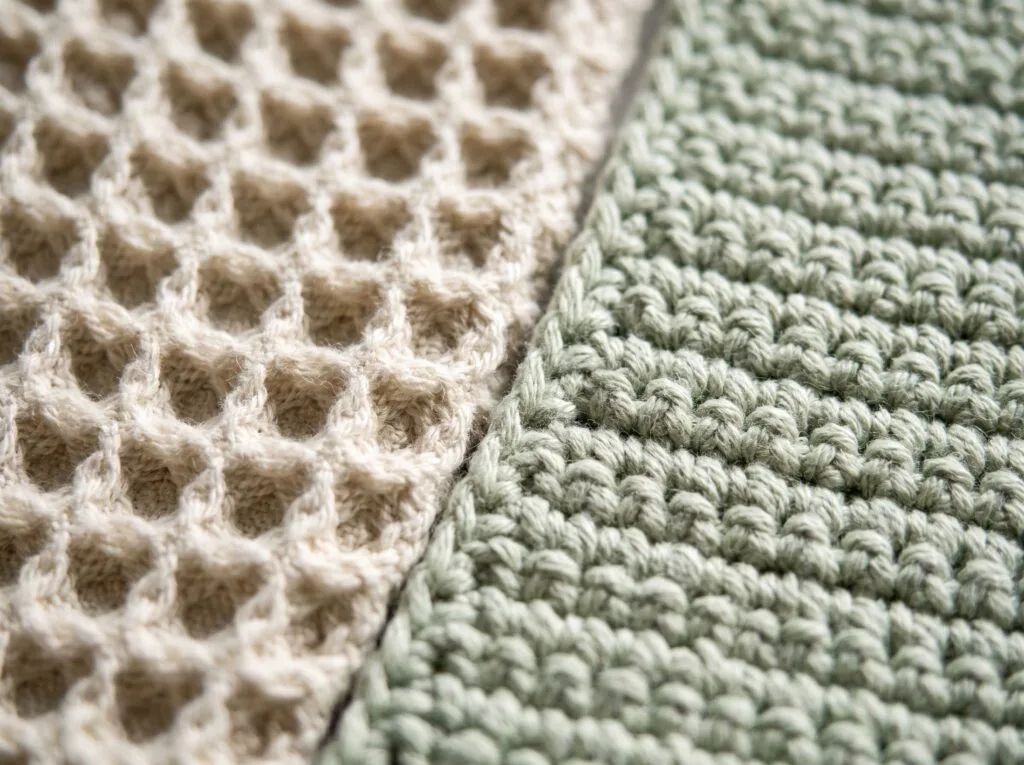
Neat edges make a cloth look store-bought. Wobbly ones give it away, and in a set the contrast shows because the cloths sit side by side.
Easy projects depend on edge discipline more than on fancy stitches. Here is what keeps mine straight:
- Count after every few rows. I check at row five, then every handful of rows after.
- Work into the very first and very last stitch. Missing the last stitch is the most common reason edges slope inward.
- Keep tension steady on the turning chain. If the chain is tight, the edge puckers. If it is loose, you get a gap.
- Check the corners. Lay the cloth flat and fold one corner to the opposite edge. If the fold lines up, the cloth is square.
If one cloth ends up slightly off, do not panic. A border will hide a lot, which brings us to finishing touches.
Borders, Edgings, and Hanging Loops
Not every washcloth needs a border. But a border helps in three ways: it neatens uneven edges, it adds weight to the frame, and it makes the set feel finished.
The simplest border is one round of single crochet worked evenly around the cloth, with three stitches in each corner so the corners lie flat. That is all I do most of the time.
If you want a pretty finish, try a round of slip stitches for a flat edge, or a crab stitch for a rolled edge. Practice on a spare cloth first, since the extra stitches change the look quite a bit.
A hanging loop is a handy extra. Make a small chain at one corner, join it back with a slip stitch, and you have a loop that lets the cloth dry on a hook. It is a small addition that makes the cloth feel designed, not just made.
For a set, I like to use the same border on all three cloths. It ties the different textures together and makes the group look like one collection. If you want to vary it, change the border color instead.
Finishing: Fasten Off and Weave In Ends
Cotton is slippery, and slippery yarn means loose ends can work their way out after a few washes. This is the step I never rush on washcloths, because these cloths get tugged and scrubbed.
When you reach the end, cut the yarn, leave a tail, and pull it through the last loop. If you want a refresher on a clean finish, my guide on how to fasten off in crochet covers it step by step.
Then thread the tail onto a tapestry needle and weave it in. My habit is to run the end in one direction for a few stitches, then double back the other way, so it locks in place. There is more detail in this guide to weaving in crochet ends.
Cotton does not hold a knot as well as wool does, so I avoid relying on knots alone. Weaving in carefully is the safer option, and trimming the tail only after the cloth has had a wash gives you a chance to catch anything that wiggles loose.
Watch It Worked Up: A Video Tutorial
Some stitches are easier to learn by watching than reading. If you would like to see the basics in motion, this beginner-friendly video shows how to crochet a washcloth step by step: <a href=”https://www.youtube.com/watch?v=HLhBPYkisKw” target=”_blank” rel=”noopener”>How to crochet a dishcloth / washcloth, easy step by step for beginners</a>.
It is a good companion for the first cloth in the set. Watch how the maker handles the turning chain and the edge, then compare it with your own work. Pause the video often. Nobody learns stitches at full speed.
For the second and third cloths, a short search for the specific stitch name plus the word “tutorial” will usually turn up a clear demonstration. Look for videos that show the hook from the front and the back of the work. That angle helps with post stitches especially.
Color Ideas for Your Washcloth Set
Color is the easiest way to make a set feel designed. A few combinations that work every time:
- Three shades of one color. Light, medium, and dark in a single family, such as pale to deep blue.
- Neutral base with one accent. Two cloths in cream or gray, one in a bright color.
- Matching the room. Pick colors from the bathroom or kitchen the set is meant for.
Think about the recipient, too. A simple crochet washcloth set free pattern in soft spa tones suits a bathroom gift, while bright, cheerful colors suit a kitchen. For a baby shower, I steer toward soft pastels and stick with a gentle cotton.
Whatever you choose, buy all the yarn at once if you can. Dye lots vary, and a second skein of the same color bought months later may not match.
Washing, Shrinkage, and Care
Wash a swatch before you start the real cloths. It is boring advice, and it is the advice I most often ignore, and every time I skip it I regret it.
Many cotton yarns shrink a little the first time they are washed, and some bleed color if they are dark. Test your own yarn: wash and dry a swatch the way you expect the cloths to be washed, then measure it. If it changes size, make your cloths slightly bigger to allow for it.
Always follow the care instructions on the yarn label. They vary between brands, and the label is the only information that applies to your specific yarn.
Washing the finished set before gifting is a good habit too. It softens the cotton, shows you any color bleeding, and lets you trim tails with confidence. Wash dark and light cloths separately the first time.
Turning the Set Into a Gift
This is where a set pays off. Three cloths, folded and stacked, look generous. Here is how I wrap them:
- Stack the cloths with the most textured one on top.
- Tie with ribbon or twine. A strip of fabric works nicely too.
- Add something small, like a bar of soap, a bath bomb, or a wooden dish brush, depending on where the cloths will live.
- Include a care note. A small card with the yarn fiber and washing instructions is thoughtful, since many people have never owned a handmade cotton cloth.
If you are giving the set as a housewarming gift, a kitchen version with a brush and a bottle of dish soap is a welcome surprise.
I once made a set for a friend who had moved into a new place, and the care card ended up on her fridge. People like knowing how to look after something someone made for them.
Mistakes I Have Made So You Don’t Have To
I have made most of the mistakes you can make on a washcloth, so let me save you the trouble.
Choosing the wrong yarn. I once used a soft, fluffy cotton blend for a cloth that was meant for scrubbing. It looked beautiful and fell apart in a month. For cloths that work hard, pick a sturdy, smooth cotton.
Skipping the swatch. I made three cloths in three stitches without swatching and ended up with three different sizes. They looked like a family of mismatched socks.
Pulling the tension too tight. A washcloth that feels hard when dry is hard on the skin when wet. If your fabric is stiff, try a larger hook.
Rushing the finish. I trimmed tails short on a gifted set, and one unraveled after a few washes. Now I always weave tails in properly and leave them a bit longer until after the first wash.
Forgetting to count. A cloth that tapers to a point is a funny story the second time you tell it, not the first.
Frequently Asked Questions
How much yarn do I need for a set of three washcloths? It depends on your stitch, hook, and cloth size, so any number is a rough estimate. For an 8 inch cloth, plan on roughly 50 to 70 grams (about 80 to 120 yards) per cloth, and a bit more for the waffle one. The most reliable method is to weigh your skein before and after the first cloth, then multiply. Buy a little extra to be safe.
Can I use acrylic yarn instead of cotton? You can, but it behaves differently. Acrylic is softer and lighter and does not absorb water the way cotton does. It is fine for decorative cloths and face scrubbies some people like, but cotton is better for everyday scrubbing.
What size should a washcloth be? There is no standard, so choose what feels good in your hand. Many people like a square that is easy to fold over a palm. I aim for about 8 inches (20 cm) square, then check my own swatch rather than copying a number.
Do I need to block washcloths? Not usually. Cotton does not need the shaping that lace or garments do. If a cloth curls at the edges, a border will usually fix it, and a damp press with your hands works fine.
Which of the three stitches is best for a beginner? Single crochet. It is the simplest and the most forgiving, and a whole set in single crochet is still a lovely gift. Use different colors to keep it interesting.
Why is my washcloth curling at the edges? Usually it is the stitch, since some stitches curl more than others, or your tension changed. A single crochet border often flattens it. If it keeps curling, try a slightly larger hook.
Can I sell what I make from a guide like this? This guide is general technique, and the stitches themselves are common knowledge. If you follow a specific designer’s pattern, check their terms. For your own design, the choices are yours.
Final Thoughts
A crochet washcloth set free pattern does not need to be complicated to be good. Three cotton cloths, three stitches, one steady border, and a bit of care in the finishing give you something people will actually use, which is the best compliment a handmade item can get.
Start with the single crochet cloth, keep notes on your hook size and gauge, and build the set from there. If you make your own version, I would love to hear which stitches you chose. Leave a comment below, share the set with a friend who crochets, and follow along for more guides like this one.