I made my first granny square with a hook that was, in hindsight, completely wrong for the yarn I was using, and the corners came out so tight I could barely see the chain spaces. Picking the right crochet hook for granny squares isn’t complicated once you know what to look for, and it makes a bigger difference to how your squares actually turn out than most beginner guides let on. In this article I’ll walk through hook sizing, yarn pairing, and the full method for making a classic granny square, based on what’s actually worked across a few hundred squares of my own.
I’ve been making granny squares on and off for over a decade — they were one of the first things I learned, and I still reach for them constantly, whether it’s a quick coaster or a full blanket. Hook choice is one of those things that seems minor until you’ve made the same square with three different hooks and can actually feel the difference in your hand.
Why Hook Choice Actually Matters Here
Granny squares are built almost entirely out of double crochet clusters and chain spaces, which means the fabric is naturally open and airy compared to something dense like single crochet. That openness is part of the charm, but it also means hook size has an outsized effect on how the finished square looks and drapes.
Go too small for your yarn and the clusters bunch up tight, the corner chain spaces shrink, and the square stiffens into something closer to cardboard than fabric. Go too big and the whole thing gets loose and floppy, with gaps so large the square loses its structure entirely. Somewhere in the middle is a hook size that lets the clusters sit with a bit of give while the chain spaces stay open enough to see that classic granny square lace-like texture.
This matters more for granny squares specifically than it does for, say, a solid single crochet dishcloth, because there’s so little dense fabric to hide a sizing mismatch in. Every corner space and every gap between clusters is on full display.
What Size Yarn for Granny Squares
There’s no single correct yarn weight for a granny square — I’ve made them in everything from fingering weight thread doilies to super bulky one-square-is-basically-a-placemat projects — but a few weights show up far more often than others for good reason.
Worsted weight (CYC category 4) is the classic choice, and it’s what I’d point a beginner toward first. It’s forgiving to work with, widely available in every color imaginable, and produces a square that’s substantial enough to hold its shape without being heavy or stiff. Most of the granny square blankets and afghans you’ve probably seen were made in worsted weight.
DK weight (CYC category 3) gives you a lighter, more drapey square, which I like for anything wearable — a granny-square cardigan or vest benefits from that extra flexibility. The trade-off is that a DK-weight blanket needs a lot more squares to reach the same finished size as a worsted one, so it’s a slower build for a large project.
Bulky weight (CYC category 5) is the fast option. A single bulky-weight granny square can measure several inches across on its own, which makes it a good choice for anyone who wants a finished blanket without making eighty small squares. The chunkier yarn does mean less fine detail in the stitch definition, so it’s a trade of speed for delicacy.
According to the Craft Yarn Council’s standard yarn weight system, yarn weight categories are numbered 0 through 7 specifically so that hook and gauge recommendations stay consistent across brands and countries, which is genuinely useful here — it means a worsted-weight recommendation from one yarn label should behave similarly to worsted weight from a completely different brand, even if the exact hook you need still comes down to your own tension.
My honest opinion, for what it’s worth: if you’re newer to granny squares and not sure where to start, worsted weight is the easiest to learn on. You can see your stitches clearly, mistakes are easy to spot and fix, and it’s the weight most classic granny square patterns and tutorials are written around.
Best Crochet Hook for Granny Squares
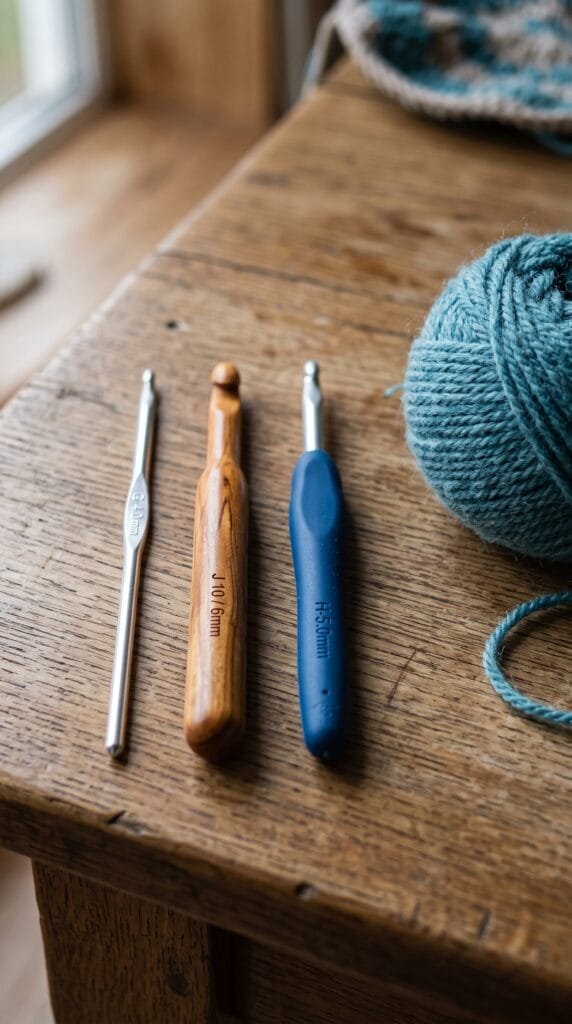
Yarn weight gets you into the right general hook size range, but the actual best crochet hook for granny squares comes down to more than just millimeter size — material and handle shape matter too, especially once you’re making enough squares in one sitting to notice hand fatigue.
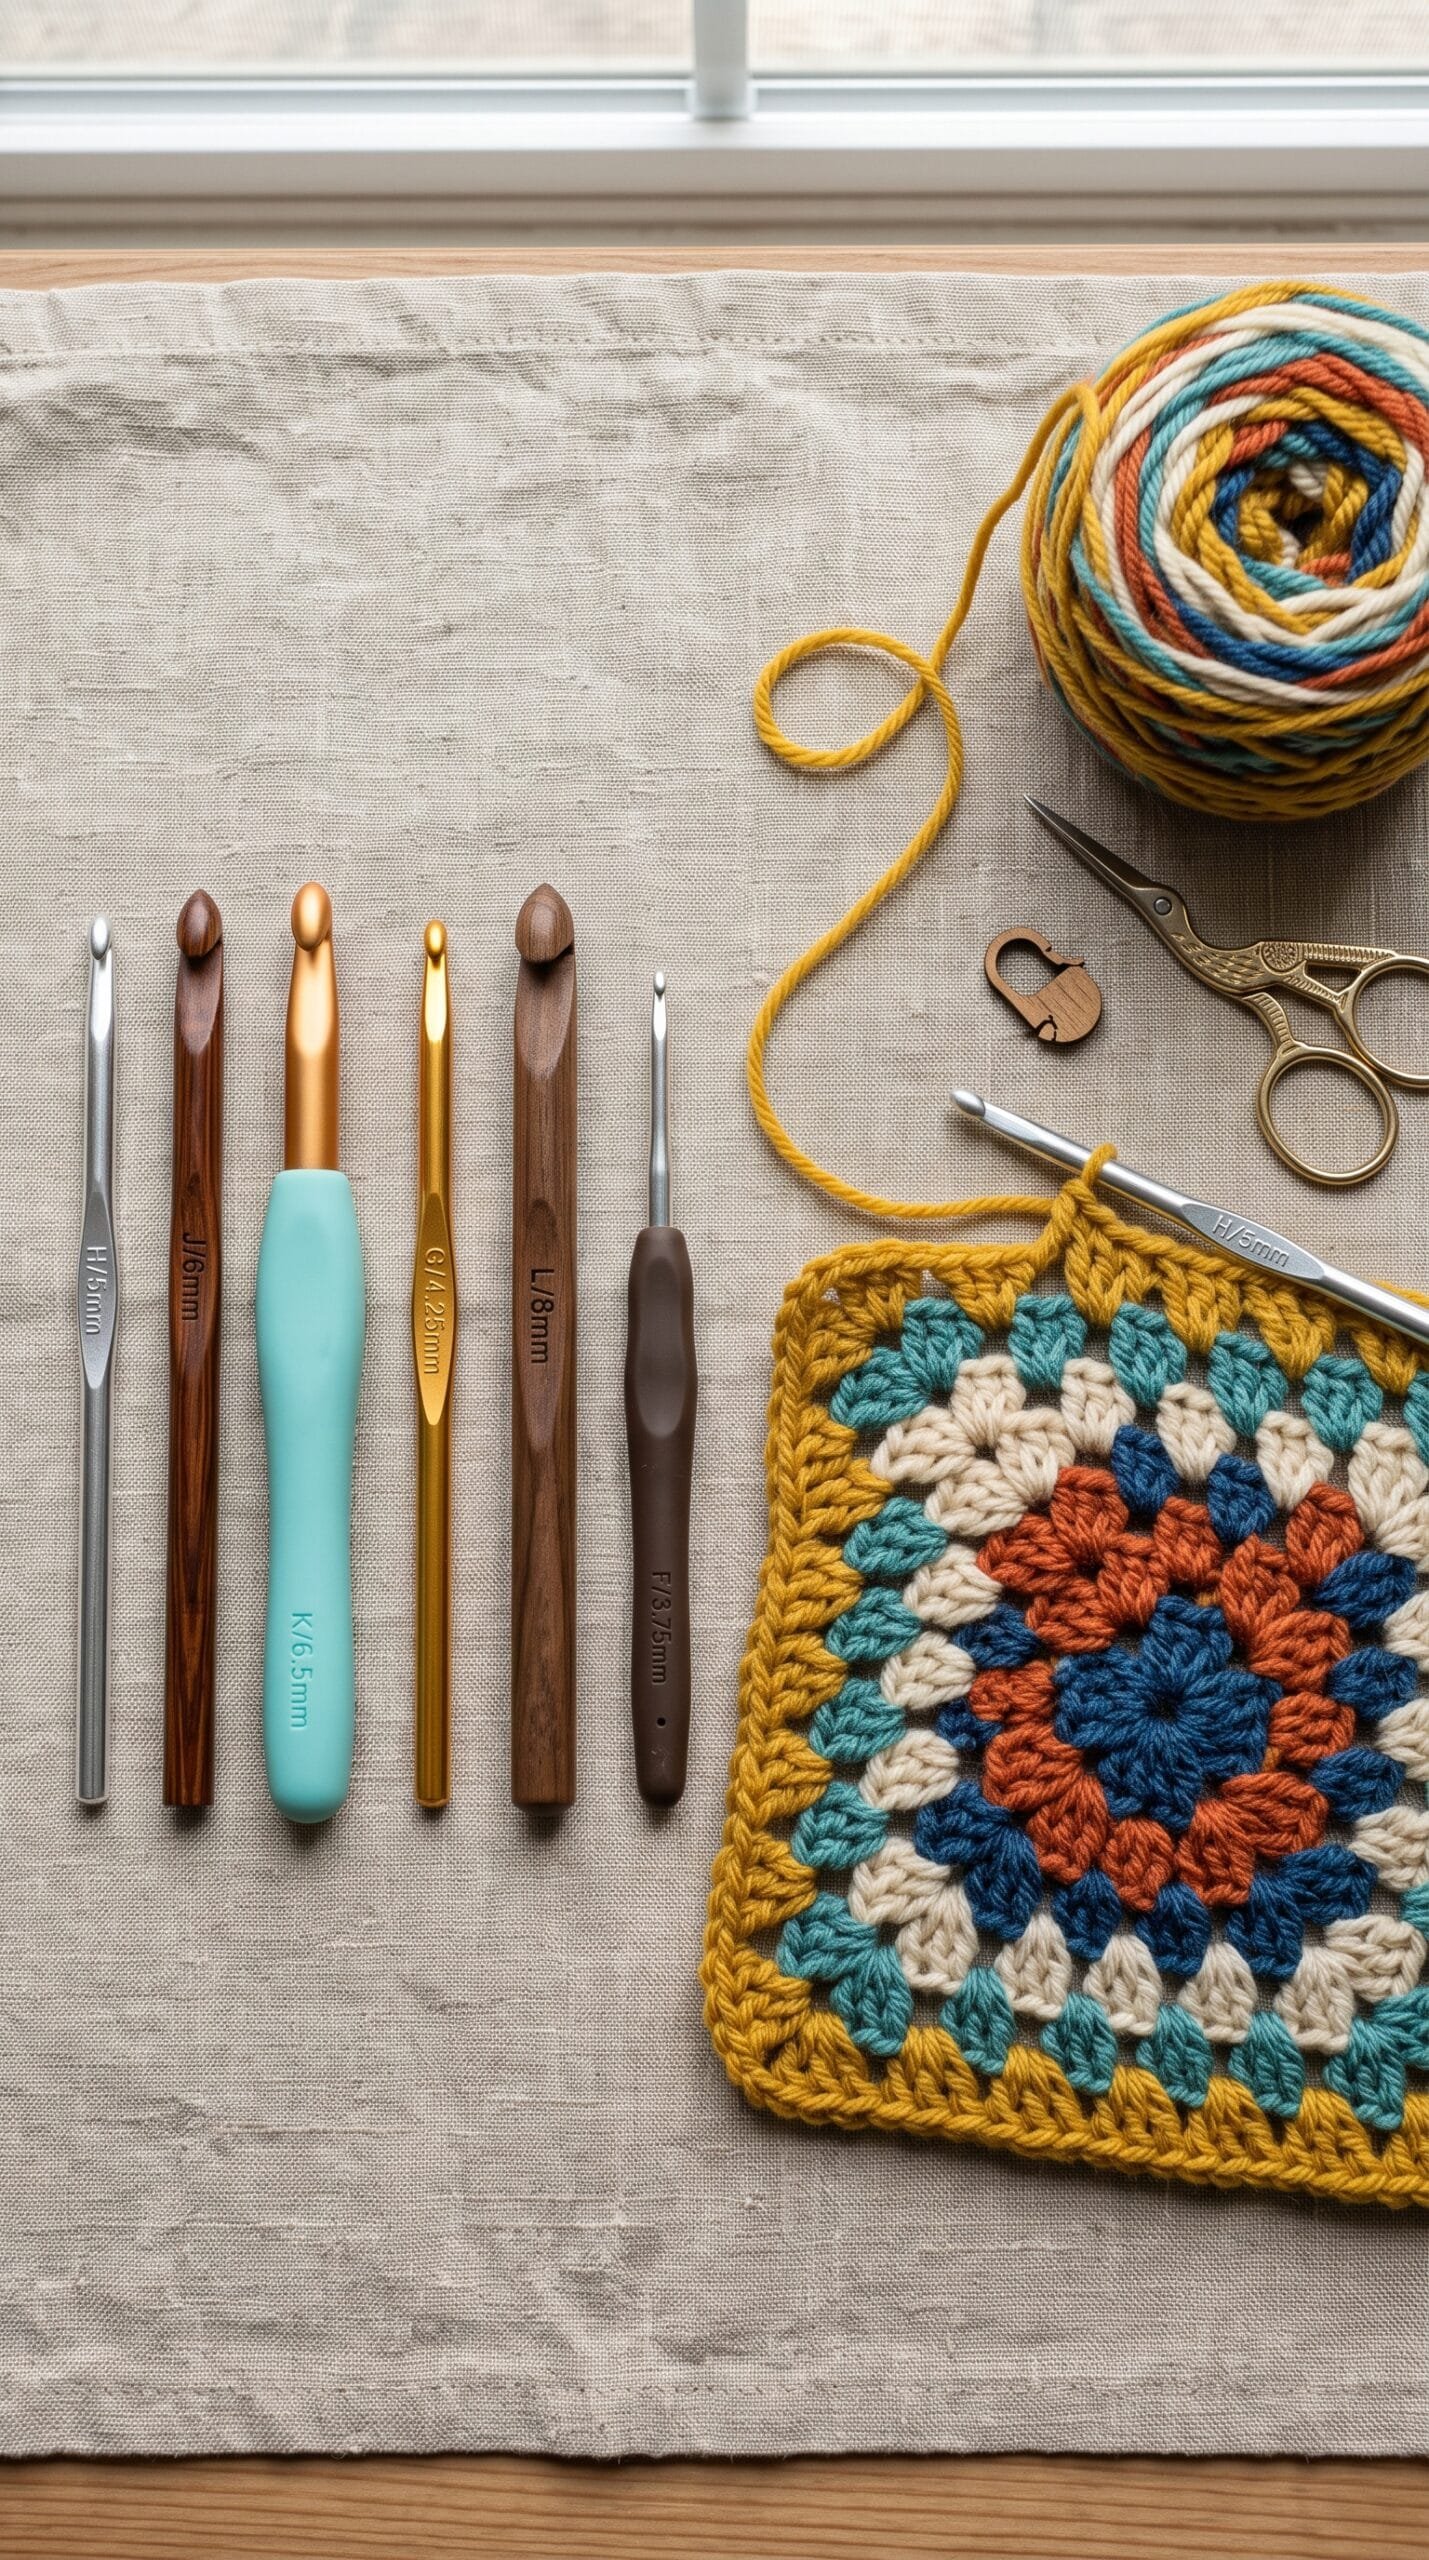
Hook size range. For worsted weight yarn, a hook somewhere in the 4.5mm–5.5mm range (roughly a US G/6 to H/8) is the typical starting point most patterns and yarn labels suggest. DK weight generally pairs with something closer to 3.5mm–4.5mm, and bulky weight often wants 6mm or larger. These are starting points, not fixed rules — your own tension might land you a size up or down from what the yarn label suggests, which is exactly why swatching a single square before committing to a whole blanket’s worth is worth the extra ten minutes.
Material. Aluminum and steel hooks are the classic choice and still what I reach for most — yarn glides across a smooth metal hook with very little drag, which matters when you’re making cluster after cluster of double crochet. Wooden and bamboo hooks have more grip, which some crocheters actually prefer with slippery yarns like bamboo or silk blends, since the extra friction helps control tension. Plastic hooks are the lightest option and fine for casual use, but I’ve found the tips wear down faster with heavy daily use.
Handle shape. This one is entirely personal, but it’s worth mentioning because it changes how comfortable a long granny square session actually is. A standard inline hook has a fairly uniform shaft, while an ergonomic hook has a wider, contoured handle designed to reduce strain during long stitching sessions. I switched to an ergonomic hook a few years back after a genuinely painful bout of hand cramping partway through a large blanket project, and it made a noticeable difference on multi-hour sessions specifically — for a single square here or there, I don’t think it matters much either way.
If you’re buying your first dedicated granny-square hook, I’d suggest a mid-range aluminum hook in the 5mm–5.5mm range as a genuinely solid starting point for worsted weight yarn — it’s a size that suits the vast majority of classic granny square patterns you’ll come across, and it’s inexpensive enough that sizing up or down later isn’t a real loss.
How to Crochet a Granny Square
Here’s the classic, traditional method — the one you’ll see as the base for nearly every granny square pattern out there, worked in rounds from the center out.
A note on sizing: the finished measurements of your square will depend on your yarn weight, hook size, and your own tension, so I’m not going to invent a specific finished size here — swatch one square first if you need a particular measurement to match a project.
Round 1: Starting the center
- Chain 4 and join with a slip stitch into the first chain to form a ring.
- Chain 3 (counts as your first double crochet).
- Work 2 more double crochet into the ring — you now have a cluster of 3 dc.
- Chain 2.
- Work another cluster of 3 dc into the same ring.
- Chain 2.
- Repeat step 5 and step 6 two more times, so you have four clusters of 3 dc total, each separated by a chain-2 space.
- Join with a slip stitch to the top of your very first chain-3.
You should now have four clusters and four chain-2 corner spaces, arranged in a small ring. This is your round 1.
Round 2: Building the first corners and sides
- Slip stitch across to the next chain-2 space (you’re moving into position for round 2).
- Chain 3 (first dc of this round), then work 2 more dc, chain 2, and 3 more dc — all into that same chain-2 space. This is your first full “corner.”
- Chain 1.
- Move to the next chain-2 space from round 1 and work a 3-dc cluster, chain 2, 3-dc cluster again — another full corner.
- Chain 1.
- Repeat step 4 in each remaining round-1 corner space, until you’ve made four corners total, each separated by a chain-1.
- Join with a slip stitch to the top of the beginning chain-3.
Round 3 and beyond: Continuing the pattern
Each additional round follows the same logic: work a full corner (3 dc, ch 2, 3 dc) into every chain-2 corner space from the previous round, and work a plain cluster of 3 dc into every chain-1 space along the sides, separating each cluster with a chain-1. The square grows outward one ring at a time, and the corners stay stacked directly on top of each other round after round.
Keep repeating this until your square reaches the size you want, then fasten off.
A tip on color changes: if you’re making a multicolor granny square (the classic look most people picture), the easiest place to change color is right at the join at the end of a round — finish your last slip stitch in the old color, then start your new color’s chain-3 at the beginning of the next round. It keeps the color transition clean and avoids having to weave in a tail mid-round.
If you want to see this same construction logic applied to a full multi-square project rather than just one square in isolation, my star blanket pattern is built on a related joined-motif approach and is worth a look once you’re comfortable with the basic square.
US Letter Sizes vs. Metric: Clearing Up the Confusion
If you’ve shopped for hooks online, you’ve probably noticed most are labeled with both a letter (like G or H) and a millimeter size. This trips up a lot of newer crocheters, myself included when I started, because the letter system isn’t as universally standardized as it looks.
The metric measurement — the actual millimeter diameter of the hook shaft — is the more reliable number to trust across brands. A US “H” hook is generally accepted as 5mm, but I’ve come across a small number of older or off-brand hooks where the lettering didn’t quite match current conventions. If a pattern gives you both a letter and a millimeter size, and your hook only has one or the other, go by millimeters whenever you can; it’s the measurement least likely to vary between manufacturers.
This matters more for granny squares than you’d expect, because a half-millimeter difference is genuinely enough to shift how open or tight your chain-2 corners look. If you’re ever unsure which hook you’re actually holding, most hooks have the size stamped somewhere on the flat thumb rest, though older or well-worn hooks sometimes have that marking rubbed away entirely — in which case a hook gauge tool (a small flat ruler with graduated holes) is a cheap way to check.
Building a Hook Collection Without Overspending
You don’t need one of every size and material to make good granny squares, and I’d actively discourage a beginner from buying a huge multi-piece set right away before knowing what they actually prefer.
My honest recommendation for someone just getting into granny squares specifically: start with a single mid-range aluminum hook in the 5mm–5.5mm range, make several squares with it, and only buy additional sizes once you’ve actually hit a situation where that hook clearly wasn’t right — chain spaces collapsing with a thinner yarn, say, or clusters looking sloppy and loose with something bulkier.
From there, a small set covering roughly 3.5mm up through 6mm in half-millimeter increments covers the overwhelming majority of granny square projects you’re likely to make, from DK-weight coasters to bulky one-square throws. I built my own collection this way, gradually, over about two years of actually running into situations that called for a size I didn’t already own, rather than buying a full set upfront and guessing at what I’d need.
If you do end up loving the technique enough to make granny squares regularly, an ergonomic hook in your most-used size or two is a worthwhile upgrade — but I’d genuinely wait until you know your preferred size range before spending extra on a comfort-grip handle you might not end up reaching for.
If you’re staring at a ball of yarn with no label, or a hook with worn-off size markings, here’s the process I actually use rather than guessing.
Work a small test swatch — even just one full granny square — with your best guess at a hook size. Look at the chain-2 corner spaces once you’re a couple rounds in. If they’ve collapsed down to tiny holes you can barely poke a finger through, size up. If they’re so loose the whole square looks floppy and the clusters don’t hold their shape, size down.
I do this every single time I start a new yarn-and-hook combination, even after years of crocheting, because tension genuinely does shift slightly from yarn to yarn — a cotton and an acrylic in the same labeled weight can behave differently enough on the same hook that it’s worth the extra five minutes to check.
Common Mistakes I See With Hook and Yarn Pairing
Assuming the label size is the only size that works. Yarn labels suggest a hook size range, not a mandate. Your own tension might genuinely call for a size up or down from what’s printed, and that’s completely normal, not a sign you’re doing something wrong.
Switching hooks mid-project without checking gauge again. If you run out of your original hook or misplace it mid-blanket, don’t just grab whatever’s closest in your hook case. A different brand’s “same size” hook can have a slightly different head shape, which sometimes changes tension just enough to make new squares look subtly different from your earlier ones.
Using a hook that’s genuinely uncomfortable and pushing through it anyway. I did this for longer than I should have, telling myself the discomfort would go away. It didn’t, until I actually switched to a hook shape that suited my grip. If your hand is cramping constantly, it’s worth trying a different handle style before assuming the problem is just “crocheting takes practice.”
Frequently Asked Questions
Do I need a different hook for every yarn weight I use? Not necessarily a whole new hook for each weight, but you likely need a small range of sizes if you work with more than one or two yarn weights regularly. A lot of crocheters end up with a core set covering roughly 3.5mm through 6mm, which covers DK through bulky-ish worsted with room to swatch up or down.
My granny squares always come out a slightly different size than my friend’s, even with the same yarn and hook. Why? This comes down to individual tension — how tightly or loosely you naturally pull your yarn as you work. It’s completely normal for two people using identical materials to produce noticeably different-sized squares. If matching sizes matters for a joint project, the fix is usually adjusting hook size rather than trying to consciously change your tension, which is a much harder habit to retrain.
Is a more expensive hook actually better for granny squares, or is that marketing? Genuinely a mix of both, in my experience. A well-made hook with a smooth, consistent head shape does make a real difference in how cleanly yarn catches and releases, which matters over the course of a big blanket project. But plenty of inexpensive hooks work perfectly well too — I wouldn’t assume a higher price automatically means better results for this specific technique.
Can I use a smaller hook than recommended to make my chain-2 corner spaces tighter on purpose? Yes, that’s a legitimate style choice some crocheters make deliberately for a denser, less lacy-looking square. Just know that going noticeably smaller than the yarn’s suggested range will also make the fabric stiffer and use up yarn a bit differently than the label’s estimated yardage assumes.
Wrapping Up
Picking the right crochet hook for granny squares really comes down to matching hook size to your yarn weight, then paying attention to your own tension rather than following a label blindly. Swatch a square before committing to a whole blanket’s worth, and don’t be afraid to size up or down if your corners are collapsing or your clusters are floppy. It’s a small amount of upfront testing that saves a lot of frogging later, especially once you’re several squares deep into a project and only then notice something’s been off the whole time.
If you’ve got a favorite hook-and-yarn combination for granny squares, or a lesson you learned the hard way like I did with that first too-tight square, share it in the comments — I love hearing what’s worked for other people. And if this helped, sharing it or following along for more foundational technique guides keeps this kind of content coming.