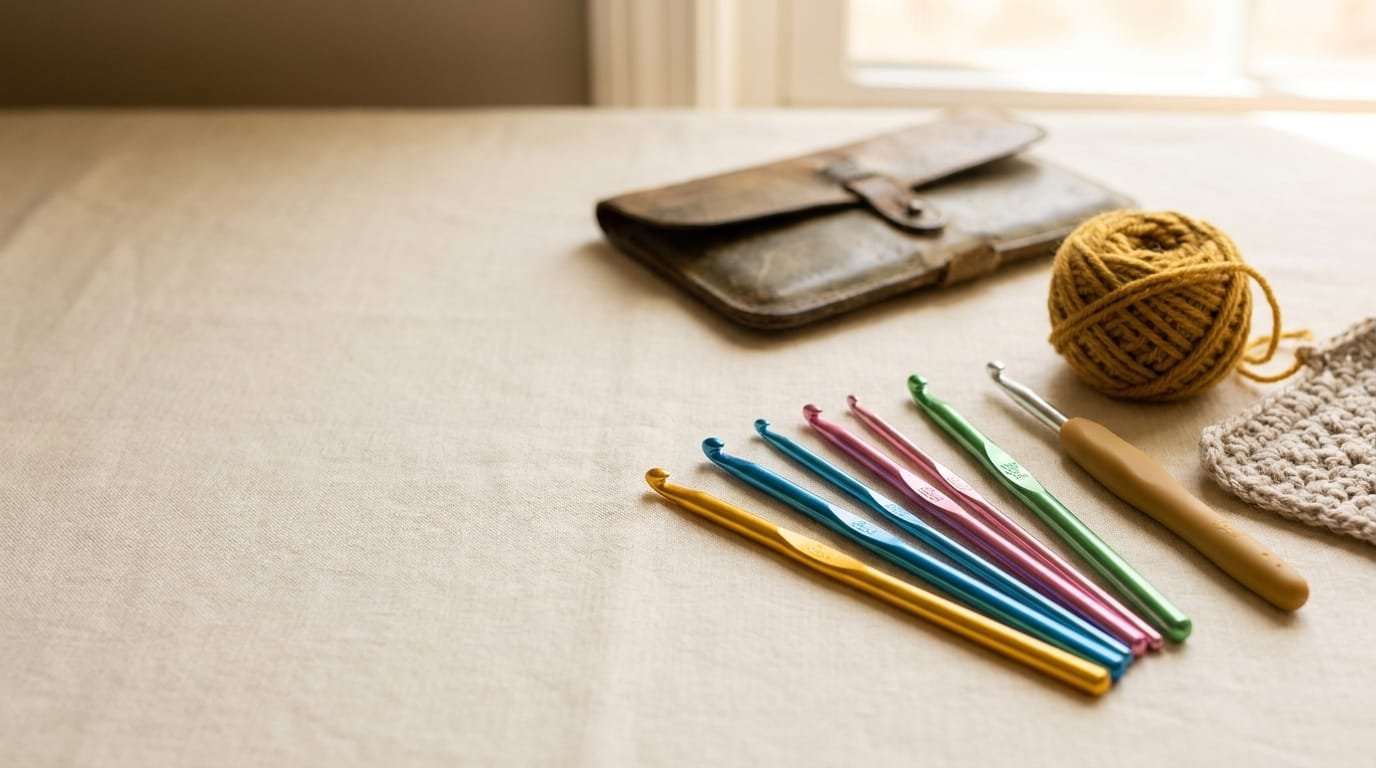
I have a soft spot for tools that do their job without making a ceremony of it. That is why Boye crochet hooks still turn up in my project bag, even after years of trying newer hook shapes and fancy handles. In this guide, I’ll show you how I choose a Boye hook, when a vintage one is worth keeping, what to know about ergonomic handles, and how to read the sizes without getting trapped by confusing letters.
This is a technique and buying guide, not a tested pattern. The goal is to help you make better decisions with the hooks you already own—or choose the next one with more confidence.
Why Boye crochet hooks remain useful
A crochet hook is a small tool, but its shape changes the way a project feels. The hook’s throat affects how easily it catches yarn. The shaft determines the approximate loop size. The thumb rest changes how your fingers settle after hundreds of repeated stitches.
Boye’s traditional aluminum hooks are familiar to many crocheters because they are light, widely available, and offered in a broad range of sizes. The colored metal also makes it easy to grab a particular hook quickly from a crowded pouch. I appreciate that practical quality. A hook does not have to look luxurious to become the one I reach for every day.
The classic Boye profile is tapered rather than strongly inline. That means the head and throat transition gradually into the shaft. Some crocheters like the way that shape enters a stitch; others prefer the sharper, more defined throat of an inline hook. Neither preference is wrong. Hand angle, yarn tension, and stitch style all change the experience.
The important point is this: brand alone will not choose the right tool for you. The yarn, pattern gauge, stitch texture, and your own grip matter just as much.
1. Start with millimeters, not only the letter
When people search for Boye crochet hooks sizes, they often want a simple letter-to-number chart. That chart is useful, but the millimeter measurement should be your anchor. Letter and number systems can vary between manufacturers, while the millimeter measurement gives you a more dependable comparison. The Craft Yarn Council specifically advises crocheters to rely on the package’s millimeter sizing and to make a gauge swatch rather than trusting a label alone .
Here is a practical selection of common Boye-compatible sizes. Treat it as a reference, not a substitute for the pattern instructions or your swatch.
| Approximate hook size | Millimeter size | A sensible starting use |
| B-1 | 2.25 mm | Fine yarns and some lightweight fabric |
| C-2 | 2.75 mm | Fine yarn, small motifs, tighter fabric |
| D-3 | 3.25 mm | Light yarn and detailed stitch work |
| E-4 | 3.5 mm | Light yarn, firm accessories |
| F-5 | 3.75 mm | Light yarn and compact fabric |
| G-6 | 4 mm | Light-to-medium yarn, depending on the project |
| H-8 | 5 mm | A common starting point for medium yarn |
| I-9 | 5.5 mm | Medium yarn with a little more drape |
| J-10 | 6 mm | Medium-to-bulky yarn and looser fabric |
| K-10.5 | 6.5 mm | Bulky yarn or intentionally open stitches |
| L-11 | 8 mm | Bulky yarn and large, soft stitches |
| M/N-13 | 9 mm | Bulky or super-bulky yarn |
| N/P-15 | 10 mm | Super-bulky yarn and fast, open fabric |
Boye’s own sizing information describes a range from B, 2.25 mm, through S, 19 mm, across its crochet hook offerings . That broad range is one reason the brand appears in both beginner collections and long-time stashes.
One small warning: vintage steel hooks use a different numbering logic. With steel hooks, the higher number generally indicates a smaller hook, which is the opposite of what many crocheters expect from regular aluminum hooks . Always look for the metric measurement when it is present.
2. Use the pattern gauge as the final judge
The hook printed on a yarn label is only a starting point. A pattern’s recommended hook is also a starting point. Your tension may be tighter or looser than the designer’s, so the swatch has the final say.
Make a swatch in the same stitch used by the project. If the pattern calls for a certain number of stitches across a measured width and your swatch is too wide, try a smaller Boye hook. If it is too narrow, try a larger one. The Craft Yarn Council gives the same basic adjustment: go down in hook size when the swatch is too large and up when it is too small .
I used to change hook size based on how the first few rows looked, which was not reliable. A textured stitch can look tight at the beginning and relax after several rows. Now I make enough fabric to see the stitch pattern settle, gently wash or block the swatch when the finished item will be washed, and then measure it without stretching.
Gauge is not only about width. Check the height of the rows too. A hook can produce the correct stitch count across but a very different row height, especially in tall stitches. For hats, fitted garments, and anything with a planned finished measurement, both directions matter.
3. Know when classic Boye aluminum is the right choice
Traditional aluminum Boye hooks are a sensible choice for many everyday projects. They are light, easy to clean, and smooth enough for most acrylic, wool, cotton, and blended yarns. The metal shaft warms slightly in the hand during a long session, which I find pleasant compared with a cold, heavy tool.
The tapered head can also be helpful when you are working into crowded stitches. You can approach the stitch with the tip, then slide the throat through without forcing the whole shaft into the opening. That is especially useful for dense single crochet or a foundation chain that has tightened more than expected.
There are trade-offs. A smooth metal handle can feel slippery if your hands perspire or if you hold the hook with a loose pencil grip. The flat thumb rest may also feel too narrow if you use a knife grip and keep your thumb pressed firmly in one place. These are reasons to test a hook in your actual grip before buying a full set.
For a basic project, I would rather have one comfortable, correctly sized aluminum hook than a large set full of sizes I never use. A small, useful collection might include a 3.5 mm, 4 mm, 5 mm, 5.5 mm, 6 mm, and 8 mm hook, then expand only when a project calls for something else.
4. Consider Boye crochet hooks ergonomic options for long sessions
Boye crochet hooks ergonomic models add a shaped or cushioned handle around the metal hook. The purpose is not to make stitches magically better. The purpose is to distribute pressure and give your fingers a larger surface to hold.
Ergonomic is not a universal feeling. A handle that reduces thumb pressure for one person may force another person’s fingers farther apart. I look for three things: whether my wrist stays fairly neutral, whether I can rotate the hook without squeezing, and whether the handle creates a hot spot after ten or fifteen minutes.
Try the hook with the yarn and stitch you actually use. A handle can feel excellent while making slow single crochets but awkward during a fast double-crochet row. The reverse can also happen. Your motion matters more than a product label.
Ergonomic handles are particularly worth considering if you crochet for long periods, have noticed soreness, or find yourself gripping a slim aluminum shaft too tightly. They can also help a beginner who is still learning to keep the hook from twisting in the hand.
However, a thicker handle is not automatically better. If the shape is too large, you may compensate by flexing your wrist or tightening your fingers. Take regular pauses, change your grip slightly, and stop when pain begins rather than trying to crochet through it.
5. Learn what makes Boye crochet hooks vintage interesting
Boye crochet hooks vintage pieces attract crocheters for several reasons. Some people enjoy the history and the older colors. Others like the feel of a particular aluminum finish or are replacing a single hook from a family member’s collection. Vintage steel hooks are also useful for thread crochet, lace, and small repair work.
I would not buy an old hook simply because it is old. I inspect it first. Look for a hook that is straight, with a clean tip and a throat free from burrs. Run a scrap of smooth yarn through the hook. If it catches, stop and examine the metal under good light before putting it into a delicate project.
Surface wear is not always a problem. A few marks on the shaft may be cosmetic. A deep scratch across the yarn path is different because it can snag fibers repeatedly. Tarnish on a steel hook may be manageable, but active rust, a bent shaft, or a damaged point makes the tool a poor choice for regular work.
Vintage sizing can also be confusing. Some older sets use numbers or labels that do not line up neatly with modern charts. When possible, measure the shaft with a reliable hook gauge or compare it with a known metric hook. Do not assume that a letter means exactly the same thing across every era and product line.
The best vintage find is one you can use, not one you feel obligated to preserve. If a hook is comfortable and sound, let it work.
6. Match the hook shape to the yarn and stitch
People often talk about a crochet hook as though the size is the entire tool. It is not. Two hooks marked with the same millimeter size can feel different because the head, throat, shaft, and handle are shaped differently.
With a tapered hook, the head narrows toward the throat. This can make it easier to enter a stitch and pull up a loop without dragging the full shaft through. It may suit crocheters who scoop yarn from a lower angle or who prefer a slightly more open, sliding motion.
The head should hold the yarn without splitting it. If the tip is too sharp for your yarn, it may separate plies. If the throat is too shallow, loops can slip off. If the head is too blunt for a tight stitch, you may push against the fabric instead of entering cleanly.
Cotton can expose these differences quickly because it has less spring than many acrylic yarns. A sticky wool may benefit from a hook that releases loops smoothly. A loosely plied yarn needs a tip that does not constantly divide the strands.
When a project feels frustrating, change one variable at a time. Try the same yarn and stitch with a different hook shape before changing the yarn, tension, and size all at once. That makes it possible to identify the actual problem.
7. Build a Boye hook collection around real projects
A complete set looks satisfying, but a working collection should reflect what you crochet. If you mainly make medium-weight blankets, hats, scarves, and amigurumi, you may use the middle of the size range far more than the very smallest and largest hooks.
For medium yarn, I would begin with the pattern’s suggested size and add one hook below and one above it. That small range helps you correct gauge or change the fabric without buying every size at once. For example, if a project starts at 5 mm, having a 4.5 mm and 5.5 mm nearby is often more useful than jumping straight to a jumbo hook.
Keep steel hooks separate from regular aluminum hooks. Their numbering can run in the opposite direction, and their narrower shafts are easy to overlook in a mixed pouch. A simple case with labeled slots prevents a great deal of rummaging.
I also recommend recording the millimeter size in your project notes. If you write only “H hook,” you may later discover that your pattern, hook set, and memory use different conventions. “5 mm Boye aluminum hook” is much clearer.
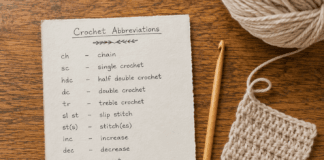
For more beginner vocabulary, keep a reference such as Loop Patterns’ guide to crochet abbreviations. It is a useful internal companion when a pattern uses US abbreviations or a stitch name you have not seen before.
8. Fix common hook problems before replacing the hook
A hook that feels wrong may need a different technique rather than a trip to the shopping cart. Start by checking whether you are squeezing it. Many crocheters tighten their grip when the yarn is difficult to pull through, then blame the handle for the resulting fatigue.
Next, check the loop on the shaft. If you pull loops very tightly against the throat, even a smooth hook will feel resistant. Let the working loop sit on the fuller part of the shaft when the pattern allows it. Keep the yarn moving through your tension hand instead of trying to control every millimeter with the hook hand.
If the yarn snags, inspect the hook under a bright lamp. A tiny burr can catch repeatedly. Do not file aggressively because changing the shape may create a larger problem. For a valuable vintage hook, it is safer to ask a specialist or simply reserve it for a yarn that does not catch.
If the finished fabric is too stiff, the answer may be a larger hook or a looser tension rather than a different brand. If the fabric has gaps, use a smaller hook or adjust the pattern’s yarn choice. The tool and the technique work together.
Finally, clean hooks occasionally with a soft, slightly damp cloth and dry them thoroughly. Avoid harsh cleaners that could damage a colored finish or a cushioned handle. Store metal hooks where they will not rub against keys, scissors, or other hard tools.
9. Use a simple decision process when buying
When I am choosing a hook for a new project, I ask five questions in order. First, what is the pattern’s recommended millimeter size? Second, what gauge does the project require? Third, is the yarn likely to split, drag, or slip? Fourth, will I work long enough to benefit from a larger handle? Fifth, do I already own a hook that solves the problem?
That sequence keeps me from buying based on color alone. Color is pleasant, and it can make sizes easier to identify, but it does not replace a good fit.
Here is the short version:
1.Read the millimeter size. Treat the letter as a secondary identifier.
2.Make a swatch. Adjust the size to match the pattern’s gauge.
3.Test the yarn path. Make sure the tip enters cleanly and the throat holds the loop.
4.Choose the handle for your grip. Ergonomic does not mean one shape suits everyone.
5.Inspect vintage hooks carefully. Use sound, smooth tools and measure uncertain sizes.
6.Record what works. Note the yarn, stitch, hook size, and fabric result.
This method is more reliable than asking whether one brand is universally best. A hook is successful when it helps you create the fabric the project needs with less strain and fewer interruptions.
A realistic Boye crochet hooks starter setup
For someone beginning to build a collection, I would choose a few versatile aluminum hooks rather than a large assortment. The exact sizes should follow the projects you actually plan to make, but a middle-weight yarn wardrobe often makes 4 mm, 5 mm, 5.5 mm, 6 mm, and 8 mm useful starting points.
Add a small steel hook only when you have a specific reason, such as crochet thread, lace, beads, or detailed edging. Add an ergonomic version of your most-used size if the standard handle causes fatigue. That approach lets you compare the shapes without replacing an entire set.
Keep a small swatch notebook. Record the yarn label, hook measurement, stitch, number of stitches, and how the fabric feels. Over time, you will develop a personal map that is more useful than any generic recommendation. I know, for example, that I often need to go up a size when my goal is drape, but I do not assume that rule will apply to a new fiber or stitch.
Common questions about Boye crochet hooks
Are Boye crochet hooks good for beginners?
Yes, they can be. They are widely available, offered in many sizes, and simple enough for a beginner to understand. The most important beginner skill is learning to read the millimeter size and make a gauge swatch, not choosing the most expensive hook.
Are Boye crochet hooks ergonomic?
Some Boye lines include shaped or cushioned ergonomic handles, while traditional aluminum hooks have slimmer metal handles. Compare the specific model rather than treating the entire brand as one shape. If you have hand discomfort, test the handle with your normal grip and stitch motion.
What are the most useful Boye crochet hooks sizes?
For many medium-weight yarn projects, the middle sizes are the most frequently used. A 4 mm, 5 mm, 5.5 mm, or 6 mm hook may be a practical starting point, but the pattern and gauge should decide. For fine thread or bulky yarn, you will need a different range.
How do I identify a vintage Boye hook?
Look for the markings, material, color, shape, and condition, then compare its shaft measurement with a known metric hook. Vintage sets can use older numbering systems, so do not rely on the number alone. Condition matters more than age if you plan to crochet with it.
Why does my hook size not match the pattern gauge?
Your yarn tension may differ from the designer’s, or the fiber and stitch may behave differently. Make a larger swatch, measure it without stretching, and adjust the hook one size at a time. If the stitch count is correct but the row height is not, check both dimensions before continuing.
Is a tapered hook better than an inline hook?
Neither is automatically better. A tapered hook may feel easier when entering tight stitches, while an inline hook may give some crocheters a more defined loop hold. Your hand angle, yarn, tension, and preferred motion determine which shape feels best.
Final thoughts
The best way to choose Boye crochet hooks is to stop treating the hook as an isolated purchase. Match the millimeter size to the gauge, match the shape to the yarn, and match the handle to the way your hand actually moves. Keep vintage hooks when they are smooth and useful, choose ergonomic options when they reduce pressure, and let the fabric—not the marketing—tell you whether the combination works.
If you have a favorite Boye hook, especially one with a story behind it, share the size and the project you use it for. A small detail like that can save another crocheter a frustrating evening of trial and error.