The first time I tried to shape a crochet hat, I ended up with something closer to a lopsided mushroom cap than a beanie. I hadn’t learned how to decrease crochet stitches properly, so I just… skipped stitches. Whole stitches, gone, no shaping logic at all. The crown puckered into a weird point on one side and stayed flat on the other. It took me an embarrassingly long afternoon of frogging and re-starting to figure out what I was doing wrong, and once I did, decreasing stopped being scary and started being one of my favorite techniques.
This guide walks through the decrease methods I actually use in my own projects — single crochet, half double crochet, and double crochet decreases — along with the mistakes that trip up most beginners and how to fix them before they wreck your fabric. I’m also going to cover the difference between decreasing in rows and decreasing in the round, because that distinction confused me for longer than I’d like to admit when I first moved from flat projects to amigurumi.
Nothing here requires fancy tools. A hook, some smooth worsted weight yarn for practicing, and a stitch marker or two will get you through everything below.
What Does It Mean to Decrease in Crochet?
A decrease is any technique that combines two (or more) stitches into one, which reduces your total stitch count and pulls the fabric inward. You’ll see it written in patterns as sc2tog, hdc2tog, dc2tog, or sometimes just “dec.” The number tells you how many stitches are being joined — 2tog means two stitches become one, 3tog means three become one, and so on.
Increases push fabric outward by adding stitches; decreases pull it inward by removing them. Together, they’re how a flat crochet piece becomes a curved hat, a tapered sleeve, a rounded amigurumi head, or the shoulder shaping on a sweater. If you’ve ever wondered why your granny square blanket stays flat but your beanie curves into a dome, decreases (and increases) are the answer.
I want to be upfront about something before we go further: this is a technique guide, not a tested pattern. I’m not going to hand you a specific stitch count, hook size, or gauge for a finished project, because those numbers change depending on your yarn weight, your hook, and your tension. If you’re following an actual pattern, always defer to the designer’s stated gauge and stitch counts over anything general written here.
Why Decreasing the “Right” Way Actually Matters
Skipping stitches, like I did on that first hat, technically reduces your stitch count too. So why not just do that? Because it leaves an ugly gap where the skipped stitch used to be, and it doesn’t distribute the tension evenly across the row. A proper decrease works both stitches together so the fabric closes smoothly instead of puncturing a hole in your work.
I learned this the hard way on an amigurumi bear years ago. I’d been skipping stitches around the head decrease rounds because it was faster, and the finished head had visible ladder-like gaps running up one side. A friend who’d been crocheting for decades pointed out, kindly but bluntly, that I was “cheating the stitch instead of decreasing it.” That phrase stuck with me. A real decrease respects both stitches; it just merges their tops into a single loop.
A Quick Note on Reading Decrease Abbreviations
If you’re new to patterns, decrease abbreviations can look like a foreign language at first. The Craft Yarn Council maintains the standardized U.S. abbreviations that most designers reference, and once you’ve seen sc2tog or dc2tog spelled out a few times, your eyes stop tripping over them. You can check their full abbreviations reference here if a pattern throws a term at you that this guide doesn’t cover.
How to Decrease Single Crochet (sc2tog)
Single crochet decrease, or sc2tog, is the one most beginners meet first because so many amigurumi patterns lean on it heavily. It’s also, in my opinion, the easiest decrease to learn your tension on, since single crochet stitches are short and forgiving.
Here’s the general method:
- Insert your hook into the next stitch and pull up a loop. You’ll have 2 loops on your hook.
- Without finishing that stitch, insert your hook into the following stitch and pull up another loop. Now you have 3 loops on your hook.
- Yarn over and pull through all 3 loops at once.
That’s it — two stitches have become one, and your total stitch count has dropped by one. The stitch will look slightly taller and wider than your regular single crochet stitches around it, which is normal.
Where I See People Go Wrong With sc2tog
The most common mistake I see (and made myself, repeatedly) is yarning over between steps 1 and 2 — basically completing the first stitch before starting the second one. If you do that, you’ve made a regular single crochet followed by an increase attempt, not a decrease, and your stitch count won’t budge. If your decrease rows aren’t actually reducing your stitch count, this is usually the culprit. Count your loops before that final yarn-over: you should have exactly 3.
The second mistake is tension creeping up gradually across a project. Decreases naturally pull tighter than regular stitches because you’re working three loops together instead of two. If you crochet tight to begin with, your sc2tog stitches can end up so dense that the next row is a wrestling match to get your hook through them. Loosen your grip slightly right as you approach a decrease stitch — I physically relax my non-hook hand for just that one stitch, and it’s made a visible difference in how even my shaping rows look.
If you want to watch the motion instead of just reading it, this beginner-friendly sc2tog video tutorial shows the loop count at each stage, which helped me a lot when I was first untangling the difference between “pull up a loop” and “yarn over.”
How to Decrease Half Double Crochet (hdc2tog)
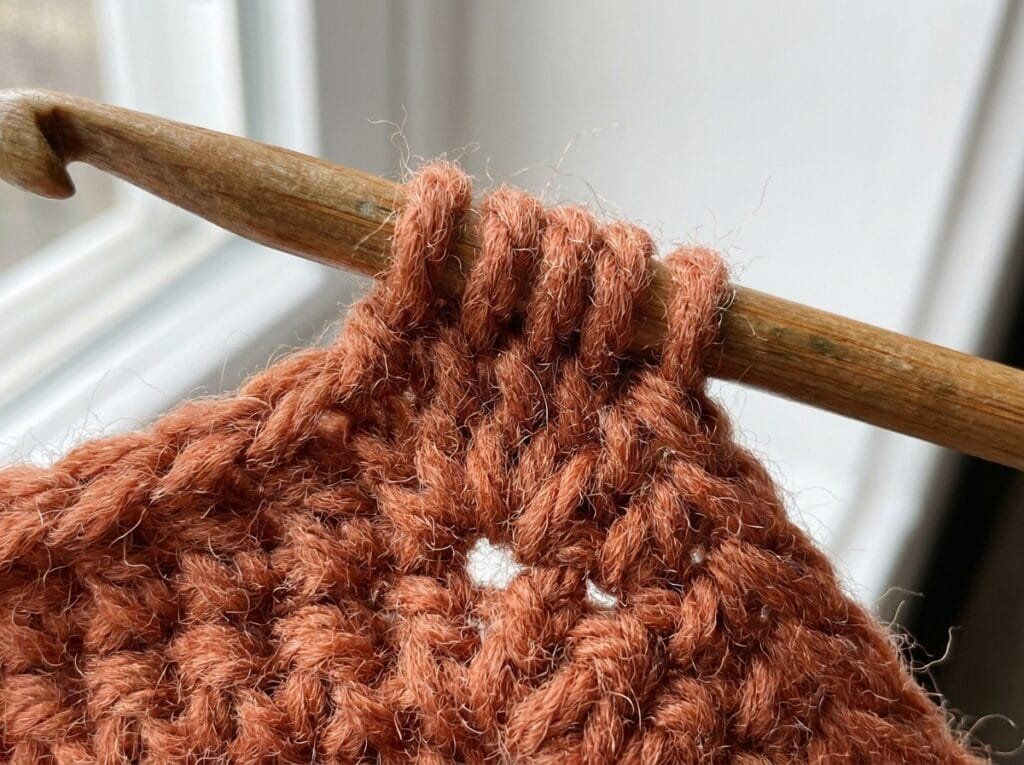
Half double crochet decrease follows the same logic as sc2tog, but because hdc already has an extra yarn-over built into the stitch, you’re managing more loops on your hook at once. This one intimidated me for longer than it should have, purely because the loop count looked so busy.
General steps:
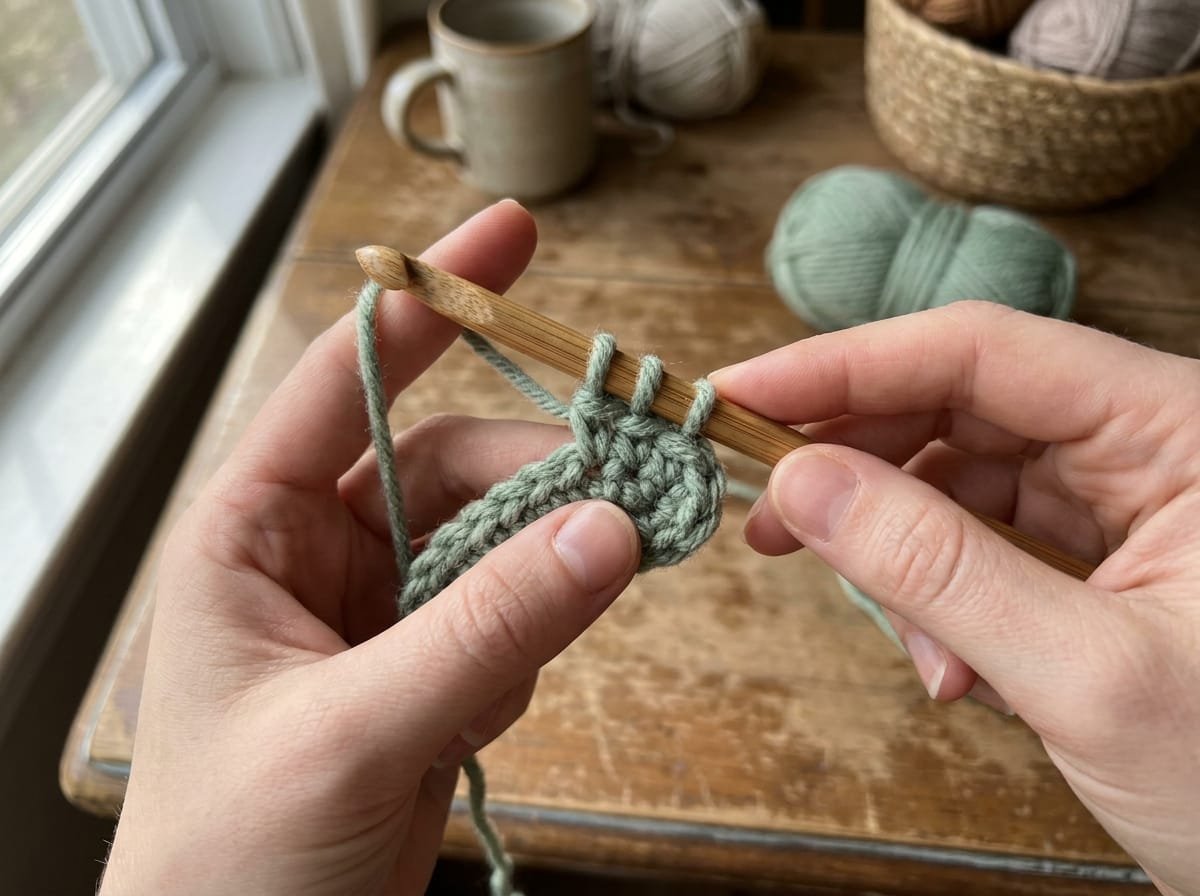
- Yarn over, then insert your hook into the next stitch and pull up a loop. You’ll have 3 loops on your hook.
- Yarn over again, insert your hook into the following stitch, and pull up another loop. Now you have 5 loops on your hook.
- Yarn over one final time and pull through all 5 loops in a single motion.
Five loops sounds like a lot to manage, and the first several times I did this, I genuinely worried I’d dropped one somewhere along the way. Slow down on that last pull-through. If your hook slips or a loop twists, it’s much easier to fix before you’ve yarned over than after.
The Fix for Lumpy hdc2tog Stitches
Half double crochet decreases can look noticeably bulkier than the stitches around them, especially in worsted weight yarn or heavier. If your decrease rows look lumpy compared to the rest of your fabric, try easing your tension specifically on that final pull-through — dragging five loops through at once tends to distort the stitch if you rush it. I also find that switching to a slightly larger hook just for a heavily decreased section (like a hat crown) softens the bunching without changing my overall gauge enough to matter.
How to Decrease Double Crochet (dc2tog)
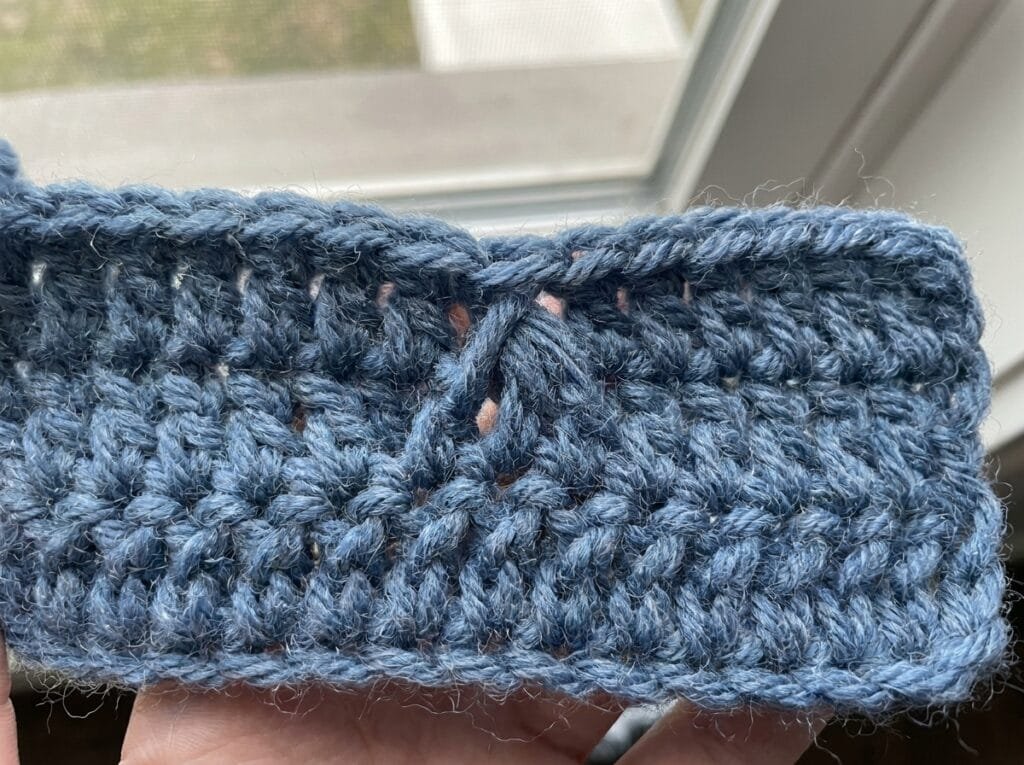
Double crochet decrease is the one that shows up most in garment shaping — raglan sleeves, waist shaping, V-neck necklines. It’s also the decrease where sloppy tension is most visible, because dc stitches are tall enough that any unevenness draws the eye.
General steps:
- Yarn over, insert your hook into the next stitch, and pull up a loop (3 loops on hook). Yarn over and pull through the first 2 loops only, leaving 2 loops on your hook.
- Yarn over, insert your hook into the following stitch, and pull up a loop (4 loops on hook). Yarn over and pull through the first 2 loops only, leaving 3 loops on your hook.
- Yarn over one last time and pull through all 3 remaining loops.
Notice the difference from sc2tog and hdc2tog: with dc2tog, you’re working each stitch partway (pulling through just 2 loops at a time) before joining everything at the end, rather than stacking every loop onto your hook and clearing them all at once. That structure is what keeps the stitch from becoming an unmanageable pile of loops, since double crochet already has more steps built into a single stitch.
My Honest Opinion on dc2tog
Out of the three, dc2tog is the one I still slow down for, even after years of crocheting garments. It’s easy to accidentally pull through 3 loops instead of 2 on that first or second step out of habit, especially if your hands are used to regular double crochet’s rhythm. When that happens, you’ll end up with a stitch that looks like a strange half-decrease, and it won’t reduce your count correctly. If a row isn’t coming out right, count your loops at each stage rather than assuming your hands know the pattern — mine still get it wrong occasionally when I’m crocheting while distracted.
The Invisible Decrease (For Amigurumi and Seamless Shaping)
If you crochet amigurumi, you’ve probably run into “invdec” or invisible decrease, which is a variation built specifically to avoid the small gap that a standard sc2tog can leave in tightly worked rounds.
Instead of inserting your hook under both loops of each stitch, you insert only into the front loops of the next two stitches, pull up a loop through both front loops at once, then finish it like a normal sc2tog (yarn over and pull through both remaining loops). Because you’re skipping the back loops, the decrease sits flatter against the fabric and the join is much harder to spot, which matters a lot when you’re staring at a stuffed animal’s face from six inches away.
I switched to invisible decreases on amigurumi years ago and never went back for visible faces — hands, feet, and hidden seams still get a regular sc2tog since nobody’s inspecting those up close, and it’s genuinely faster.
Decreasing in Rows vs. Decreasing in the Round
This distinction tripped me up badly when I first moved from flat, back-and-forth projects into working in the round for amigurumi, and I don’t think beginner resources explain it clearly enough.
When you’re decreasing in rows — a sweater sleeve, a scarf with tapered ends, a shawl — you turn your work at the end of every row, which means your decreases alternate which side they’re worked from. A decrease worked at the start of a right-side row sits on a different visual “edge” than one worked at the start of a wrong-side row, even though the stitch itself is identical. Patterns usually account for this automatically in the instructions, but it’s worth understanding why a decrease might be written differently depending on which row you’re on.
Working in the round is different because you never turn your work — you’re spiraling or joining each round continuously, so every decrease is worked from the same side, facing the same direction, every single time. That’s part of why amigurumi patterns can pack decreases so tightly together without the fabric twisting: there’s no alternating orientation to account for. It’s also why invisible decrease became popular specifically for in-the-round projects — without a turn to help disguise a slightly uneven stitch, any gap or lump is much more visible on a smooth, continuously spiraling surface like a stuffed toy’s head.
If you’re new to amigurumi coming from flat garment work, my honest advice is to expect the first round or two of decreases to feel disorienting, purely because your hands are used to turning at the end of every section and suddenly aren’t. That adjustment period is normal and it passes fast.
Common Decrease Mistakes (and How I Fixed Them)
A few patterns show up again and again in messages from readers, and in my own early projects:
Losing count mid-row. Decreases change your stitch count, which throws off your placement markers if you’re not paying attention. I now use a stitch marker at the start of every decrease round, no exceptions, even on simple projects. It costs ten seconds and saves an unraveling session.
Decreasing in the wrong spot. Patterns are specific about where decreases happen relative to the previous round’s decreases — often staggered to avoid a visible spiral line. If your finished piece has an odd diagonal seam running up one side, this is usually why. Read the placement instructions for decrease stitches as carefully as you read the stitch count.
Fighting your gauge instead of your technique. I spent an entire summer blaming my decreases for lumpy hat crowns before realizing my actual problem was inconsistent tension throughout the whole project, not just the decrease rows. If your decreases look uneven, crochet a small swatch and watch your tension on regular stitches first — sometimes the decrease isn’t the problem at all.
Mixing up decrease types mid-pattern. This one is easy to do when you’re moving fast: a pattern shifts from single crochet to half double crochet for a collar or brim, and it’s tempting to keep using sc2tog out of habit instead of switching to hdc2tog. The stitch will technically “work,” but it won’t match the height or density of the surrounding fabric, and you’ll usually spot the mismatch a few rows later when the shaping looks slightly off. Whenever a pattern changes stitch type right before or during a shaping section, double-check which decrease it’s actually asking for.
Tips for Neater, More Even Decreases
- Slow down on the final pull-through of any decrease — that’s where distortion happens fastest.
- Use stitch markers on decrease rounds, especially anything worked in the round like hats or amigurumi.
- Practice each decrease type on a swatch before using it in a project you care about. I still swatch new decrease variations before committing them to a finished piece.
- If your decreases look consistently tighter than the rest of your fabric, try a half-size-larger hook for just those stitches, or consciously relax your grip as you approach them.
- Read whether your pattern wants sc2tog, hdc2tog, dc2tog, or an invisible decrease specifically — they’re not interchangeable, and substituting one for another will change your fabric’s texture and drape.
- Photograph your swatch after each new decrease type you try. It sounds unnecessary until you’re three projects later trying to remember which method gave you that flatter, less bulky result you liked.
- Don’t crochet decrease rows when you’re exhausted or distracted. This sounds obvious, but nearly every miscounted decrease round I’ve ever made happened late at night when I told myself I’d “just finish this one round” before bed.
Frequently Asked Questions
Can I use sc2tog even if my pattern says “dec” without specifying a stitch type? Usually yes, as long as the surrounding stitches are single crochet. “Dec” is often shorthand that assumes you’ll decrease using whatever stitch the row is worked in — check a few stitches before and after to confirm.
Why does my decrease row look tighter than the rest of my project? This almost always comes down to tension. Decreases naturally pull more loops through at once, which tightens the stitch. Consciously loosening your grip right on the decrease stitch usually solves it.
Is invisible decrease only for amigurumi? No — it works anywhere you want a flatter, less visible join, including hats and toy accessories. It’s just most associated with amigurumi because that’s where seamless shaping matters most visually.
I skipped stitches instead of decreasing properly — can I fix it without unraveling everything? Sometimes, if it’s only a stitch or two and low enough in your work that you can reach it with a hook, but honestly, in most cases it’s faster and less frustrating to frog back to that row and redo it correctly. I’ve tried to “fix it in place” more than once and usually regretted it.
Do decreases work the same way in Tunisian crochet? Not quite — Tunisian crochet has its own decrease conventions tied to the forward and return pass structure, which is different enough from standard crochet that I’d treat it as a separate skill rather than assuming these steps transfer directly. If you’re working a Tunisian pattern, follow that pattern’s specific decrease instructions rather than the sc2tog or dc2tog methods above.
Wrapping Up
Once you’ve got the hang of how to decrease crochet stitches — really internalized the loop counts and the tension adjustments rather than just following steps blindly — shaping stops being the intimidating part of a pattern and starts being one of the more satisfying ones. Watching a flat piece curve into a hat crown or a rounded amigurumi head because you told it to, stitch by stitch, is honestly one of my favorite moments in any project.
If you’re working through your first shaped piece right now, I’d genuinely love to hear how it’s going — drop a comment with what you’re making, or share a photo if you’ve got one. And if you’ve got a decrease trick that works better for you than what’s here, I want to hear that too.