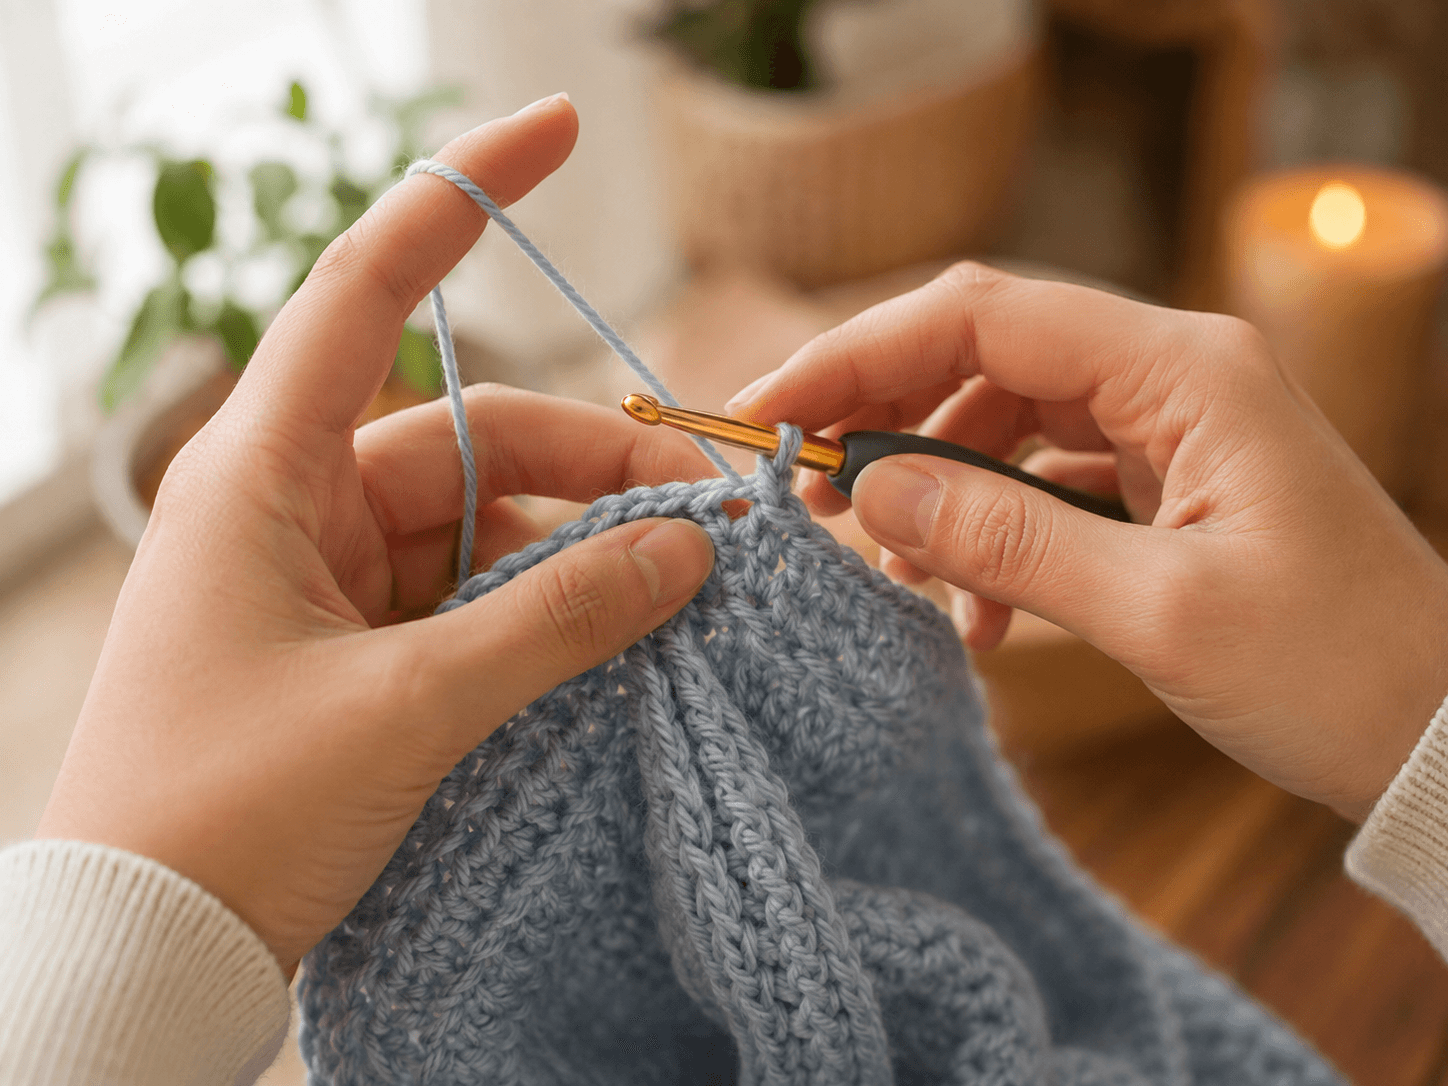
I spent my first two years of crocheting with yarn wrapped so tightly around my pinky that I’d get a red groove that lasted an hour after I put the hook down. Nobody told me there was another way. If you’re wondering how to hold crochet yarn without your hands cramping, aching, or fighting you every single row, you’re in the right place — I’m going to walk through the grips I actually use, why they work, and what to do if your hands don’t cooperate the way a tutorial video assumes they will.
This isn’t a list of rules. It’s what changed for me after years of testing, a bad bout of tendonitis, and a lot of frogged rows I blamed on “bad yarn” when the real problem was sitting in my own fist.
Why How You Hold Crochet Yarn Changes Everything
Most new crocheters focus entirely on the hook. That makes sense — the hook is the part doing the visible work, pulling loops through loops. But your non-hook hand is doing something just as important: it’s feeding yarn at a steady, even rate and controlling how much resistance the yarn has as it moves. That resistance is called tension, and it’s the single biggest factor in whether your stitches come out even or look like a toddler drew them.
Here’s the part that surprised me: two crocheters using the identical hook, yarn, and pattern will produce noticeably different fabric if their yarn hand is doing different work. I’ve sat next to friends at a stitch-and-bitch group, both of us working the same granny square pattern from the same skein, and mine came out looser and floppier every time — because I was letting the yarn slide too freely through my fingers instead of giving it something to grip against.
So before you troubleshoot a pattern, a hook size, or a yarn weight, it’s worth troubleshooting your hands.
How to Hold Crochet Hook and Yarn Correctly: The Two Main Grips
There are two widely taught ways to hold the hook itself, and honestly, neither is “correct” in some universal sense — they’re just different tools for different hands.
The Pencil Grip
You hold the hook the way you’d hold a pencil, resting it between your thumb and index finger, with the shaft running back along your palm. This is the grip most people default to naturally because it mimics handwriting.
I use this grip for anything with a lot of detail work — amigurumi faces, lace edging, places where I need fine control over the hook’s angle. The trade-off is that it can tire out your thumb and index finger faster during long sessions, because they’re doing more of the steering.
The Knife Grip
Here, you hold the hook the way you’d hold a table knife, with your whole hand wrapped over the top of the shaft and your thumb resting along the side for stability. This grip uses your whole hand and wrist to drive the motion instead of just your fingertips.
I switched to knife grip for big blanket projects years ago, and it was a genuine relief for my hand. There’s less pinching and more of a rolling motion from the wrist, which for me meant fewer aches after a two-hour crochet binge in front of the TV.
Try both for ten minutes each on a swatch before deciding. Your dominant hand isn’t wrong for preferring one — it’s just telling you something real about how your joints move.
Where Beginners Usually Go Wrong
Now let’s get to the hand actually holding the yarn, because this is where most tutorials rush past the details that matter.
The Yarn-Over-the-Fingers Method
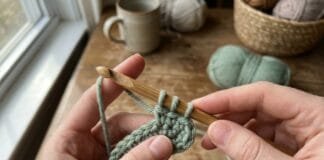
This is the most commonly taught technique, and it’s the one I’d suggest starting with if you’re brand new. The yarn goes over your index finger, under your middle finger, over your ring finger, and then it’s anchored — some people loop it around the pinky once, others just let the pinky curl toward the palm to hold light tension.
The point of weaving it through your fingers isn’t decoration. Each finger it crosses adds a small amount of friction, and that friction is what stops your stitches from being wildly inconsistent in size. Skip the weaving and just pinch the yarn between two fingers, and you’ll usually end up with fabric that’s too loose, because there’s nothing evening out the tension as the yarn feeds.
A Mistake I Made for an Embarrassingly Long Time
For my first several projects, I was tensioning the yarn only around my pinky, with no weave through the other fingers at all. It felt fine in the moment. The problem showed up later — my rows would start tight at the beginning and get progressively looser by the end, because my pinky tension would relax as my hand got tired, and I had no backup friction points to catch that slack.
The fix, once someone finally showed me, was almost insultingly simple: weave the yarn through at least two fingers, not just around one. My gauge swatches got dramatically more consistent within a single session of practicing that change.
Finding Your Own Tension, Not a Textbook One
Here’s something a lot of guides won’t tell you: there’s no universal “correct” tightness. What matters is that your tension is consistent from stitch to stitch and row to row. Some crocheters run naturally tight and need to consciously loosen up (often by going up a hook size). Others, like me, run loose and need extra friction points to keep from making floppy fabric.
If your project keeps ending up bigger than the pattern says it should, even though your stitch count is correct, tension — not the pattern — is almost always the reason. Work a gauge swatch, measure it, and adjust your hook size before you adjust your grip. If gauge swatches themselves feel confusing, our guide on reading a crochet gauge swatch walks through that step in more depth — it’s much easier to change a hook by half a millimeter than to retrain years of hand habit overnight.
How to Hold Crochet Yarn With Arthritis
This is the part I get the most messages about, and it’s personal for me too — my mother-in-law has osteoarthritis in both hands and taught herself to crochet again at 68 after giving it up for a decade because “her hands didn’t work like they used to.” What changed things for her wasn’t a miracle grip. It was a combination of small adjustments.
Loosen the Wrap, Don’t Force the Weave
The traditional finger-weave described above assumes your fingers can comfortably flex and hold light tension for an extended stretch. If your joints are inflamed or your grip strength varies day to day, forcing that exact weave can actually make pain worse. Instead, try a single loose loop around the index finger, letting the yarn ride across your palm rather than threading between every finger. You’ll trade a bit of tension precision for a lot less joint strain, and you can usually make up the difference by choosing a slightly bigger hook.
Ergonomic Hooks Aren’t a Gimmick
I was skeptical of ergonomic, fat-handled crochet hooks for a long time — they looked like a marketing add-on. Then I bought one for my mother-in-law and tried it myself out of curiosity. The wider, cushioned handle distributes pressure across your whole palm instead of concentrating it at the thumb and index finger pinch point, which is often where arthritis pain is worst. It’s a genuinely different feeling in the hand within the first few rows.
Change Your Hold Position Every 15–20 Minutes
This sounds almost too basic to mention, but it matters more than most gadget or grip advice. Holding any position — even a “good” one — for an hour straight puts sustained pressure on the same joints. Set a timer, put the project down, stretch your fingers open and closed a few times, and rotate your wrists before picking it back up. My mother-in-law credits this single habit, more than any hook or yarn holder, for letting her crochet in longer sessions without her hands locking up the next day.
Consider a Yarn Bowl or Holder for Tension Assistance
If gripping the yarn itself is the painful part, a weighted yarn bowl (or even a wide-mouthed jar) lets the ball feed with a small amount of built-in resistance, so your fingers aren’t doing all the tensioning work alone. It’s not a replacement for finger tension, but it takes some of the load off, especially for long garter-style or single crochet stretches where you’re not changing colors or stitches often.
If pain is persistent rather than just fatigue, it’s worth mentioning to an occupational therapist or hand specialist — they can sometimes suggest a grip modification specific to your joints that a general crochet guide never will.
Splints and Compression Gloves
A few readers have asked me about wearing a light compression glove or a soft wrist splint while crocheting. I don’t wear one myself, but my mother-in-law does on days when her hands feel stiffer than usual, and she says it helps her hold the yarn without over-tightening her grip to compensate for reduced sensation. It’s a personal preference rather than a rule — some people find any extra material on their hands distracting while they work. If you’re curious, it’s worth trying during a short, low-stakes project rather than in the middle of something with a deadline, so you can judge honestly whether it actually helps or just feels different.
How to Hold Crochet Yarn for Beginners: A Step-By-Step Warm-Up
If you’re brand new and the finger-weave described earlier felt like trying to learn piano and violin at once, here’s the order I’d actually teach it in, broken into pieces instead of all at once.
- Practice holding the hook alone first. Pick pencil or knife grip, and just move the hook through the air in the motion of a stitch — no yarn yet — until it feels less foreign in your hand.
- Practice the finger-weave with no hook at all. Take a strand of yarn and weave it through your fingers the way you would while crocheting, then pull it gently to feel the resistance. Get used to that feeling before you add the second hand’s job on top of it.
- Combine them on a slip knot and a chain. Chains are forgiving and repetitive, which makes them the best place to build muscle memory for both hands working together.
- Move to single crochet once your chain looks even. If your chain stitches are wildly different sizes, that’s tension, not talent — go back to step 2 before moving on.
I’ve taught this to a few friends who’d tried and given up on crochet before, and breaking the hand mechanics into separate steps — instead of expecting both hands to learn together instantly — was what finally made it click for them.
Materials That Make a Real Difference to Your Grip
I used to think hook material was a marketing distinction, the crochet equivalent of arguing over pen brands. Then I worked the same pattern in an aluminum hook and a bamboo one back to back, and the difference in how the yarn felt under my fingers was obvious enough that I noticed it mid-row.
Aluminum and metal hooks are slick, which is great for speed with smoother, plied yarns like most acrylics and superwash wools. That same slickness works against you with a slippery yarn like bamboo or silk blends — stitches can slide right off the hook if you’re not paying attention.
Wood and bamboo hooks have a little more grip to them, which slows the yarn down slightly as it moves. I reach for these with slippery fibers, or when I’m teaching someone new, because the extra friction makes it a bit harder for loops to slip off accidentally while they’re still getting used to hook control.
The yarn itself matters just as much as the hook. A fuzzy mohair or a splitty cotton behaves completely differently in your tensioning hand than a smooth, tightly plied wool. If you’re a beginner and you’re fighting your grip constantly, it might not be your hands — it might be worth swapping to a smooth, medium-weight wool-acrylic blend for practice before you judge your technique on something genuinely difficult to handle.
None of this means you need a drawer full of specialty hooks. It just means that if a grip you’ve read about “isn’t working,” it’s worth checking whether the yarn or hook material is fighting you before you assume the technique itself is wrong.
Continental-Style Tensioning: A Variation Worth Trying
Most English-language tutorials teach what I’d call the standard over-under-over weave through the fingers, but there’s a common variation where the yarn is tensioned mainly across the palm and controlled with light pressure from the middle and ring fingers together, rather than weaving individually through each one.
I picked this up almost by accident, sitting next to a crocheter who’d learned in a different country than I did, and it genuinely surprised me how much faster her hands moved. The trade-off, at least for me, was slightly less fine control over tension consistency — I had to concentrate harder to keep it even. If the standard weave feels clumsy on your hands specifically, it’s worth testing this palm-tension variation on a swatch before deciding the standard method is simply “not for you.”
Left-Handed Crocheters: A Quick Note
Everything above works exactly the same if you’re left-handed — you’re simply mirroring the entire setup, with the yarn hand and hook hand swapped. If you’re learning from a right-handed friend or a right-handed video, it can genuinely help to sit across from them rather than beside them, so their motions naturally mirror what your hands need to do, rather than you constantly translating in your head.
Troubleshooting Common Tension Problems
My stitches are too tight and hard to work into. You’re likely gripping with more friction than you need. Try dropping one finger out of the weave, or size up your hook by half a millimeter.
My rows are uneven — tight at the start, loose by the end. This is almost always fatigue loosening your pinky or ring-finger tension partway through a row. Add a second anchor point in your weave so you’re not relying on one finger to hold everything.
My hand cramps within ten minutes. Check whether you’re squeezing the hook itself much harder than necessary — a lot of beginners grip the hook like it’s about to fly away. The hook only needs enough pressure to control its angle, not a white-knuckle grip.
My gauge swatch doesn’t match the pattern even though I followed the instructions. Compare your swatch to the pattern’s stated gauge (usually stitches and rows per 4 inches/10cm) and size your hook up or down accordingly rather than fighting your natural tension. The Craft Yarn Council’s standard yarn weight system is a solid reference if you’re unsure which hook size range makes sense for the yarn weight you’re using, since it lists the commonly recommended hook sizes for each category.
A Few Real Reader Questions
Does it matter which hand I hold the yarn in if I’m right-handed? For most right-handed crocheters, the yarn goes in the left hand and the hook in the right, but I’ve met plenty of exceptions — including one friend who crochets with the hook in her left hand despite being right-handed for everything else, simply because that’s how she happened to learn. Consistency matters more than which hand is “supposed” to do which job.
Is it normal for my hands to hurt when I’m first learning? Some fatigue while your hands build new muscle memory is normal, especially in the thumb and index finger. Sharp pain, numbness, or pain that lingers into the next day isn’t something to push through — that’s your body telling you to adjust your grip or take a longer break, not to “crochet through it.”
Should I switch grips if one hand gets tired faster than the other? It’s worth experimenting, but don’t feel like you have to force a switch. Sometimes the fix is a smaller adjustment — a different hook material, a shorter session, or repositioning where the yarn crosses your palm — rather than relearning your whole hold from scratch.
My tension is different every single day. Is something wrong with me? No — this is genuinely common, especially if your hands are affected by weather, sleep, or a condition like arthritis. On days when your grip feels less reliable, lean on your hook size as the adjustable variable rather than trying to force your hand to feel like it did yesterday.
I’ve been crocheting for years and my hands still get tired after long sessions. Am I doing something wrong? Not necessarily — even experienced crocheters get fatigued during marathon sessions, because holding any static-ish position for hours puts load on the same muscles regardless of technique. The fix is usually breaks and position changes, not a grip overhaul. If it’s a new development after years of comfortable crocheting, it’s worth mentioning to a doctor, since it can sometimes signal a repetitive strain issue worth catching early.
Bringing It All Together
At the end of the day, learning how to hold crochet yarn isn’t about copying a diagram exactly — it’s about finding the specific combination of grip, finger placement, and hook hold that lets you work for as long as you want without your hands fighting you. Try the finger-weave, try the looser palm-loop if your joints need it, and don’t be afraid to size your hook up or down instead of forcing your hand into a position it’s telling you it doesn’t like.
If you’ve found a grip variation that works for your hands, especially if you crochet with arthritis or another hand condition, I’d genuinely love to hear about it in the comments — some of the best tips I’ve ever picked up came from readers, not tutorials. And if this helped, feel free to share it with a crochet friend who’s still fighting their yarn instead of working with it.